Introduction
insureMO’s Jasper Document Generation service is a report rendering service based on JasperReport. It specializes in generating various types of PDF reports. Rather than directly exposing an API to external users, this service is accessed through the Print Management Service API, allowing users to generate the necessary PDF reports.
Currently, the service supports solely JSON as the data source. As for export formats, it offers a variety of options, including PDF, HTML, Excel, CSV, and Word. For the PDF service, an encryption function is provided. It supports two encryption passwords: one for reading and the other for modification.
This service is deprecated. Please use the HTML Document Generation Service and the Word Document Generation Service instead. More and more customers tell us this tool is hard to design templates with, so we developed these two alternatives: the Word Document Generation Service is easy for normal users to design templates themselves, and the HTML Document Generation Service is easy to generate with AI. Both save users a lot of time when designing templates.
Quick Start
-
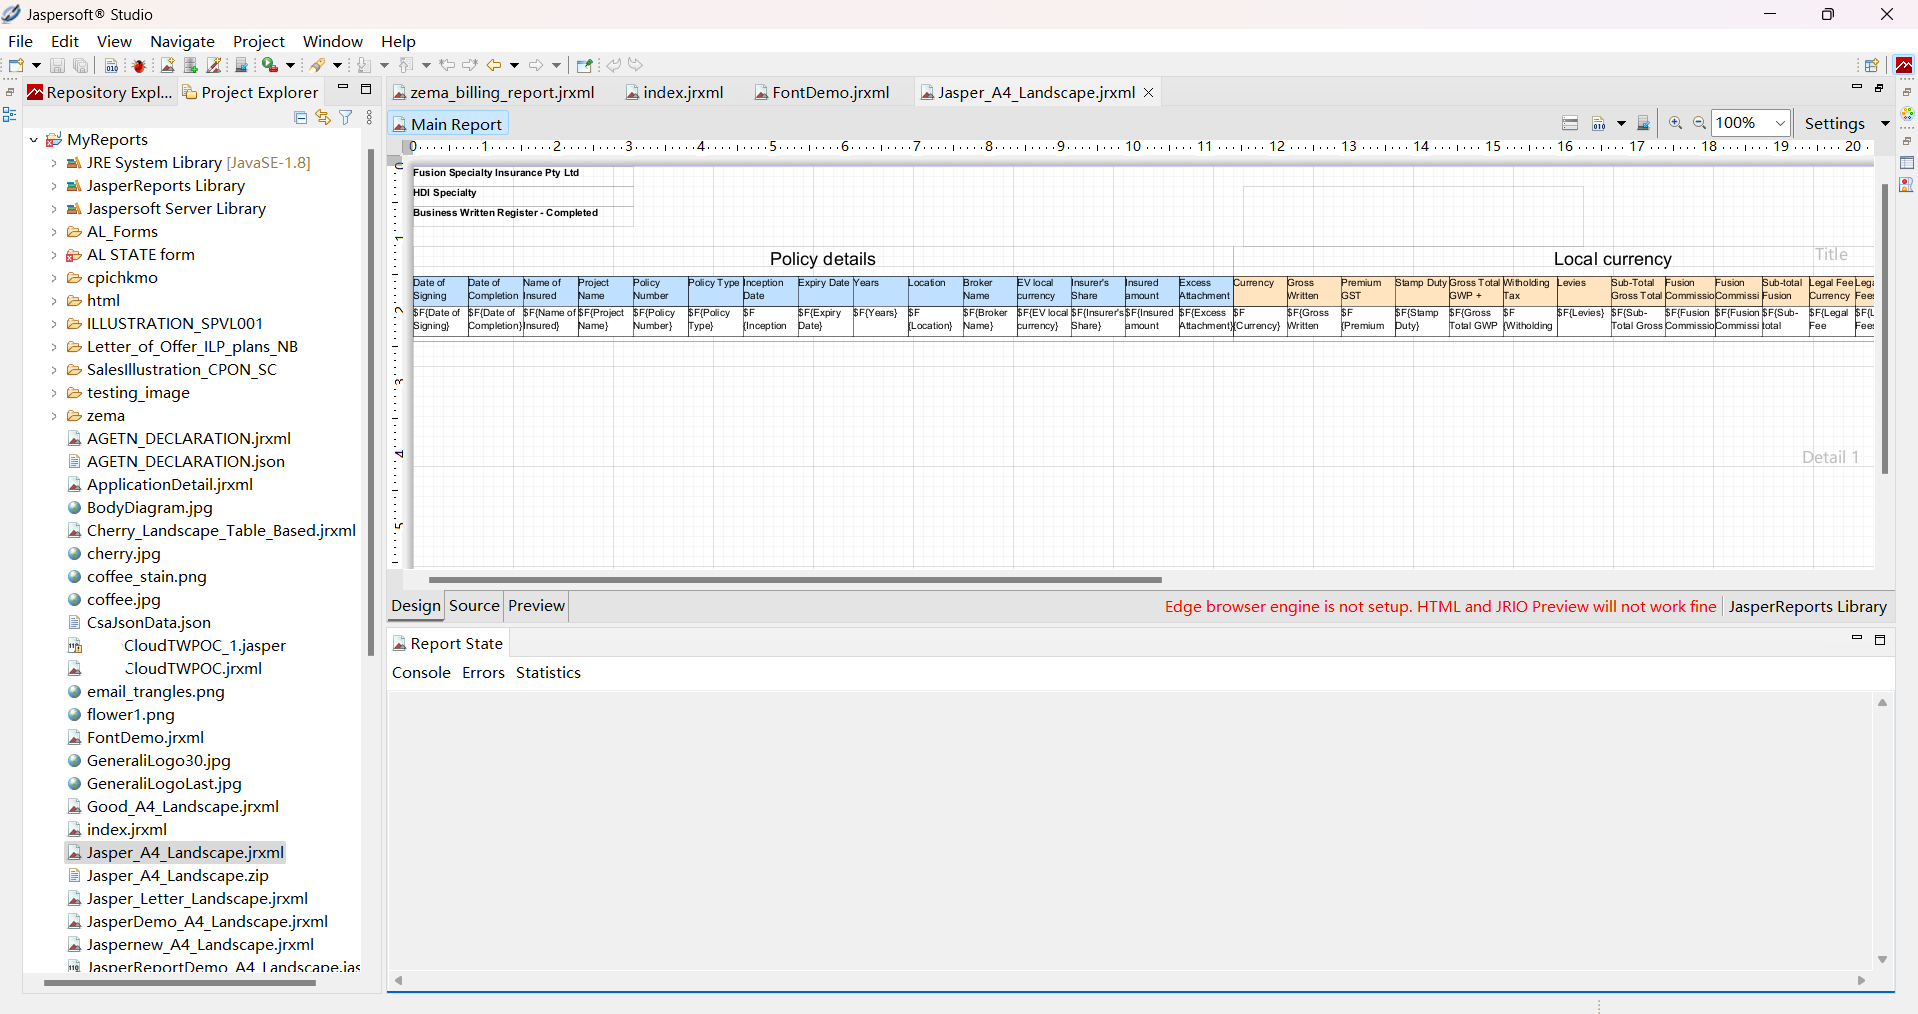
Use Jaspersoft Studio to design template.
-
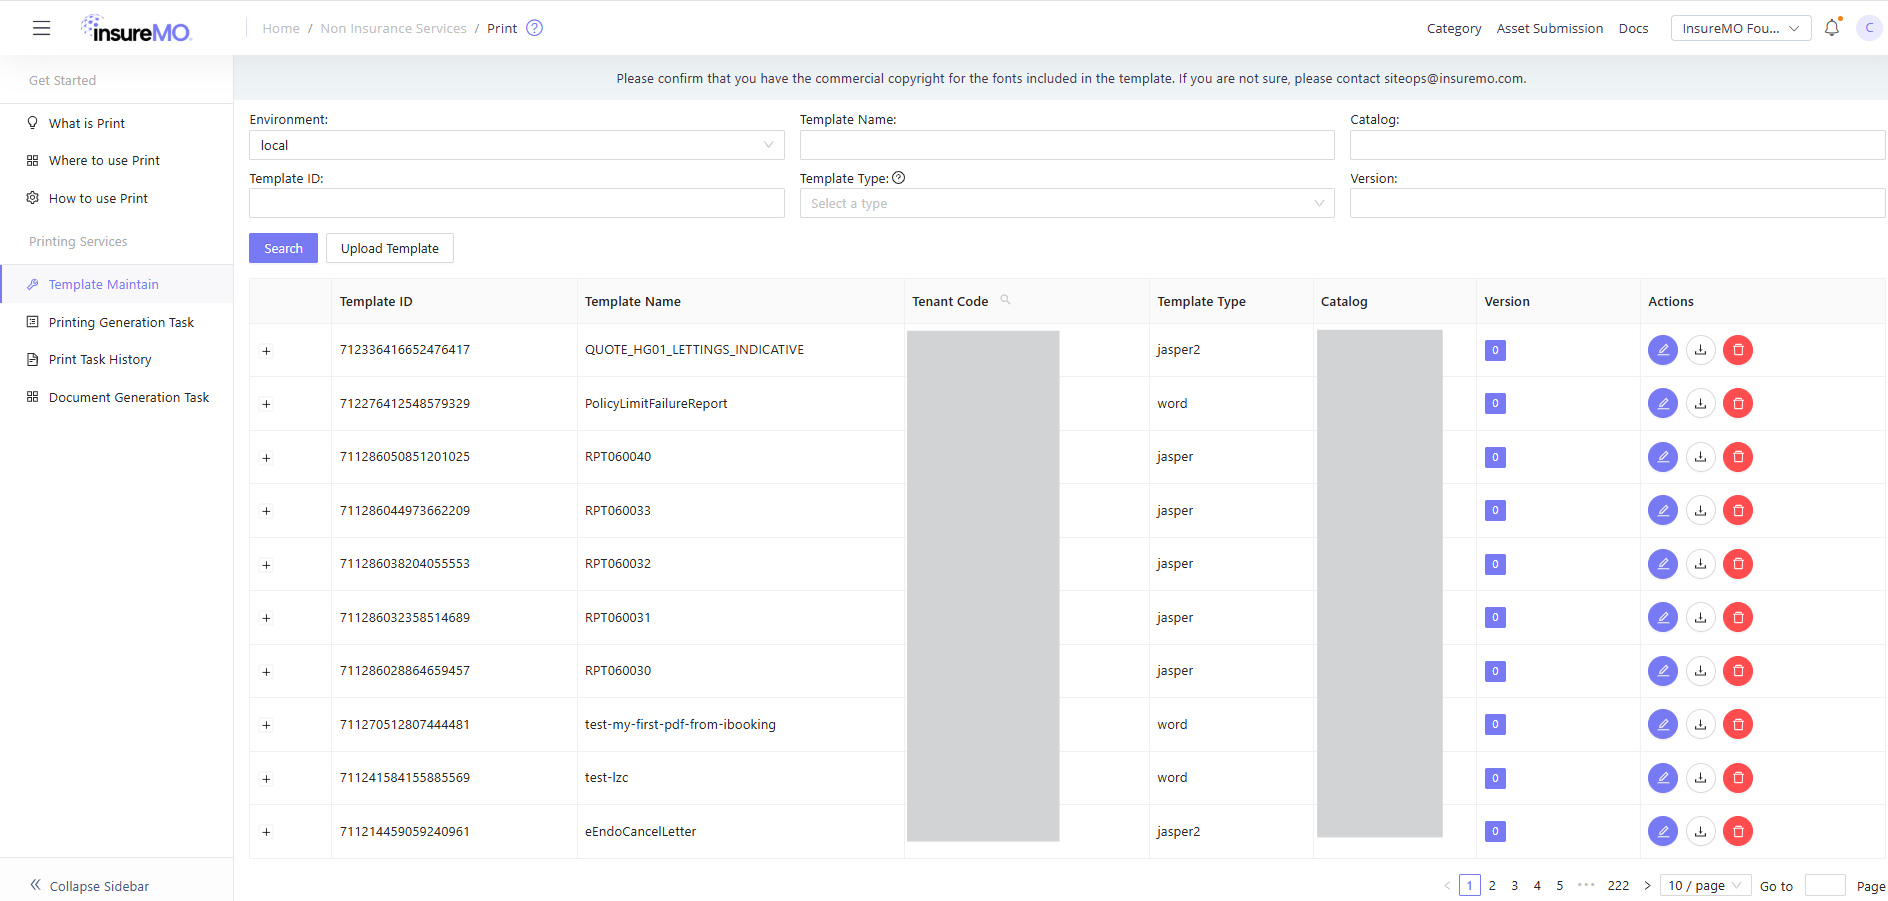
Upload template.
a. Click Sign in to log in to insureMO Portal with your personal account.
infoIf you do not have a personal insureMO account, click Sign up to register one.
b. Click Catalog at the top of the home page.
c. In the left pane of Catalog page, navigate to Utility & AI > Output & Document Management to find the Print Management Service service card.
d. Click Upload Template on the page. Template Type is jasper2.
-
Generate PDF.

- Click Create Task on the page, input templatename + print data on it, and download it on the page after the task is completed.
- Calling API, see :(https://docs.insuremo.com/non_insurance_service/docs/md/InsureMO_Print#post-printv2printtaskgenerate)
and make sure the
"print_doc_type" : "jasper2".
JasperReport Overview
JasperReport is a powerful, open-source report generation tool widely used in Java applications for creating dynamic, pixel-perfect reports. Backed by the Jaspersoft Community, it offers robust features for data integration, report design, and multi-format output, making it a leading choice for embedded analytics and enterprise reporting.
Key Features & Tools
Technical Foundations:
-
Built in Java, ensuring cross-platform compatibility across operating systems.
-
Open-source and freely available, with optional paid documentation and support.
Core Functionality:
-
Data Sources: Connects to relational databases, Java objects, JSON, XML, and other data sources.
-
Report Design: Creates complex layouts with charts, tables, and dynamic content.
-
Output Formats: Exports reports to PDF, HTML, Excel, CSV, Word, and more.
-
Template-Driven Approach: Separates report design (JRXML templates) from data population for flexibility.
-
Design Tool: Jaspersoft Studio 6.20.0 (https://community.jaspersoft.com/download-jaspersoft/community-edition/).
-
if you can’t download from the jasper official domain,please download via this :https://portal.insuremo.com/api/mo-fo/1.0/clouddisk/v3/object/get/public?key=tools%2Fjasper%2Fjapser-studio-6.20.6.exe&bucket=mo-public-resources
-
Workflow: Design templates in Jaspersoft Studio, export as
.jrxmlor compiled.jasperfiles, and integrate with Java applications.
Jasper Report Design
Install a jasper report studio
- Download and install from:https://community.jaspersoft.com/project/jaspersoft-studio
- Use the jasper report version 6.20.0. Other new versions may have some functions which are not supported.
- Notice the release notes of container, if we upgrade the jasper docgen service, upgrade your version too.
1. Create a JSON Datasource Template
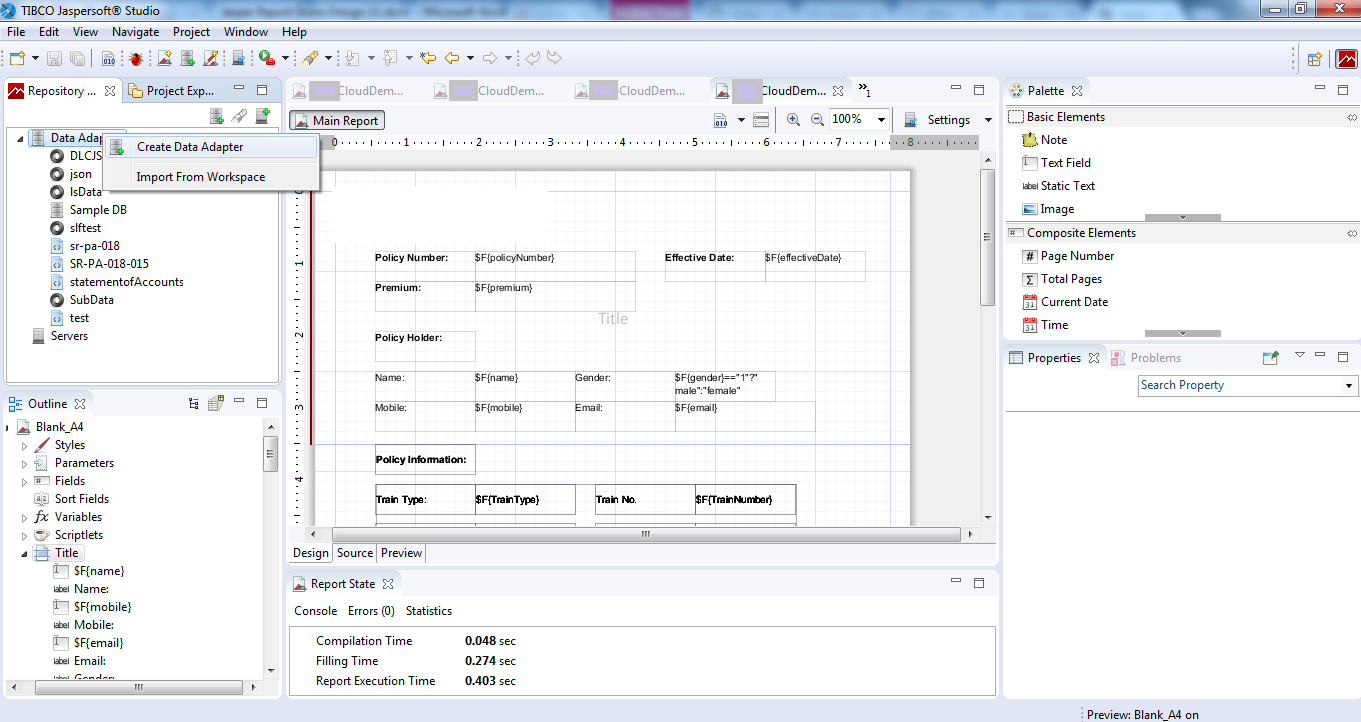
- Create New DataSource. Right-click Data Adapter, then click Create Data Adapter.
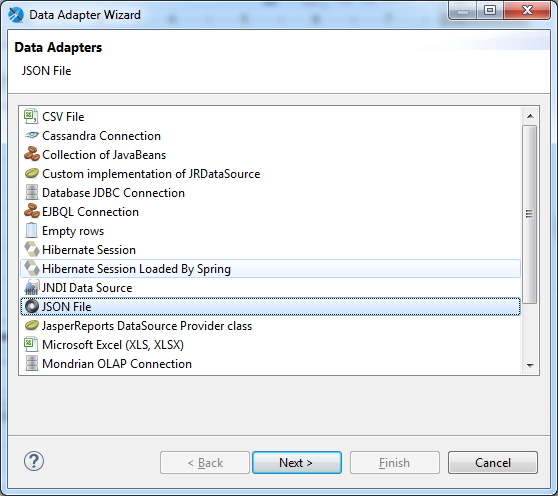
- Select a datasource you want, and choose JSON File.
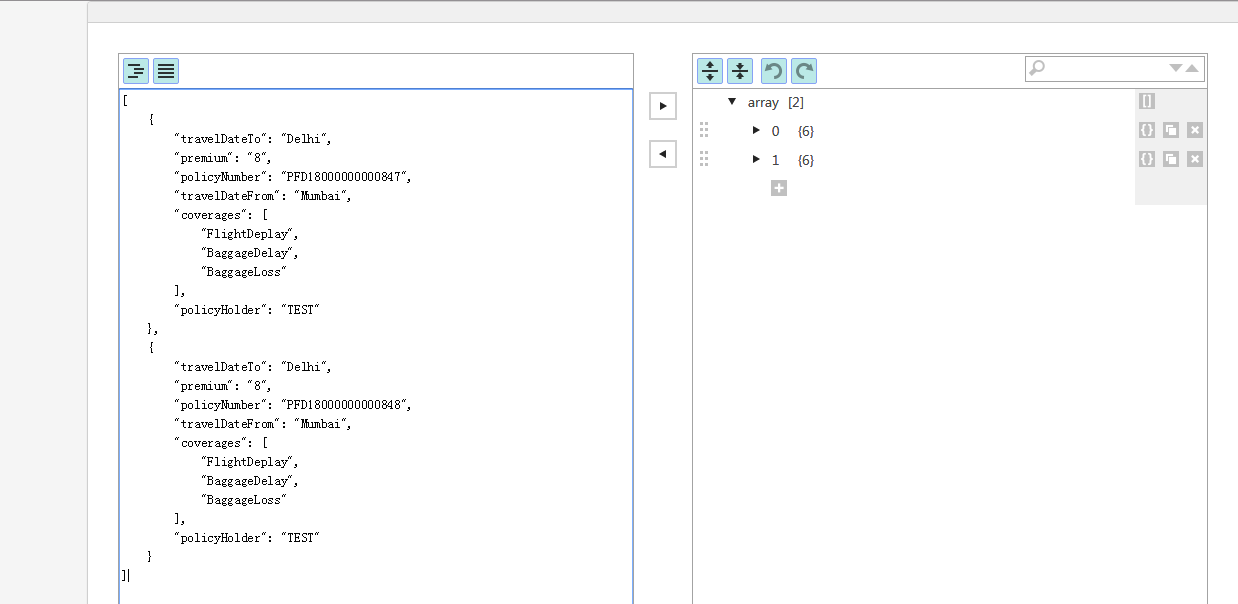
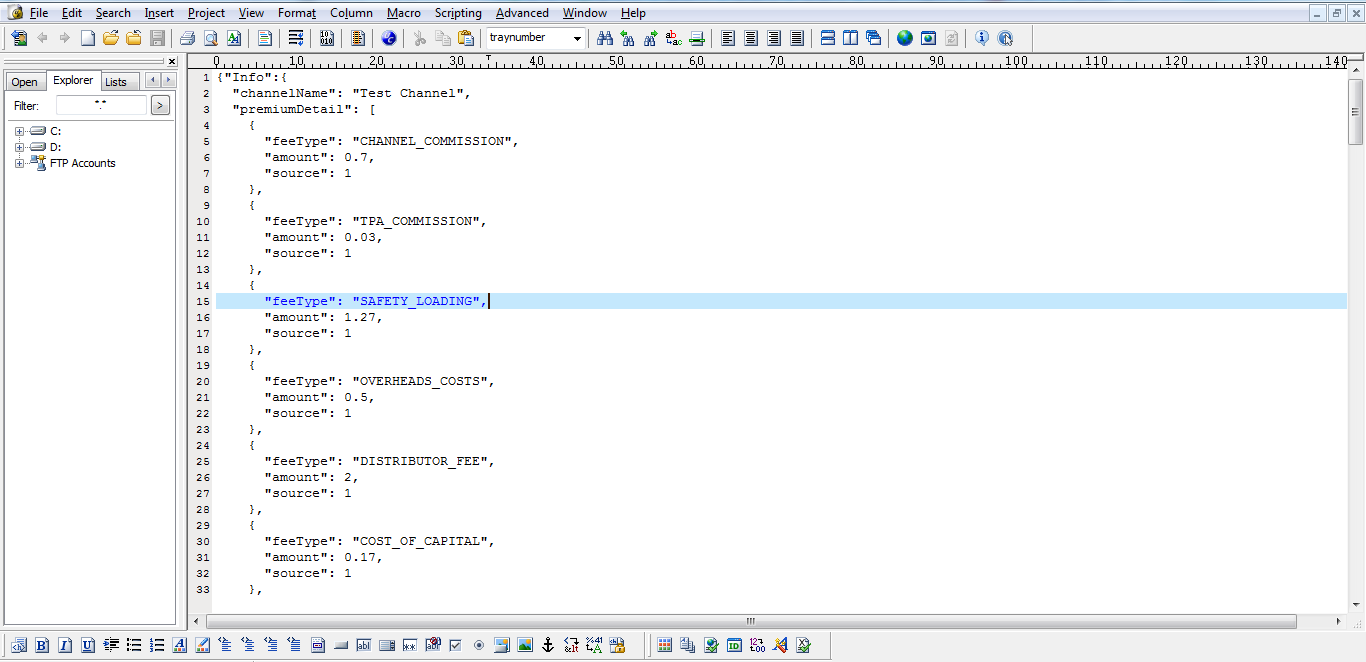
The JSON file must have a root.
The file showed below is not a valid JSON file for Jasper report source.
And this one is a proper one:
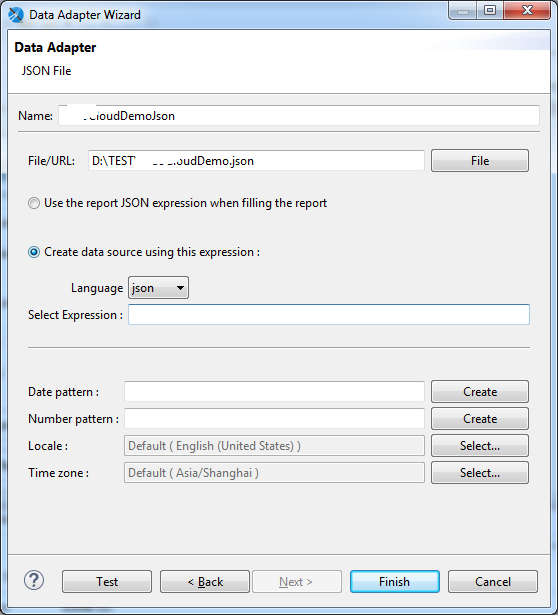
- Click Next, select the JSON file you prepared, and then click Finish.
2. Create a New Report File
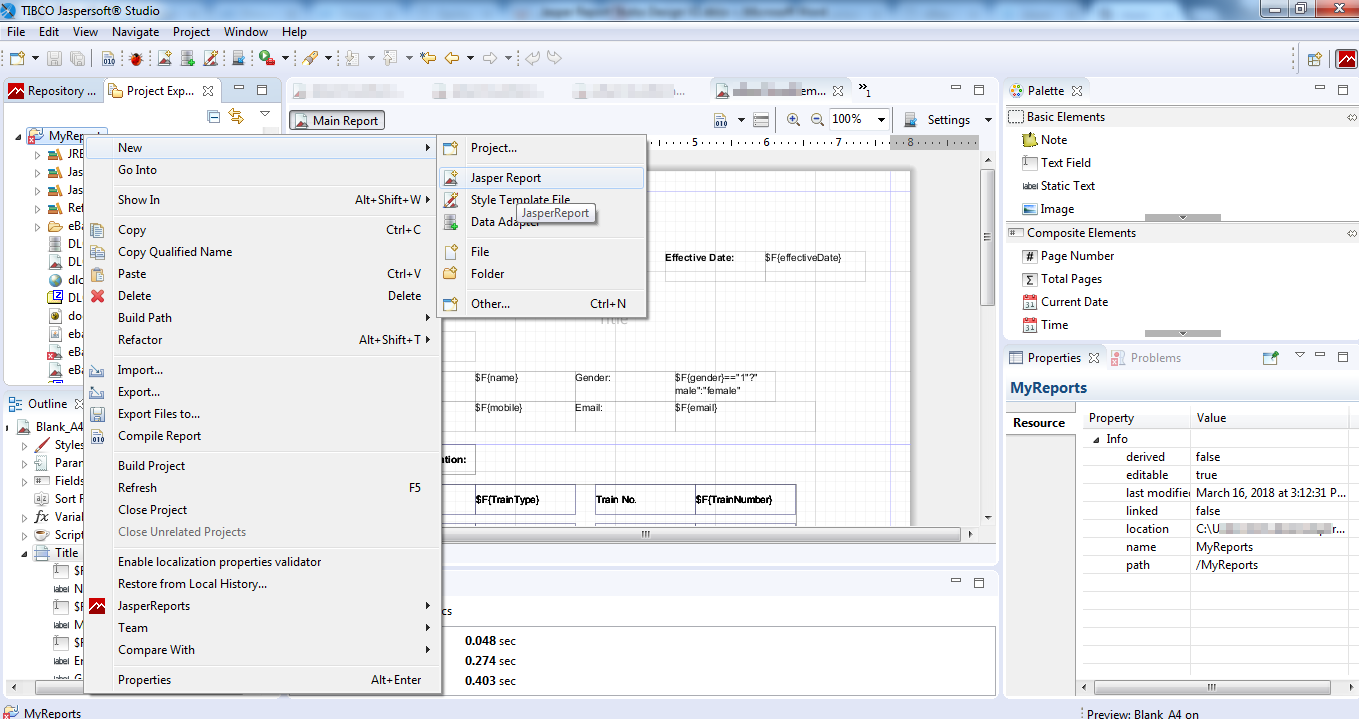
- Click FILE >New >Jasper Report, or right click MyReports >New >Jasper Report.
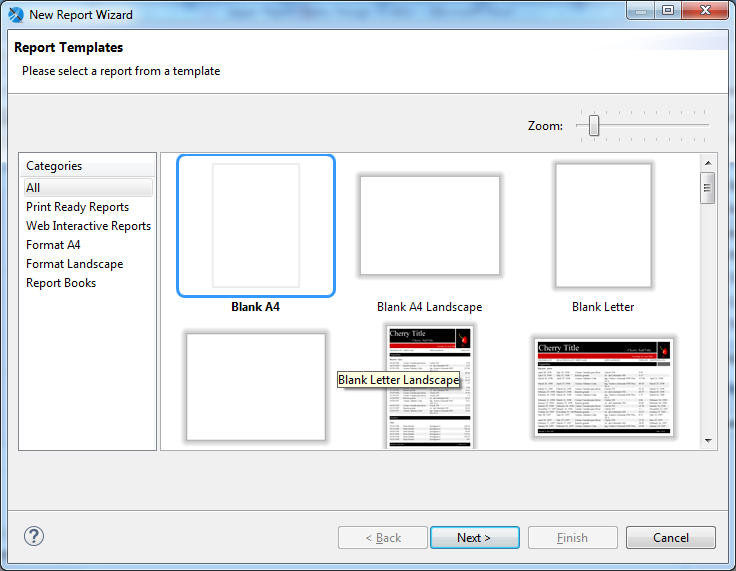
- Choose the size and format of the page you need.
Blank A4 is selected here.
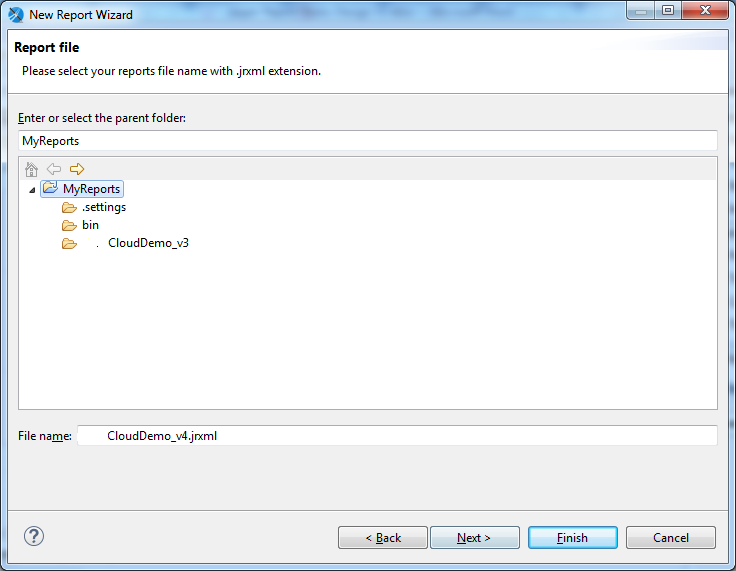
- Write the file name, click Next.
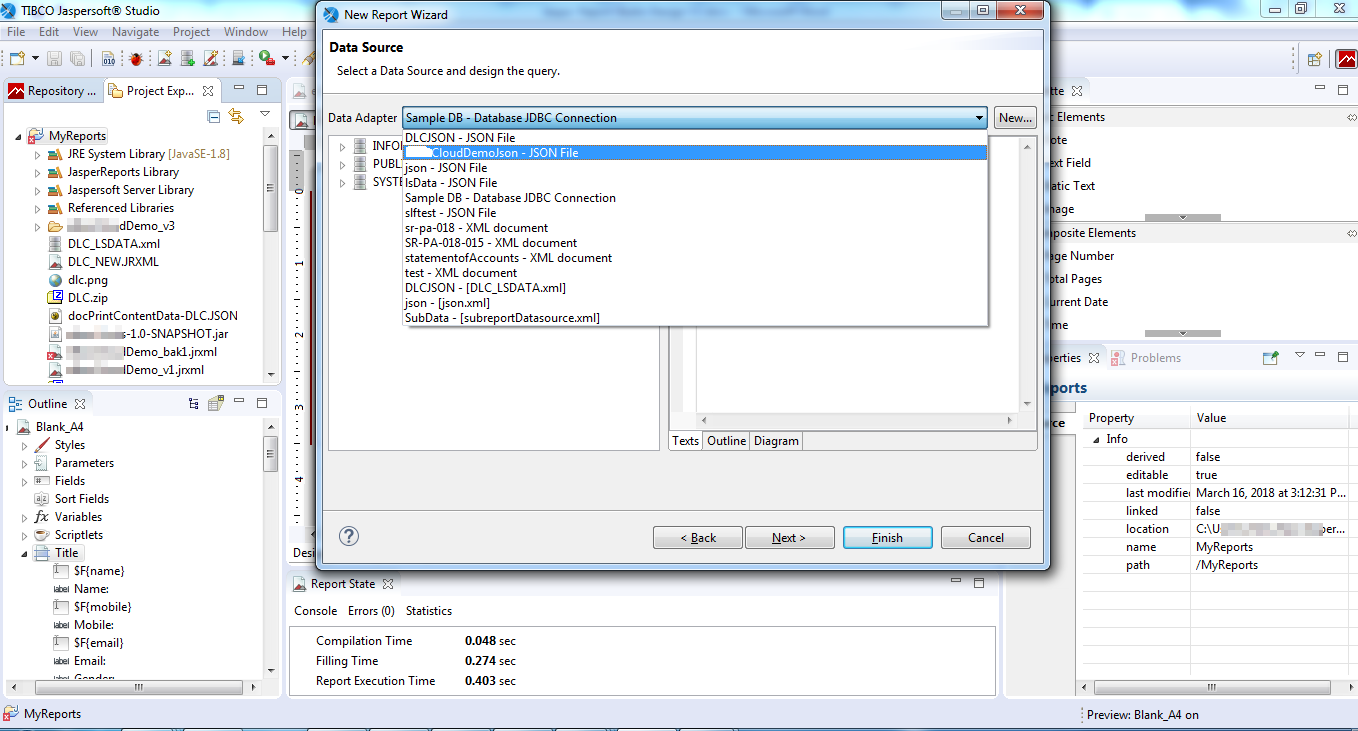
- Choose the datasource you created just now.
- Double click the root path Info.
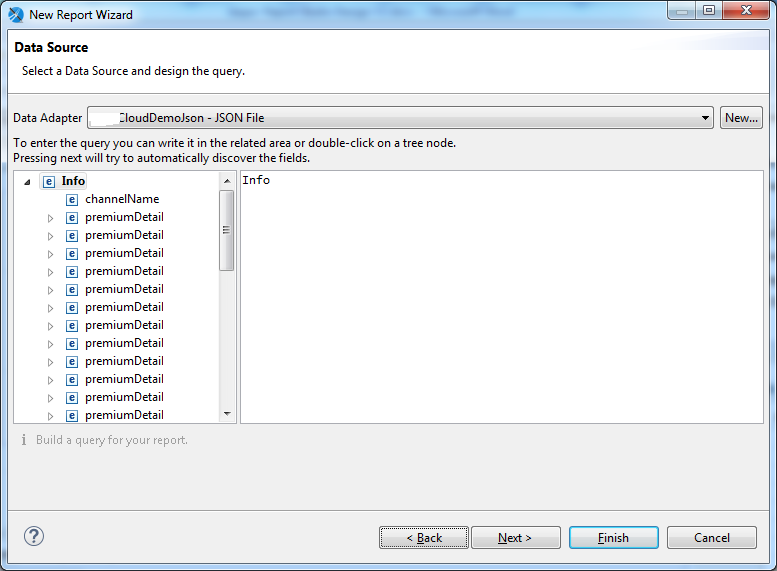
- Click Next, choose all fields (you can choose the fields you need, not all the fields you need), then click Next.
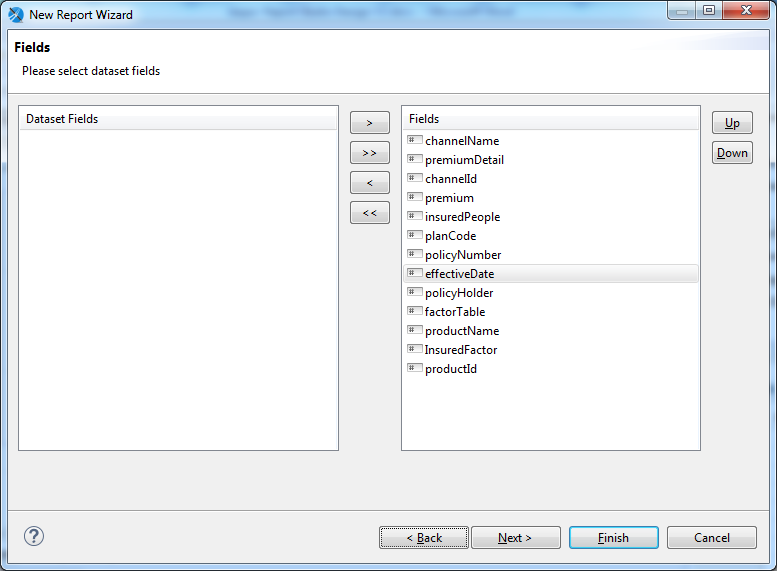
- Click Next, choose all fields (you can choose the fields you need, not all the fields you need), click Next.
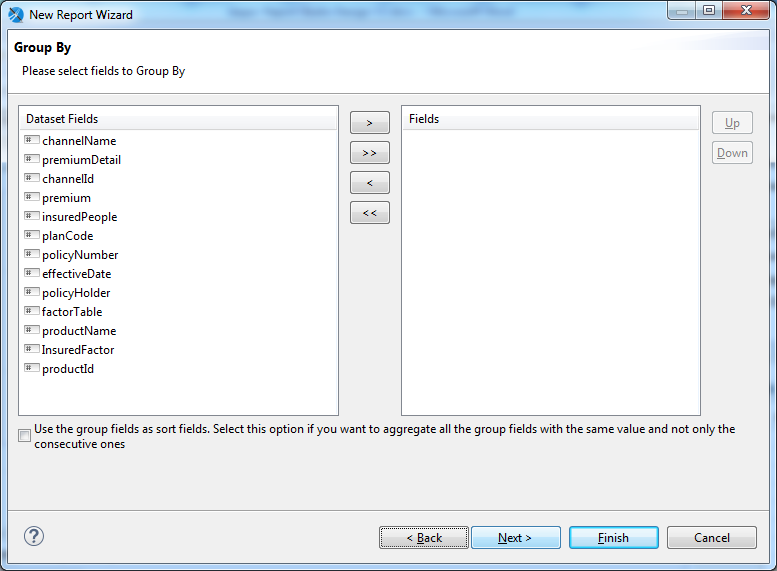
3. Design a New Report
- Open the fields under the OutLine tab, then drag and drop the fields to the page header, column header, or details section as needed.
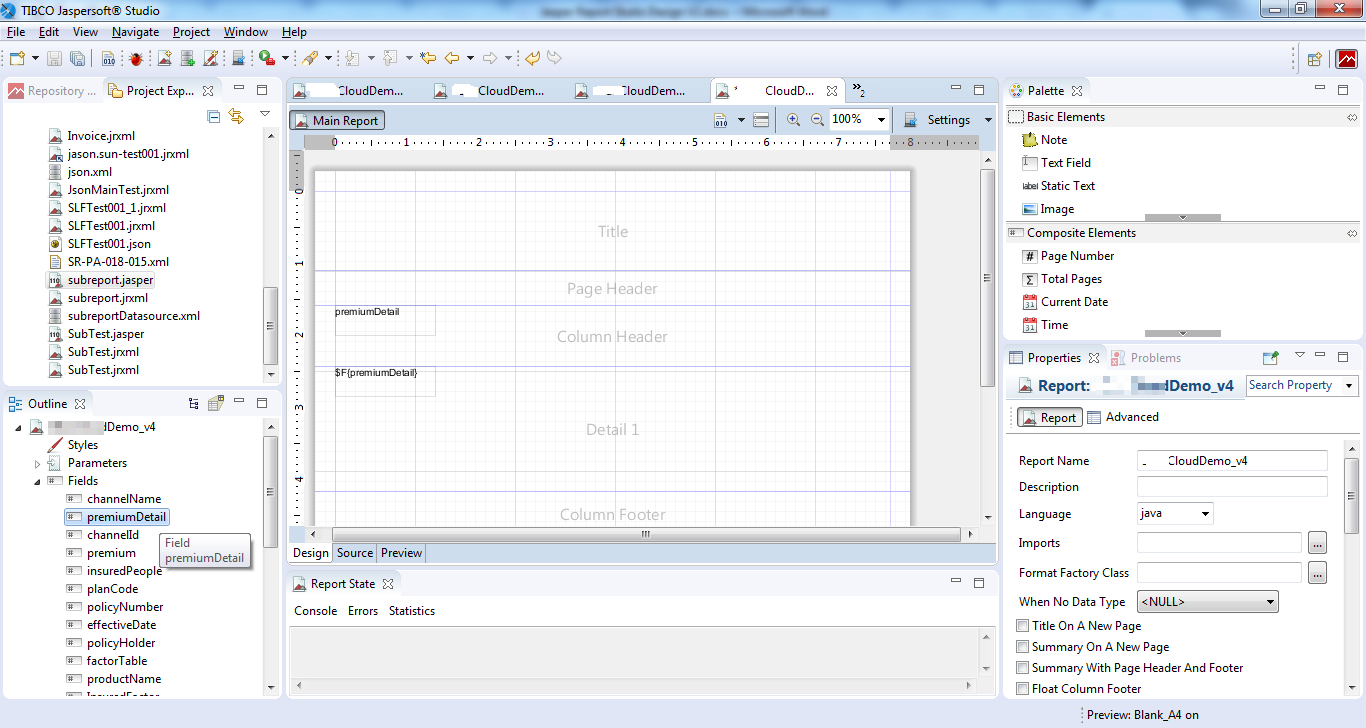
After the design, the following new template is generated.
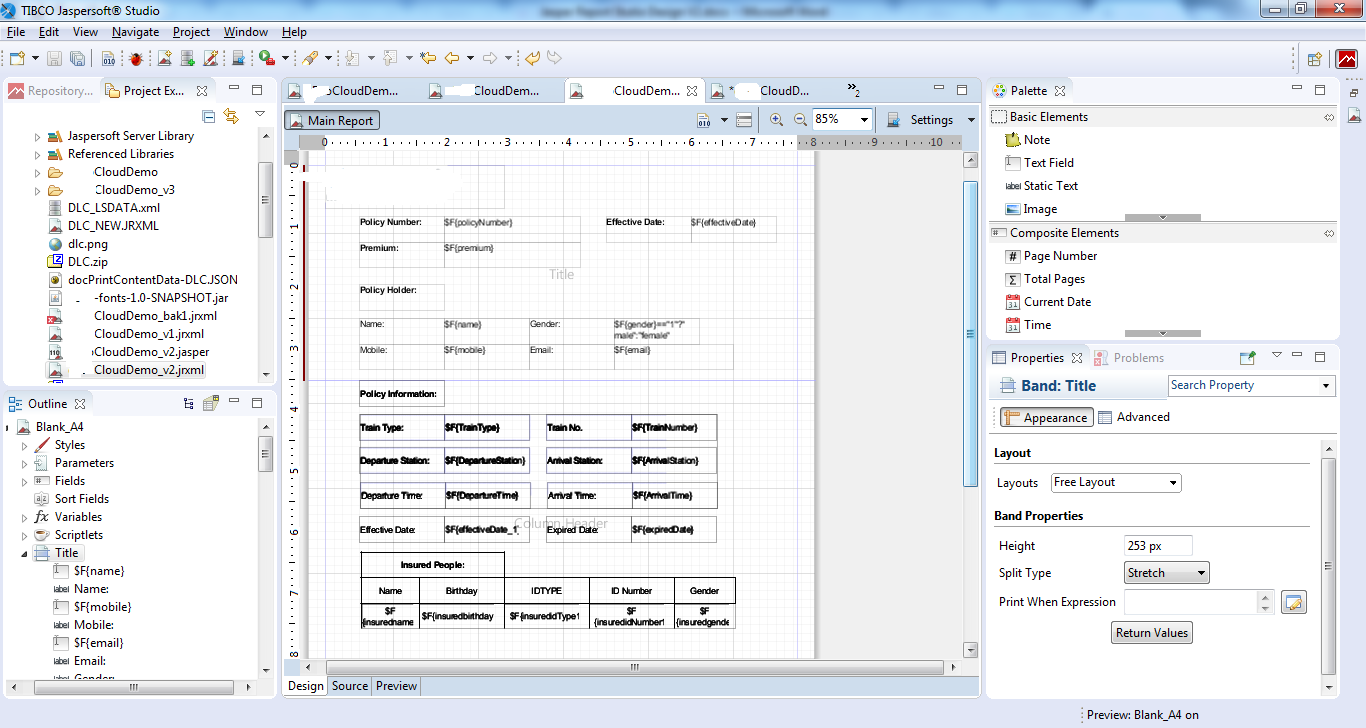
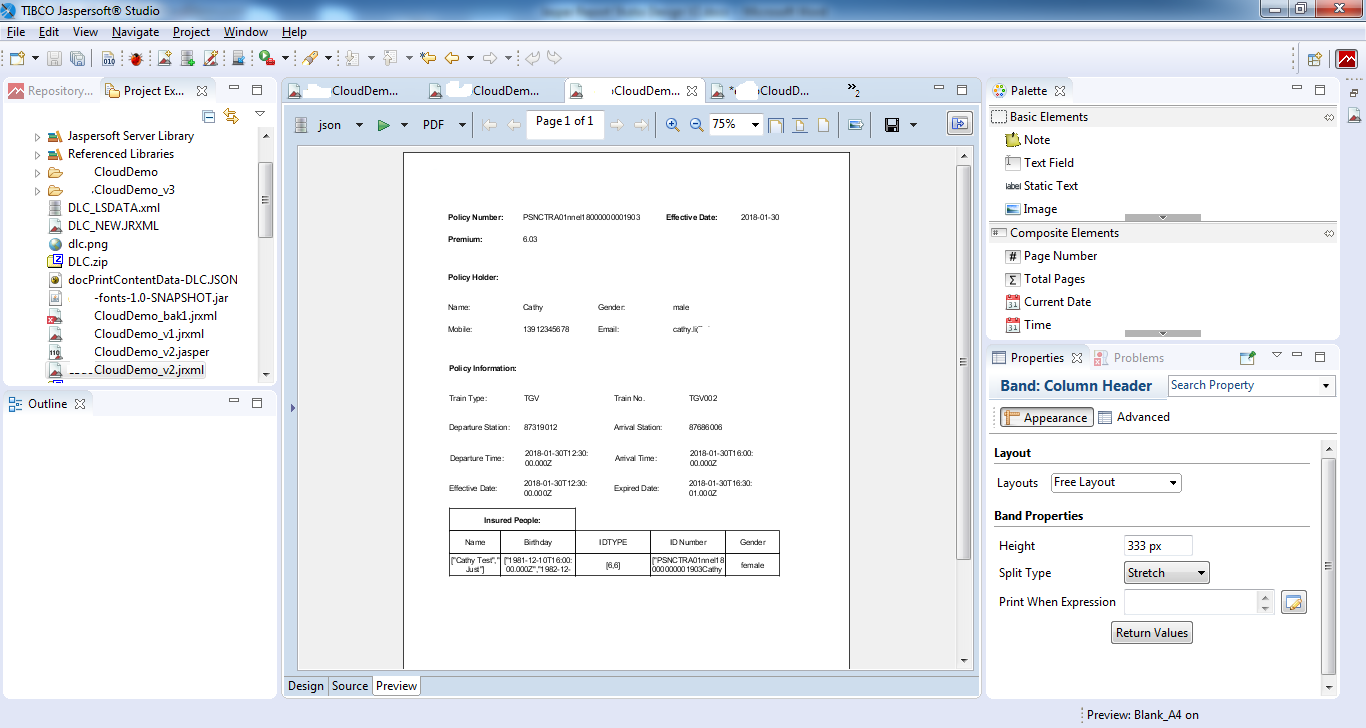
In this template, if there are no train in the JSON datasource, the three lines below the policy information will not be displayed.
Below is an example:
A. The JSON file has a train number
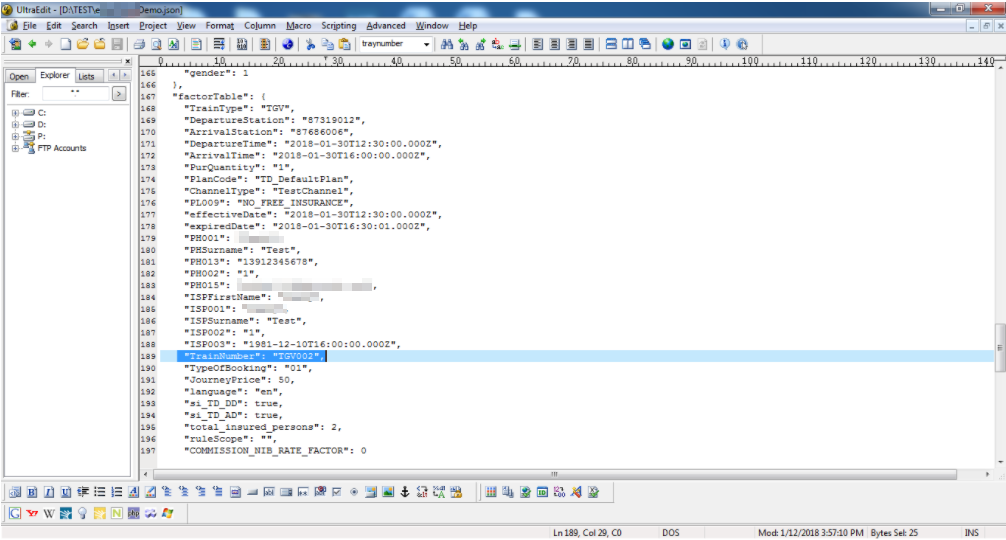
Click Preview to see the result:
B. The JSON file does not have a train number
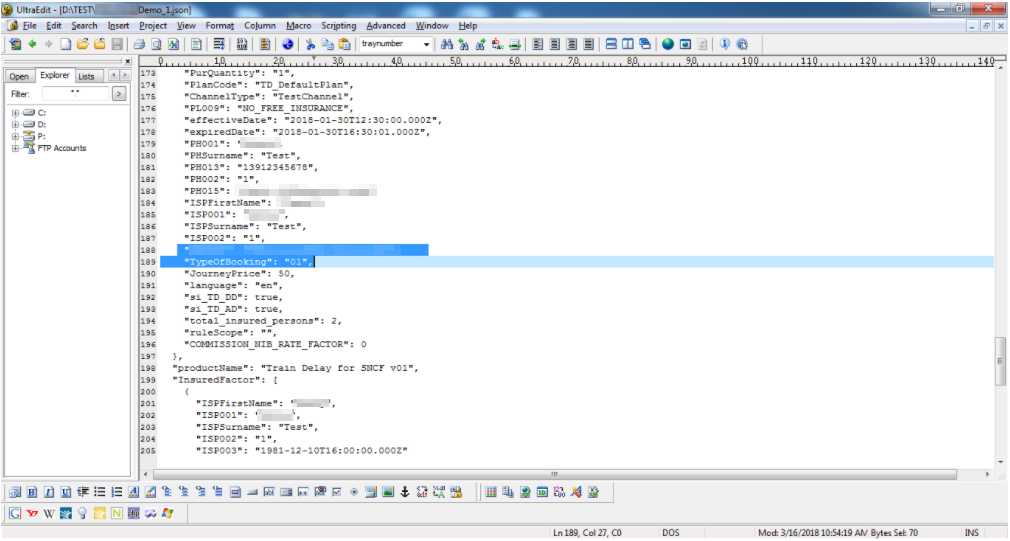
Click Preview to see the result:
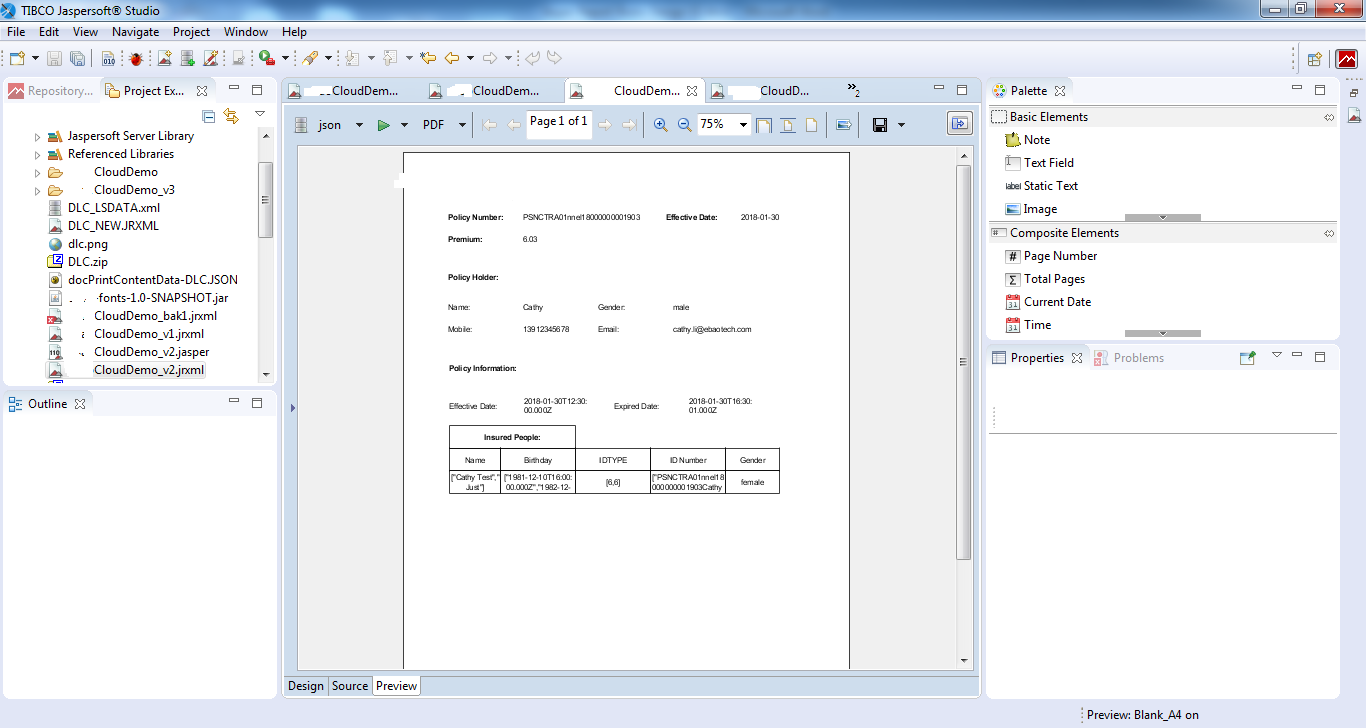
Choose the export format. Normally, PDF is used for containers.
4.Insert a image to the Template
- Import the image into the workspace. Select it from the filesystem and click Finish.
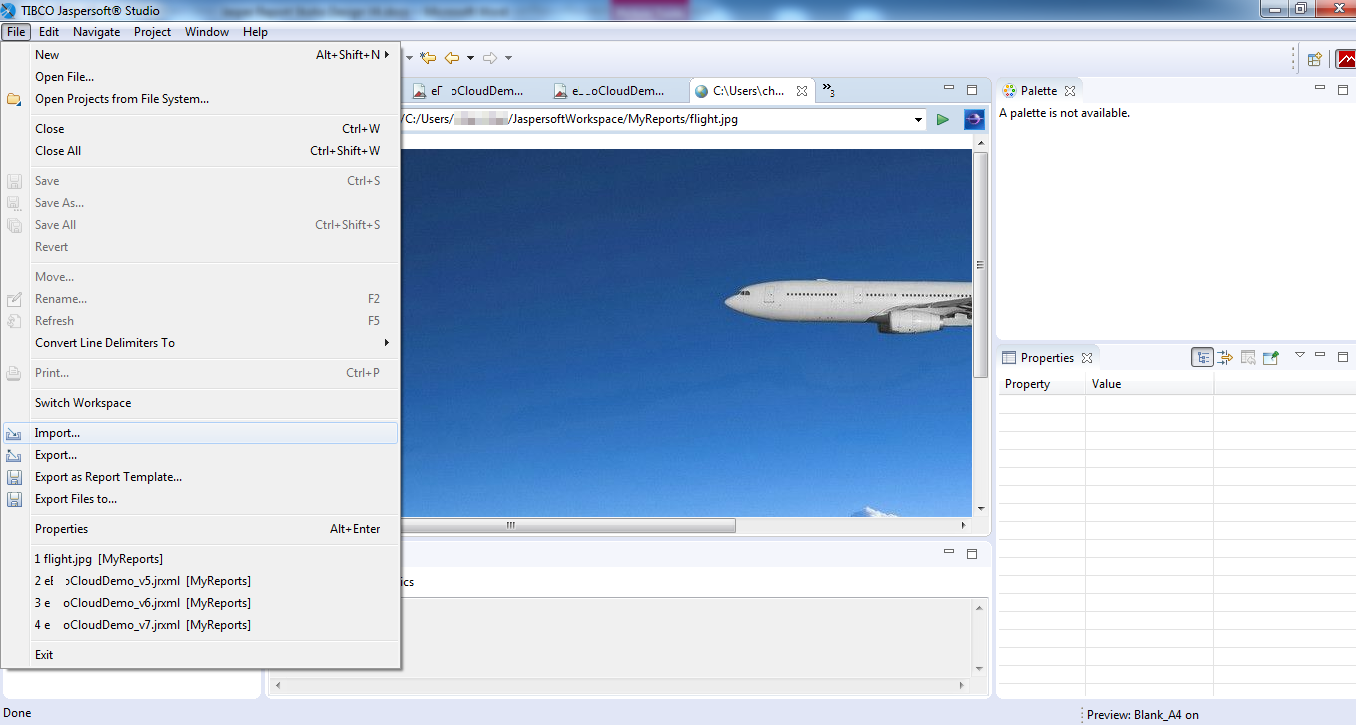
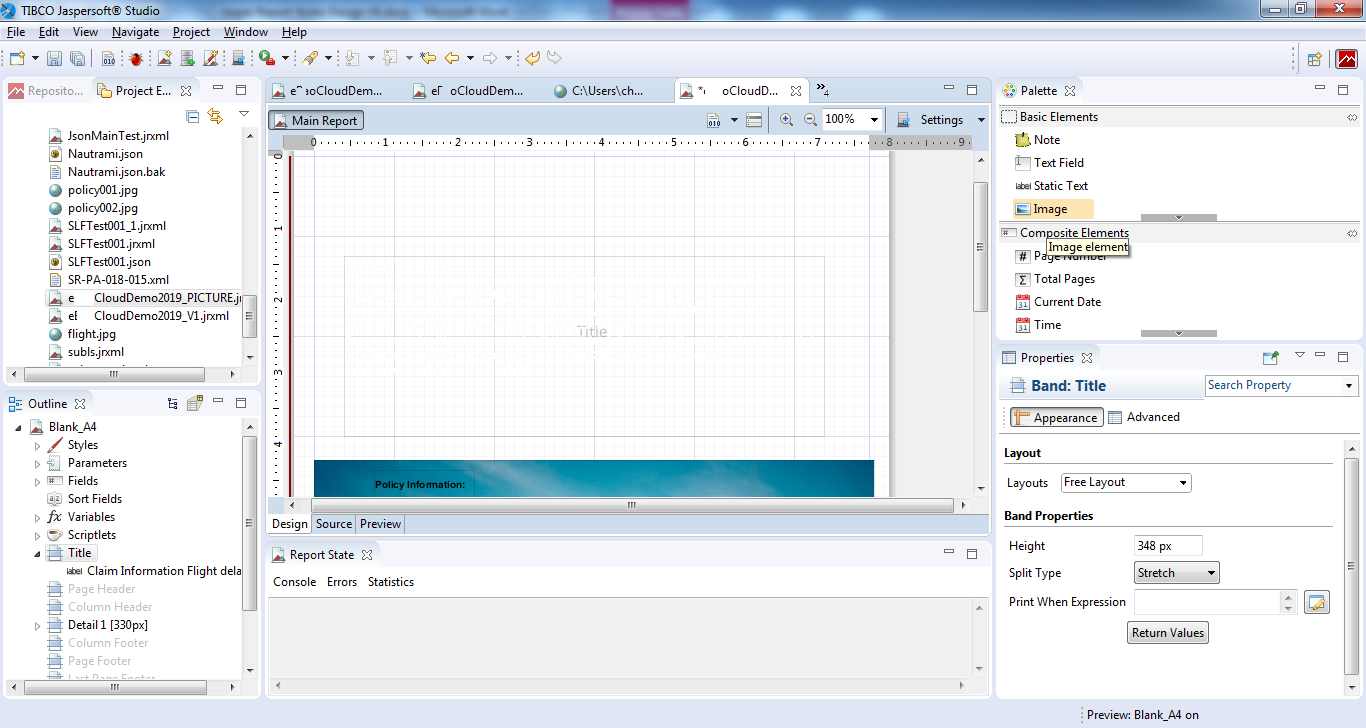
- Drag and drop the image into the template.
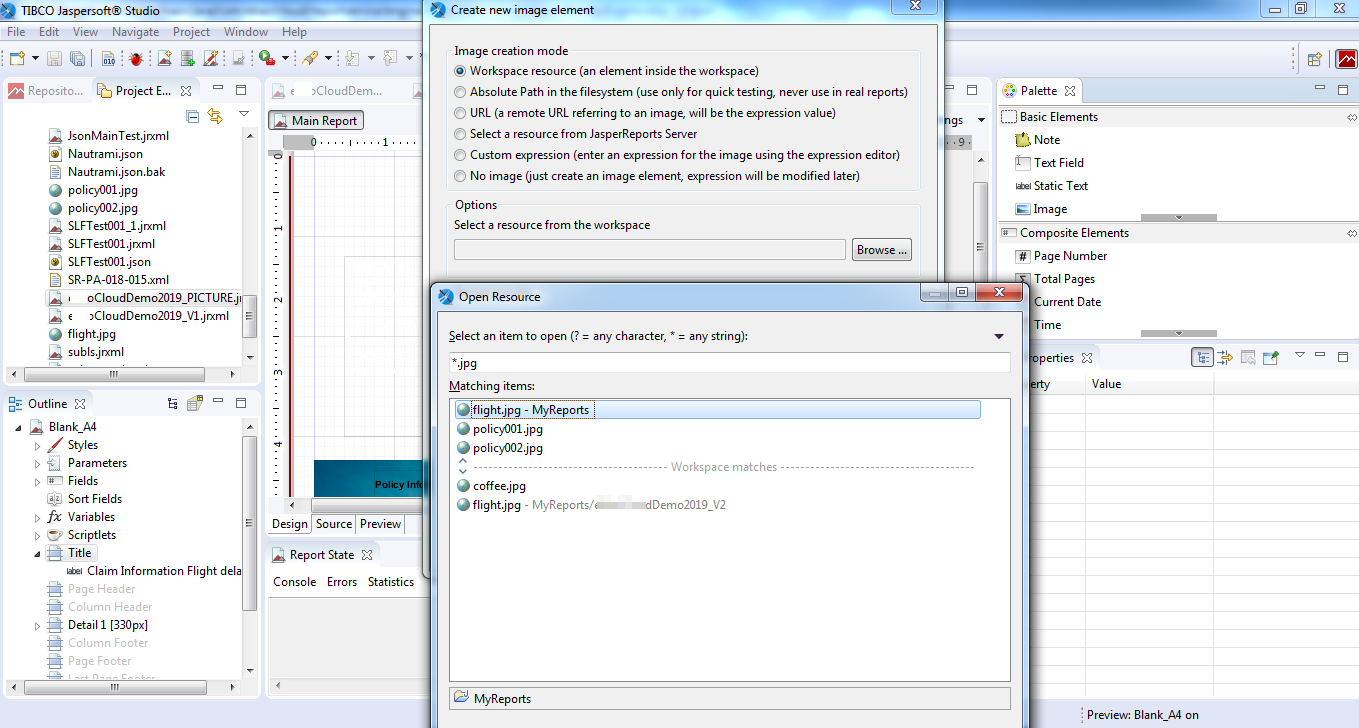
- Select Workspace Resource. If you select the absolute path in the file system, you will not find the image when the template is uploaded to the document generation server. Please select the flight.jpg image which is just imported.
- Adjust the image to your needed size.
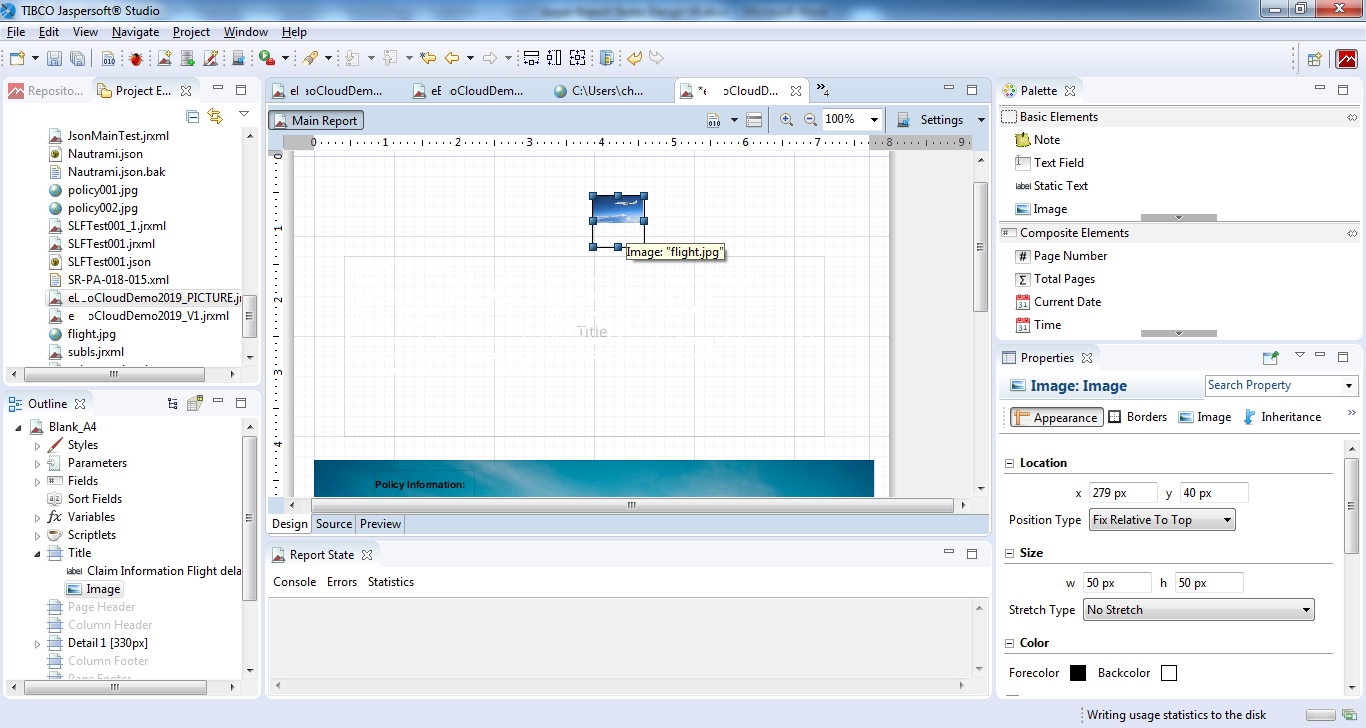
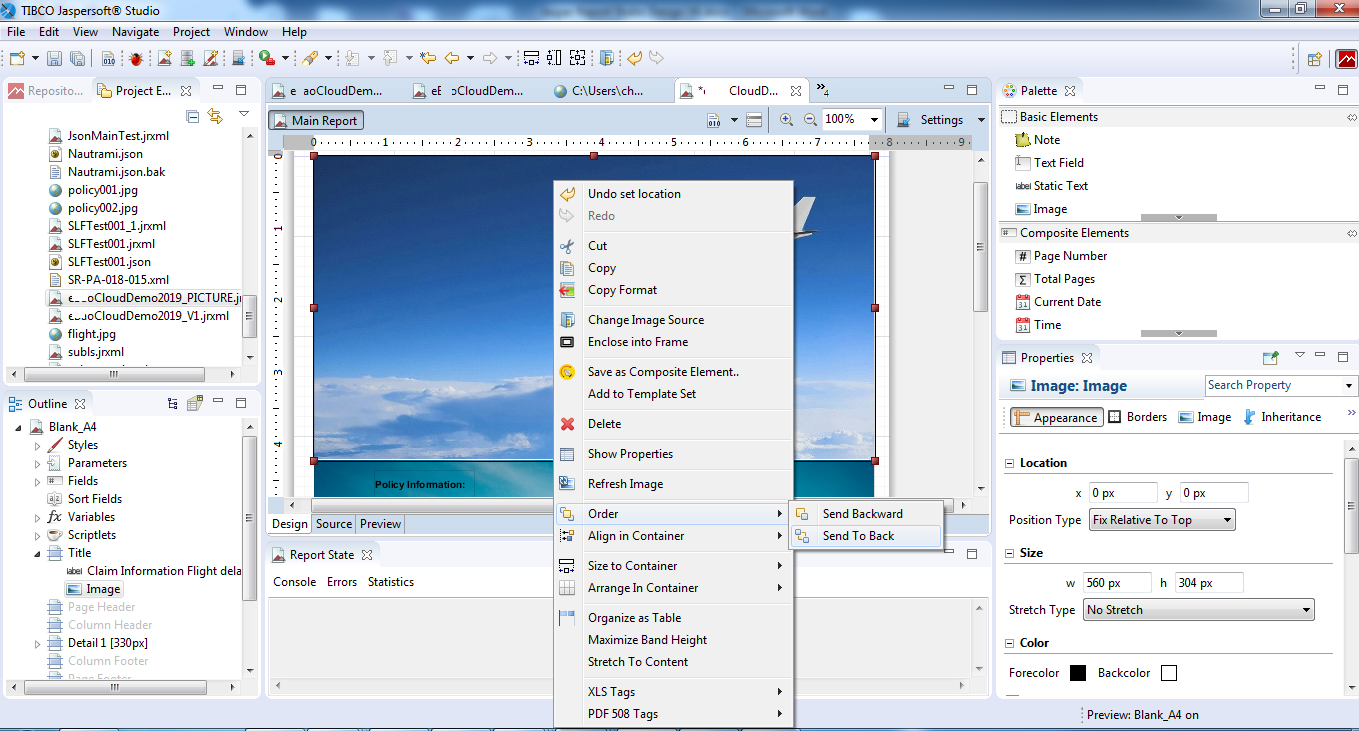
- Right click and send image back as a background.
5. Insert a Sub Report to the Template
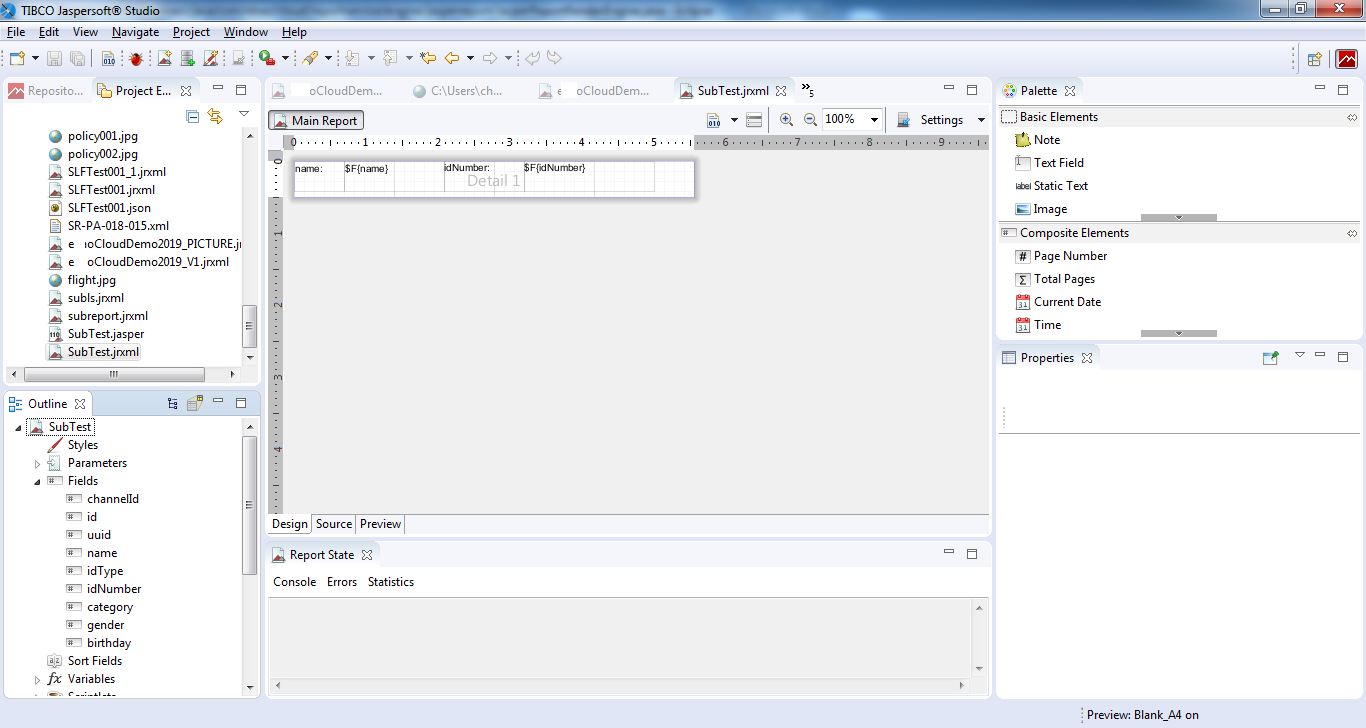
- Prepare a subreport as shown in the image.
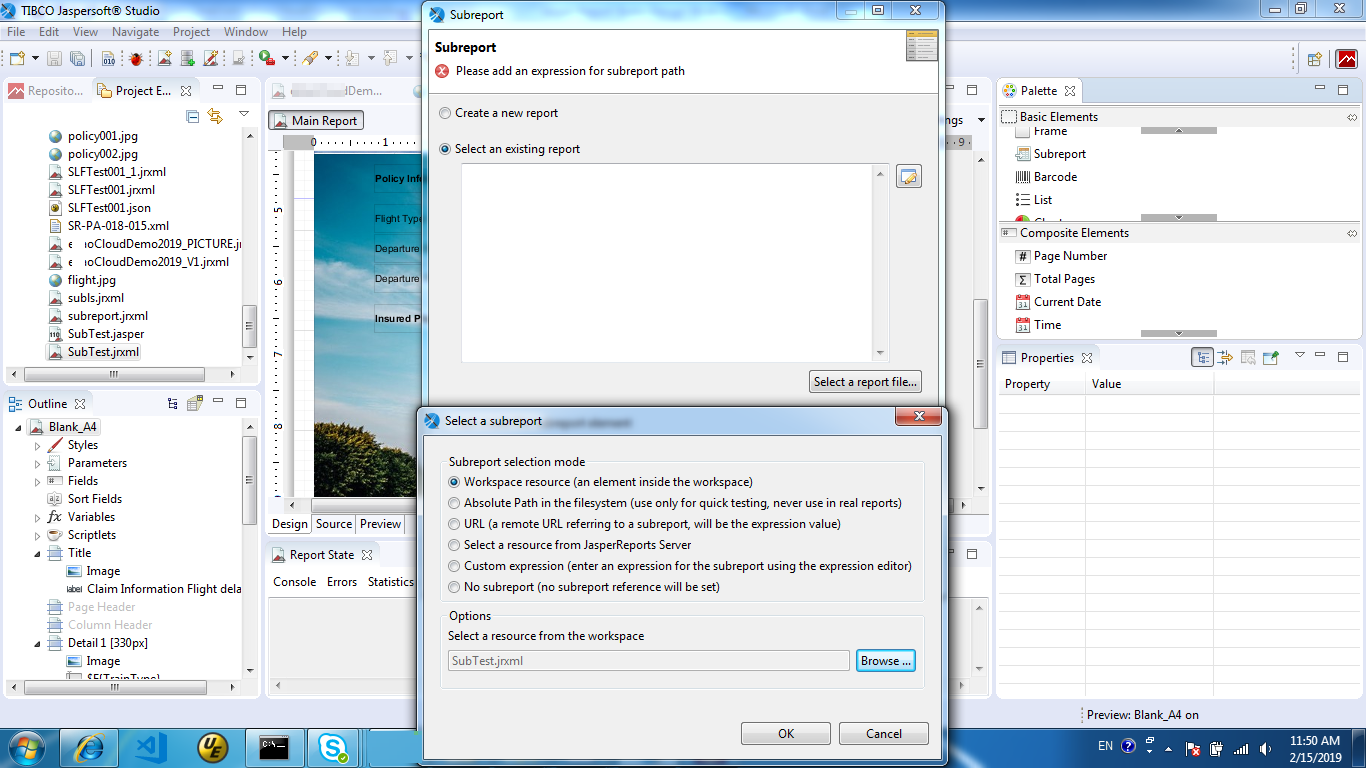
- Click Subreport, select an existed report, and then choose the subreport you have just prepared.
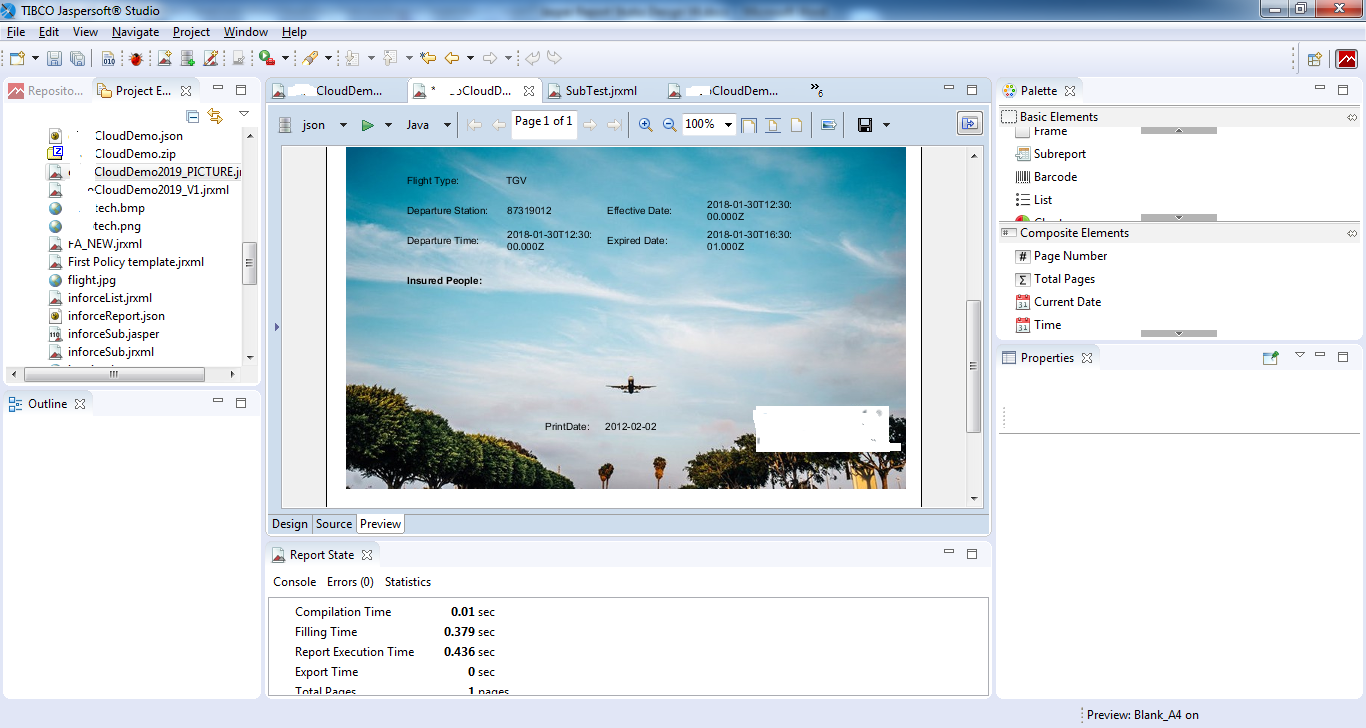
- Click Finish, If the subreport contains only static text, it will be empty. To display content, ensure the subreport uses the same JSON data source as the main report.
How to fix it:
Not click Finish, click Next and set the datasource. For different datatypes, the datasource expression is not the same. This is just for JSON file, xml file is another source.
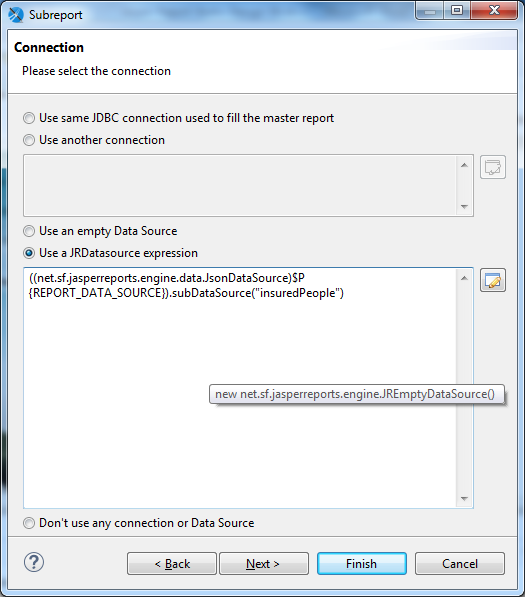
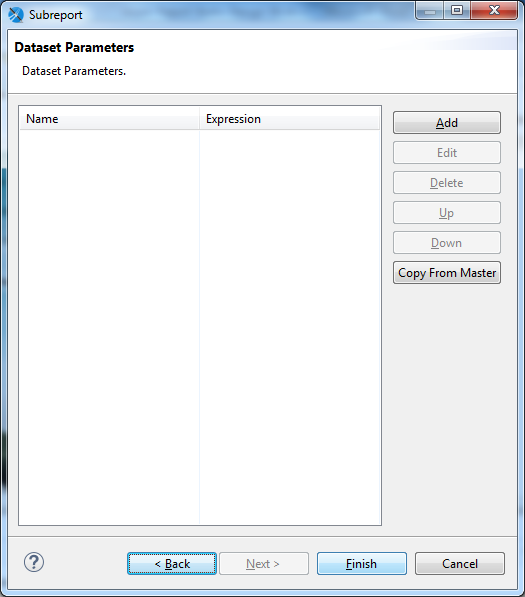
Now, the subreport could be seen.
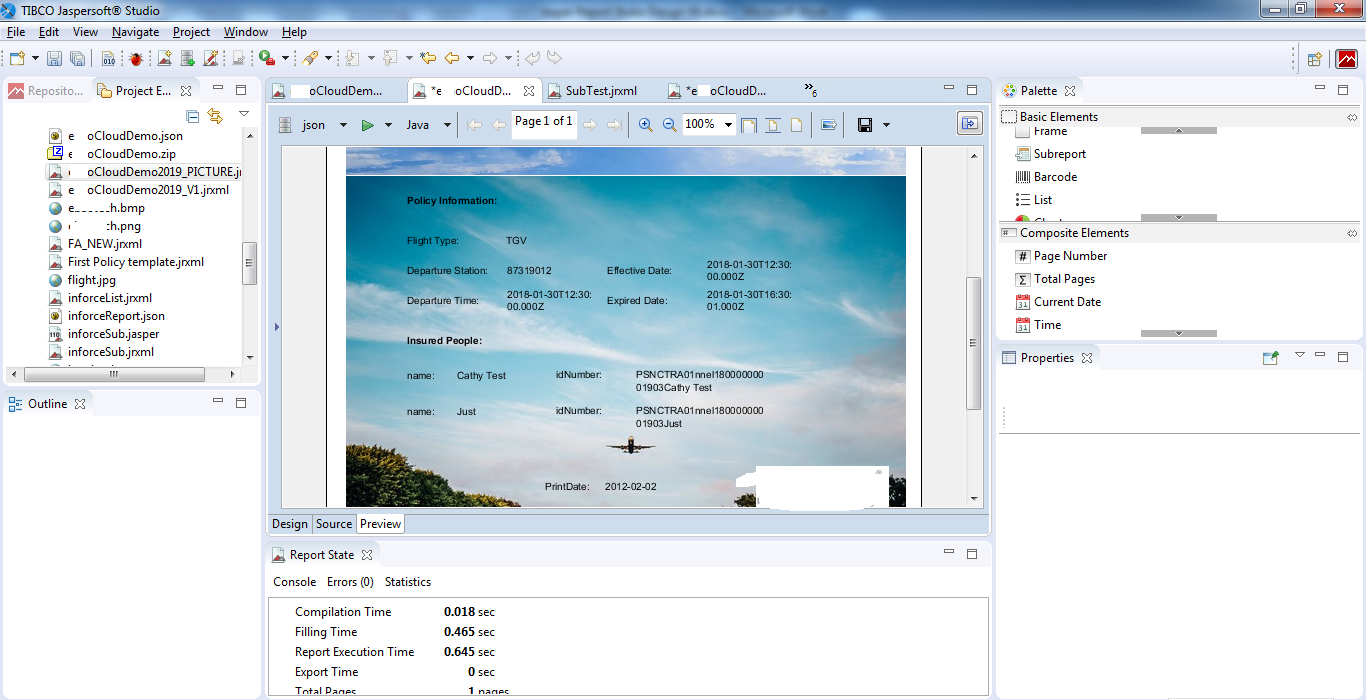
6.Create a Sub-report Whose Datasource is the Same with Main-report
This section will introduce how to create a subreport that shares the same data source as the main report, especially when you want to list all the records which you don’t know the total number.
For example, use JSON as the datasource (which is the same as the main-report) to list all the insured individuals’ information in the sub-report. As shown in the image, two insured individuals are listed here.
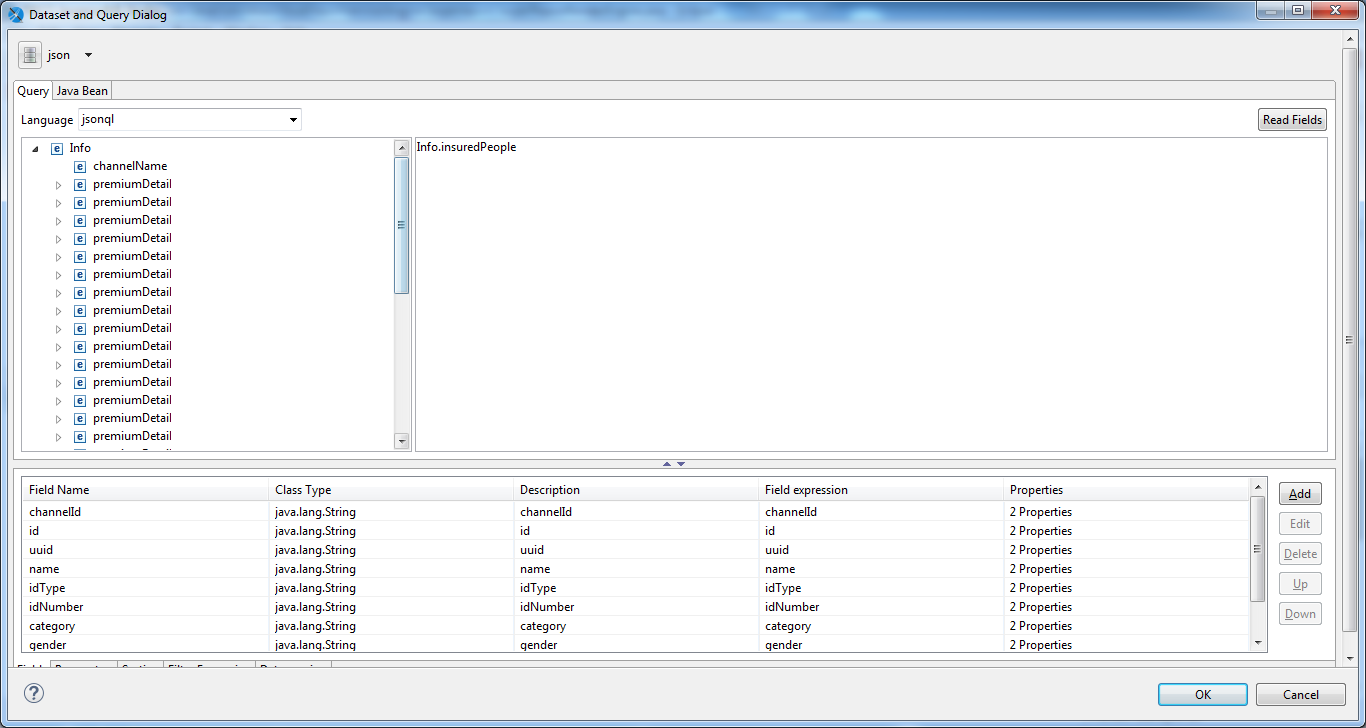
After selecting the datasource, you will find that all the fields are displayed on the left panel. Then design the subreport as a common report.
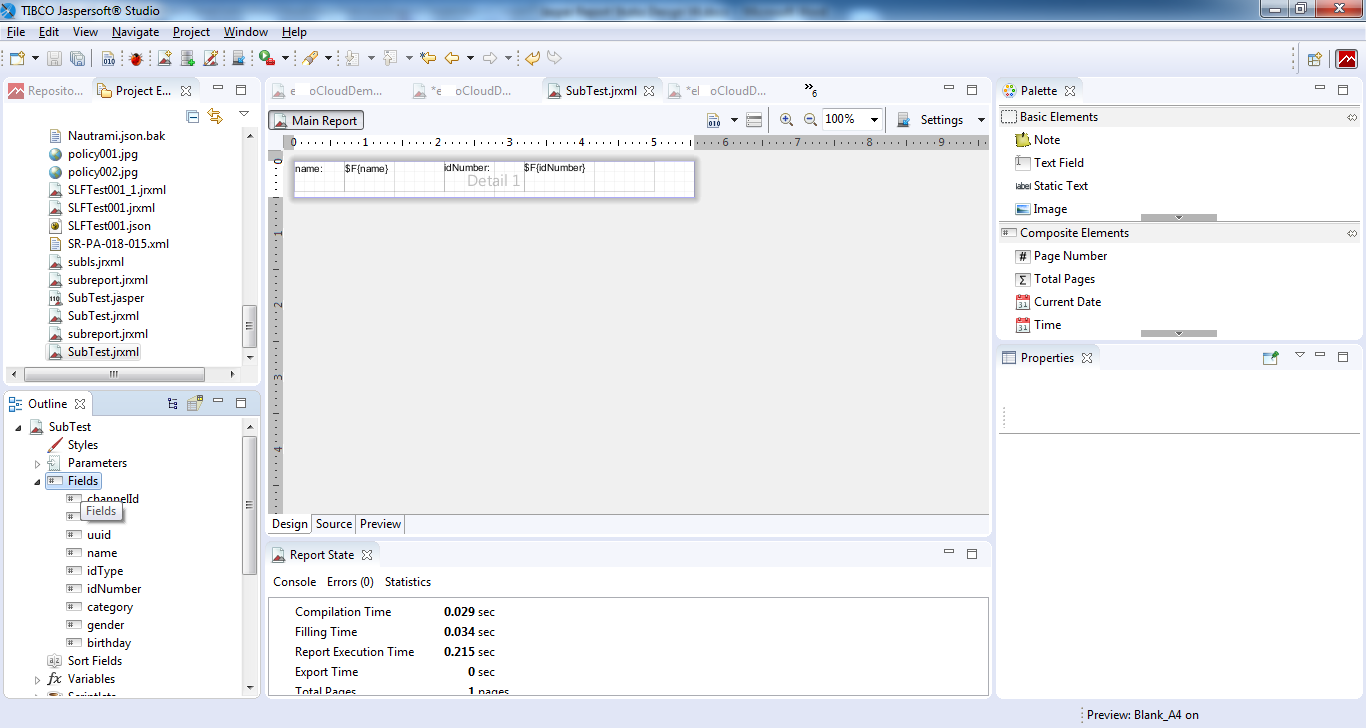
7. Zip All the Needed Files and Upload Them to the Document Generation System.
All images, subreports, and the main-report must be uploaded to the server together.
If you have a sub-report in your folder, name the zip file the same as the main-report so the print server can identify the main report. Or you can name the main-report as index.jrxml.
How to build jrxml to Jasper file
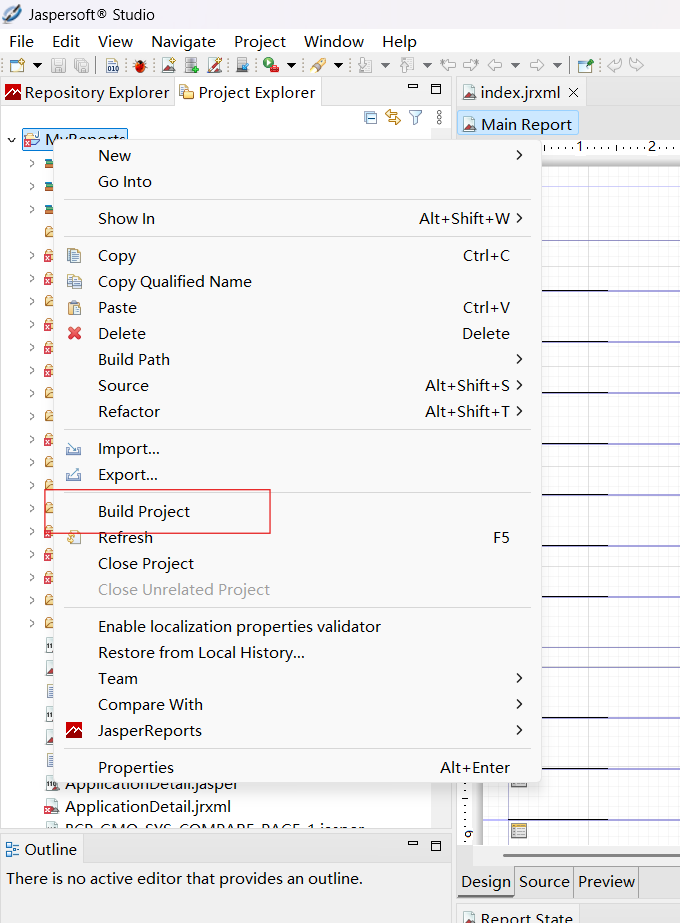
open the jasper studio 6.20.6 version,import the jrxml file,right click MyReports->Build Project, you will get the *.jasper file with the same name as the jrxml file.
Supported Fonts
All the supported fonts are available for download from your repo. Input -fonts, find the highest version for this jar file, download and unzip it.
Ensure your company possesses the font license when using these fonts. Contact the font vendor for proper business authorization.
Use the fonts currently supported when designing your template. Contact the support team to add other fonts if needed, though this may take time. Using existing fonts saves time.
This document may include links to external websites and third-party features for demonstration purposes only. These links and features do not imply our endorsement or recommendation. We do not control and are not responsible for the content, services, or privacy practices of these third parties. Users should independently review their terms and privacy policies.
FAQs
Q: I can’t find all the information I need in your jasperReport studio design document, do you have more information for me to create the template?
A: If you have any questions when using Jasper Report Studio Design, you can search for more online tutorials, as jasperReport is an openSource tool. For example: Tutorialspoint.