This guide will help you get started quickly by creating an API from the API factory and registering them on the insureMO platform.
There are 4 main types of APIs that can be created on insureMO including API creation from the API factory:
-
You can register any existing APIs you have by uploading a swagger file. The only requirement is that they are reachable by the insureMO API gateway. Its benefit is that you can bring all your legacy APIs into one place, manage them in one place and only have your apps talked to one API gateway to deliver new and exciting functionality on top of your older underlying systems.
-
You can publish Product APIs from the insureMO Product Studio (Easy Designer). These are systems generating APIs and managed by the system. This will normally be the backbone of your Insurance offering and handle the entire policy lifecycle for you. Behind the scenes, these are powered by the same insurance engines that have been developed for over 20 years.
-
You can run your own docker containers as microservices in My Services and register their APIs. We have lots of code templates to help you get started. You can also run any existing docker containers you have as long as you have a swagger file that describes the APIs they expose. See the Services documentation page to see how to configure this on insureMO Portal.
-
You can use our API factory to write webhooks that can be triggered by API calls. This is a good way to combine multiple API calls into a single call for your front-end. Additionally, this can be used to write adapters between various API data models. The main supported languages are JavaScript.
API Factory
API factory is a very useful tool for the cases where your APIs don’t work exactly the way that is required by your front-end. It’s a simple way to script some code into an API call and allows for several interesting use cases:
-
Create a Backend For Frontend (BFF) - This allows you to simplify your complex backend insurance APIs into a very simple and intuitive interface, providing for your UI developers. You can simplify the backend object models into a simple one that makes it easier to develop a user experience around.
-
Chaining API Calls - It may include your own APIs as well as third-party ones you may call for additional functionality in your insurance experiences. This is a quick and easy way to integrate with third party systems that may require to be notified when a certain API is triggered.
-
New Functionality - Sometimes your legacy APIs may not be able to support a feature that is required by a new user experience being developed on top of them. API factory can be the quickest way to expose new functionality over an API provided that it can be coded in one of our supported languages.
Lesson 1: Build a simple API for calculating premium
This is a simple example that will show you how to quickly put together an API that takes 2 variables (Sum Insured, Excess) and calculates a premium. Although this is a non-realistic example, it will teach you how to quickly write some functionalities in Javascript that can be triggered by an API.
Prerequisites
-
Knowledge of JavaScript and basics of RESTful APIs.
-
Have an Admin, Developer or DevOps role on the insureMO Portal.
Steps
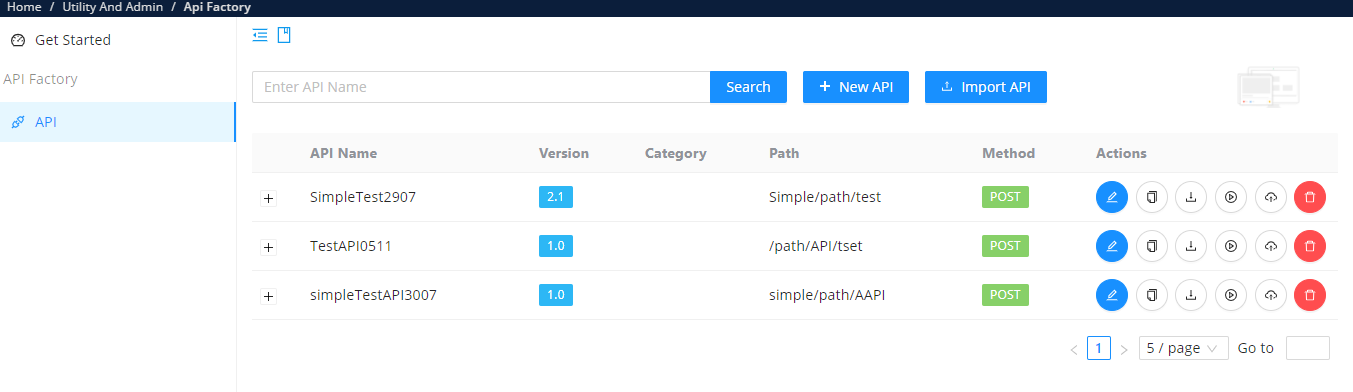
- Login to the insureMO Portal and navigate to Admin & Utility > API Factory.
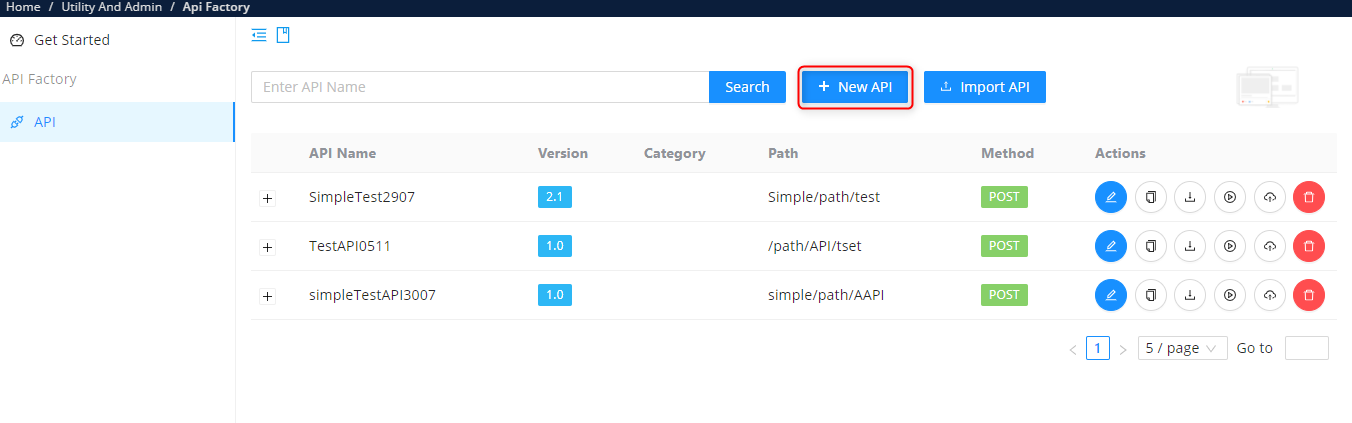
- Click New API.
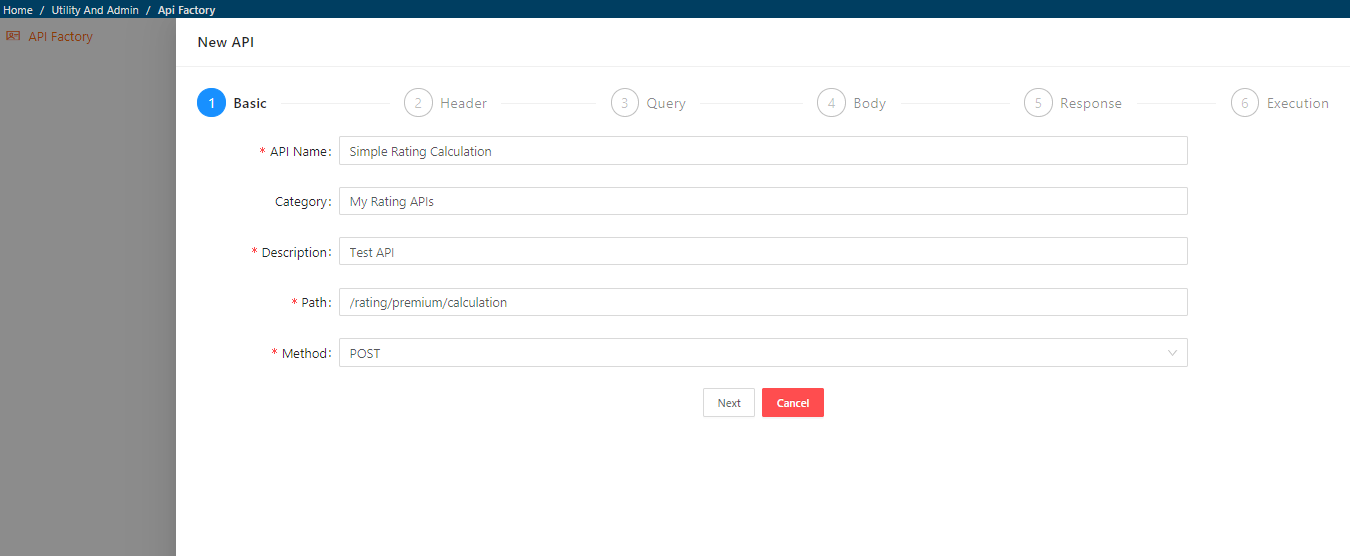
- Configure the basic details of the API. Make sure you pick the POST method so that you may configure the request body. It is also important to provide an appropriately meaningful Path as this will make your URLs easier to manage and maintain.
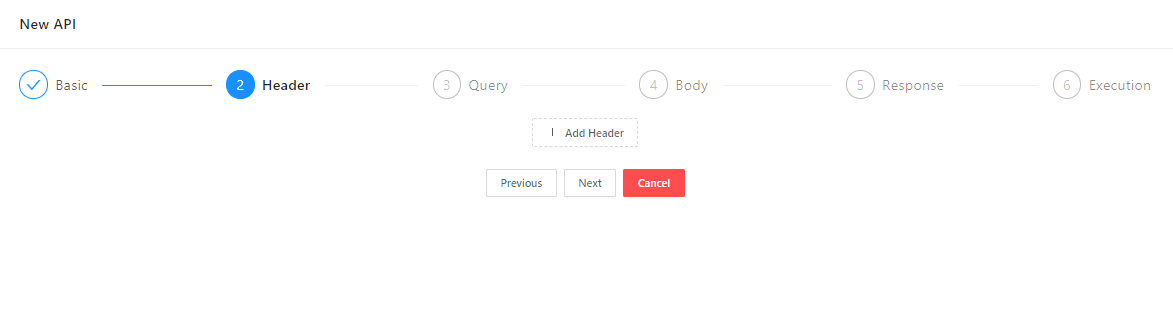
- Configure ‘Headers’ - this allows you to define mandatory or optional headers that should be present in any requests made to this API. You do not need to include any authentication headers as this will automatically be handled by the insureMO API Gateway. For the purposes of this example, do not configure any headers. Click Next.
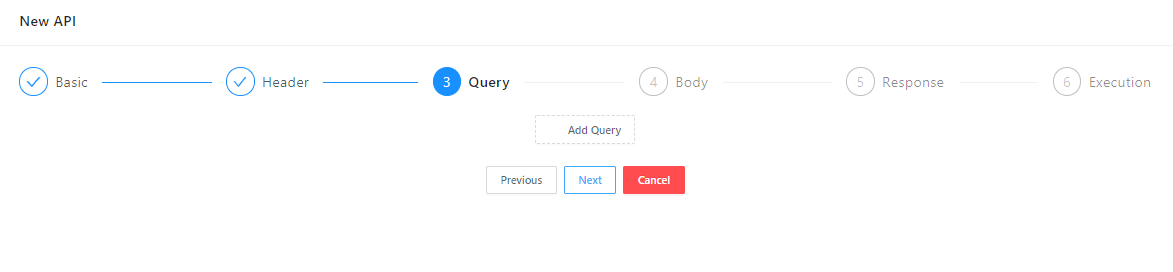
- Configure ‘Query Parameters’ - if you would like the request to contain any query parameters and define them here. Query parameters are sent in the request URL after the ’?‘. This can be a convenient way of passing data within GET requests. However for the purposes of this example, we are using a POST request and will ensure our data is sent in the request body. Hence we will not configure any query parameters. Click Next.
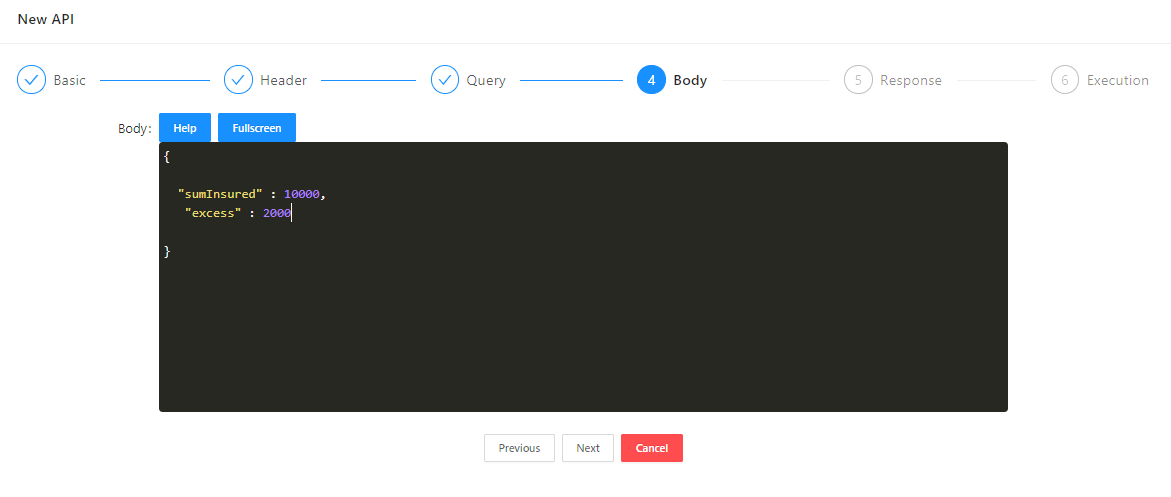
- Configure request ‘Body’ - this page allows you to define a sample body that your request will expect. In this example, we will define 2 fields: Sum Insured and Excess. You can configure any JSON body you like depending on your use case, as long as it is a valid JSON. Ensure your property names are within double quotes and any numeric data types are left without quotes. insureMO will automatically infer the type of data in each property and generate a schema for you. Fill out the Body field as follows:
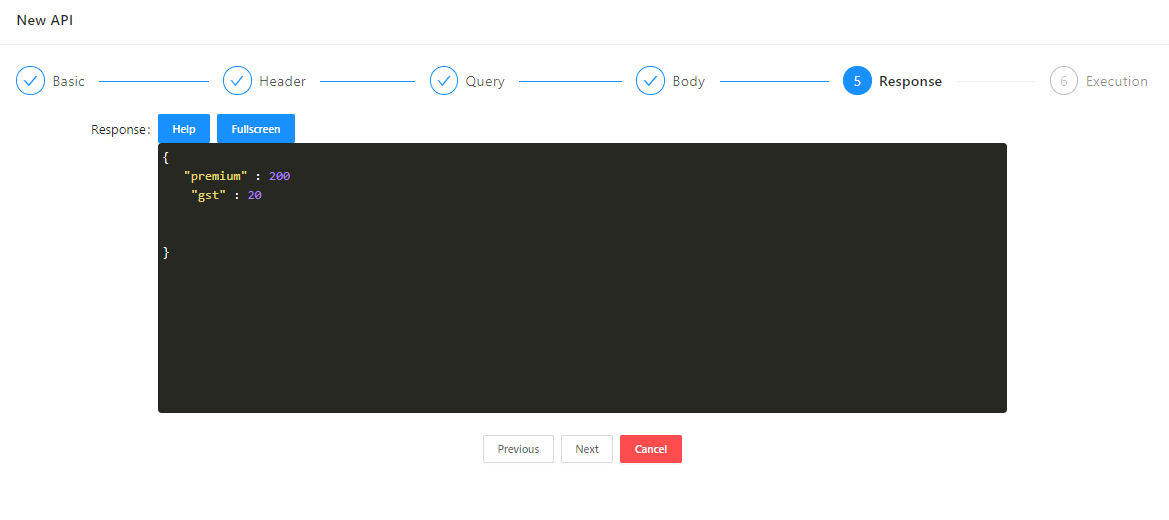
- Configure ‘Response’ body - this page allows you to define a sample response that your API will generate and will be used to automatically generate the schema for this API. Similar to the request body, configure the properties in a valid JSON format that your API will return. In this example, we will return 2 fields: Premium and GST.
- Configure your ‘Execution’ script - this is the JavaScript code that will run when this new API is triggered. Click View Help to see the functions you can access in JavaScript to access the request body, headers, and other parameters. It is worth being stated that the API factory is not designed to do extensive coding on top of that, so try to limit the complexity of a single API and try to break it up into smaller APIs. In this example, we will write some simple code to calculate premium and gst:
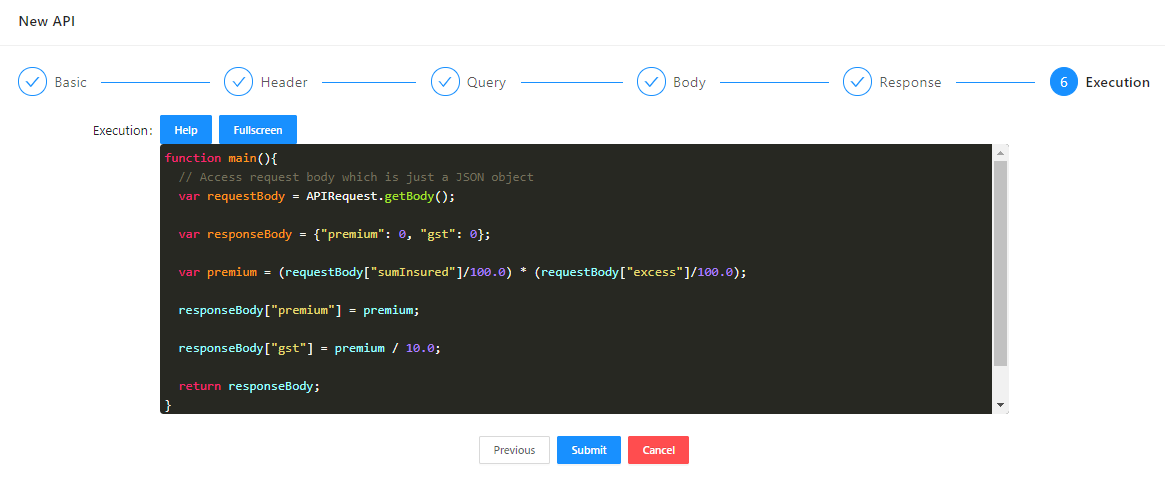
function main(){ // Access request body which is just a JSON object var requestBody = APIRequest.getBody(); var responseBody = {“premium”: 0, “gst”: 0}; var premium = (requestBody[“sumInsured”]/100.0) * (requestBody[“excess”]/100.0); responseBody[“premium”] = premium; responseBody[“gst”] = premium / 10.0; return responseBody; } main();
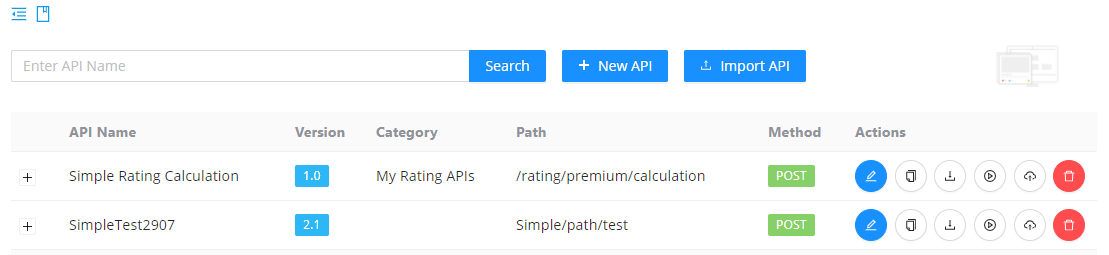
- Click Submit - if everything checks out the system, it will create an entry in the API Factory list:
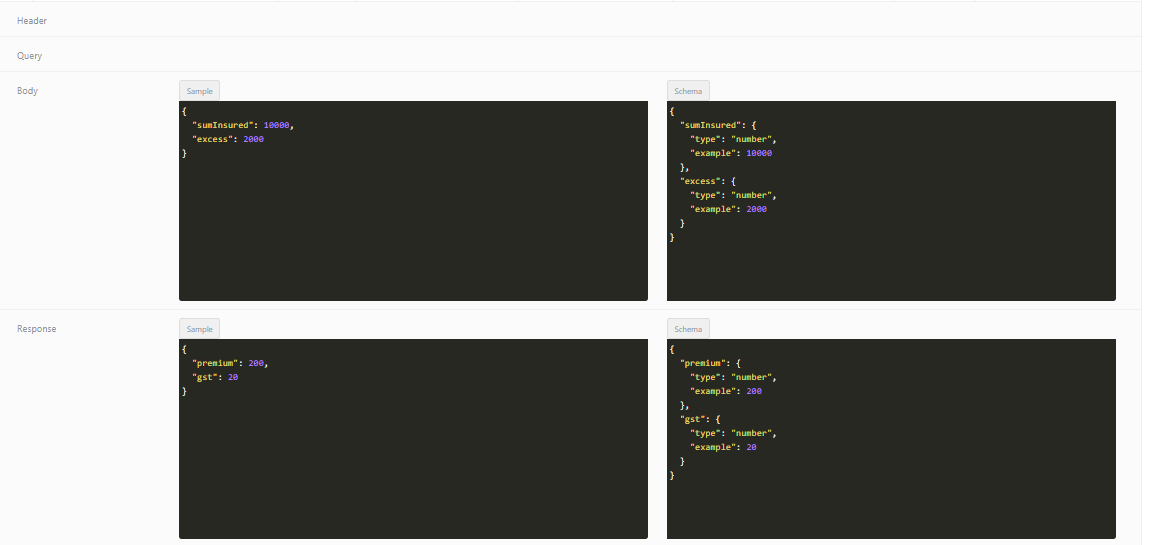
- Examine Schema - Click + to expand the entry in the API Factory list. This will show you the auto-generated schema that insureMO has created. You will notice that it has automatically figured out the datatype of the various properties in your request and response bodies. This will be used to generate the swagger file for this API when you publish it.
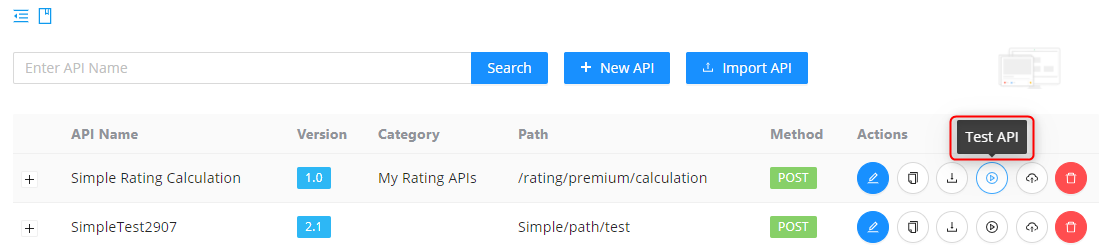
- Test the API - Click Play so that you can test your new API. This will allow you to configure sample request bodies and run them against your Execution script. Make sure you test all edge cases in your code and handle any potential errors gracefully. In our case, the code checks out and is returning to a valid premium!
Limitations
-
External libraries are not supported at this time. However, you may call as many other APIs as you like as a part of these.
-
Only JavaScript is supported as the programming language at this time.
Test API
Click Test API or Play.

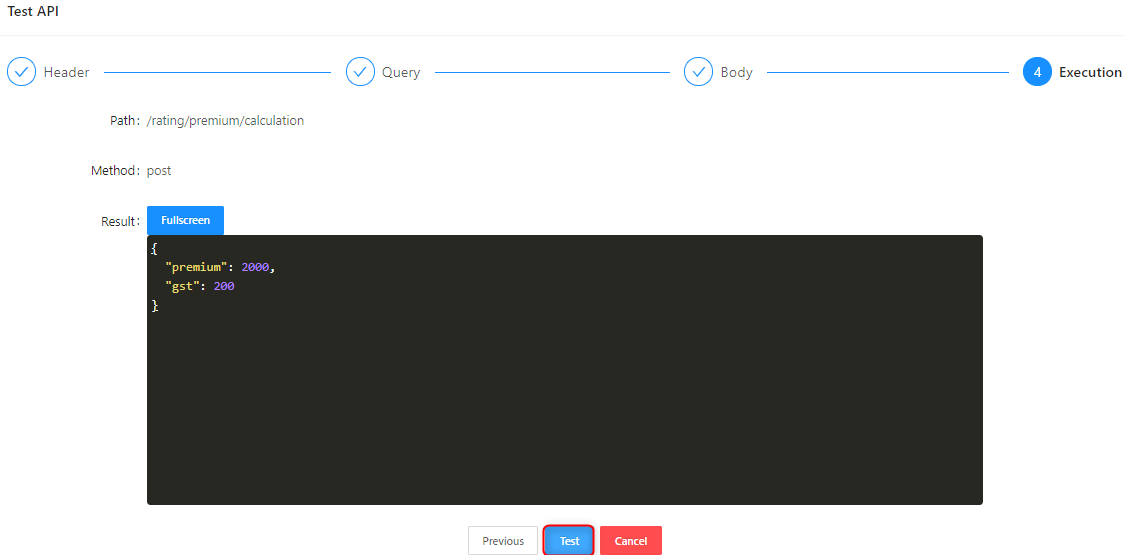
This is the Test API screen. Click Next to check every step one by one.

Click Test to test API. You will see the API Test result in Result window.
Publish API
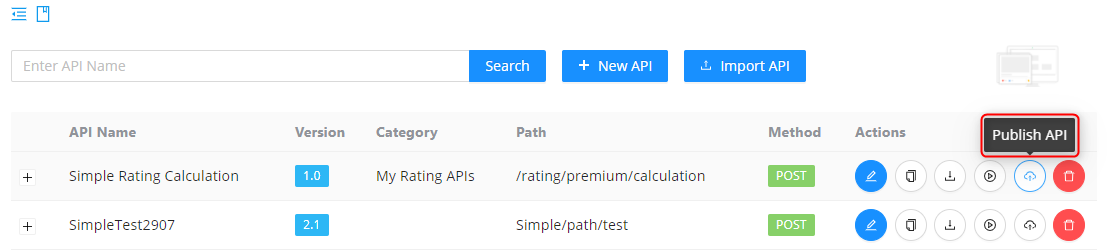
Click Publish API then users can publish created APIs in the local environment.
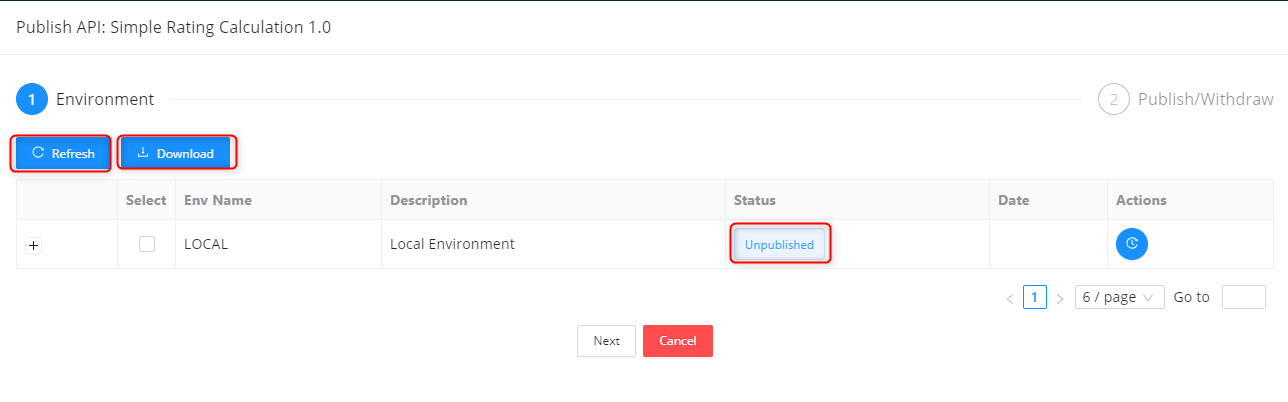
Refresh: For refreshing the page.
Download: For downloading API in json.
Status: API status i.e. unpublished.
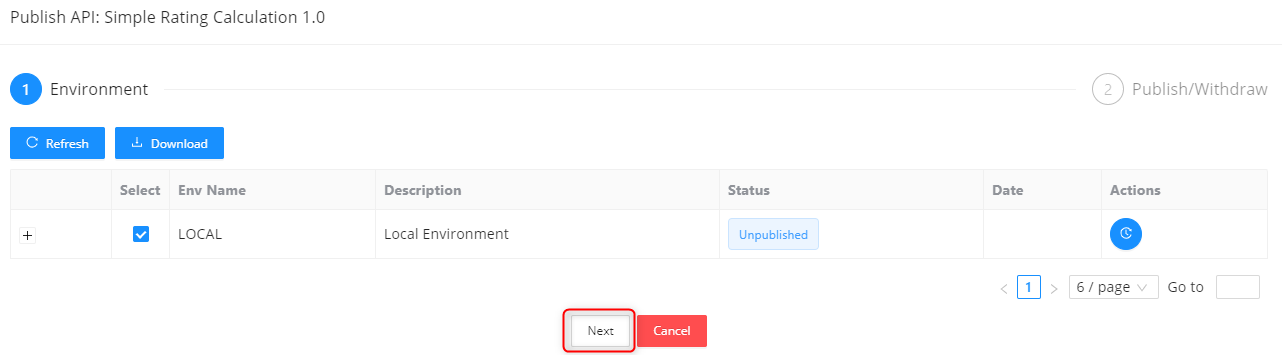
Select the given checkbox and click Next.
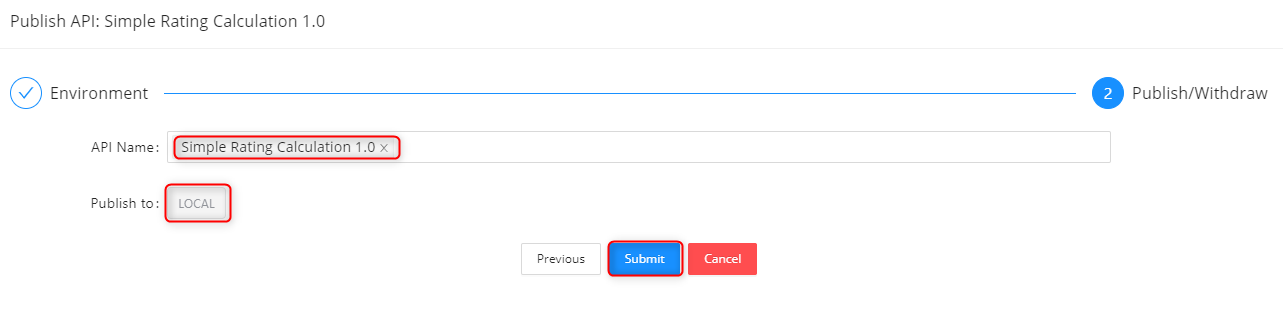
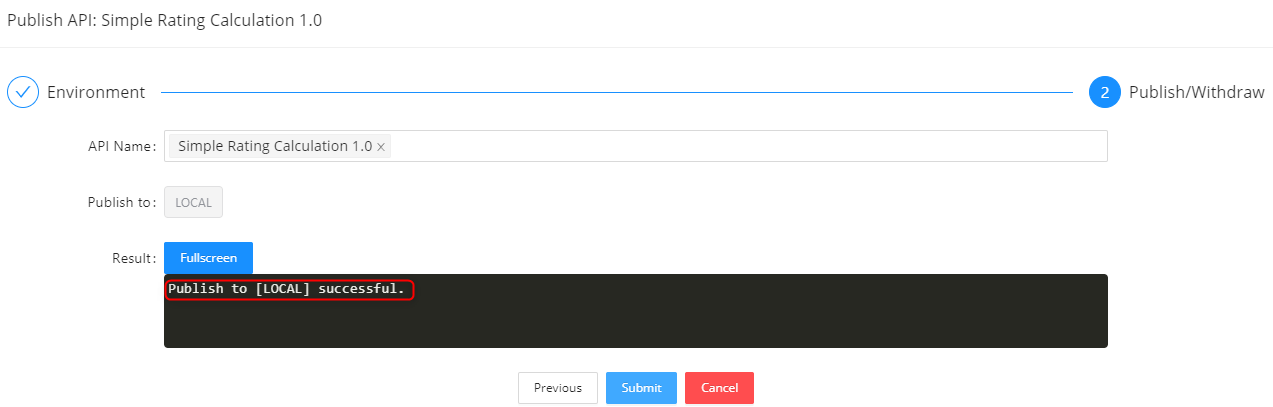
Click Submit to publish the API in a published environment. API Name of published API and Published Environment will be given.
After clicking Submit, you will see below image.
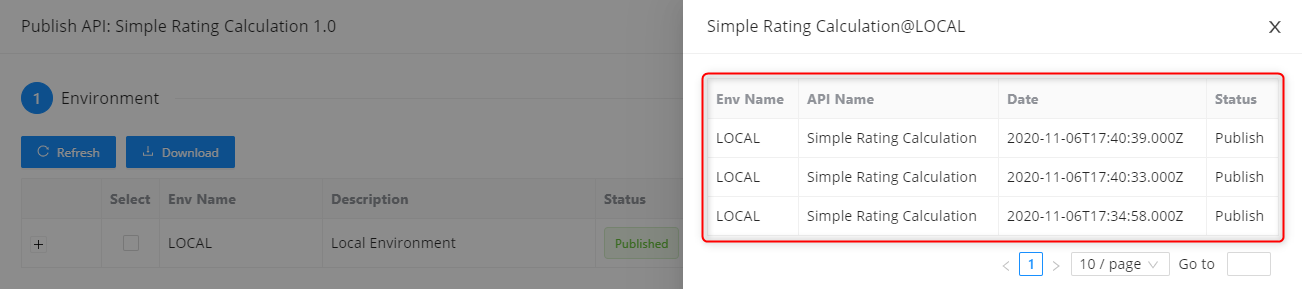
Once the API is published successfully, you can click History under the Action section to see the published history of the API.
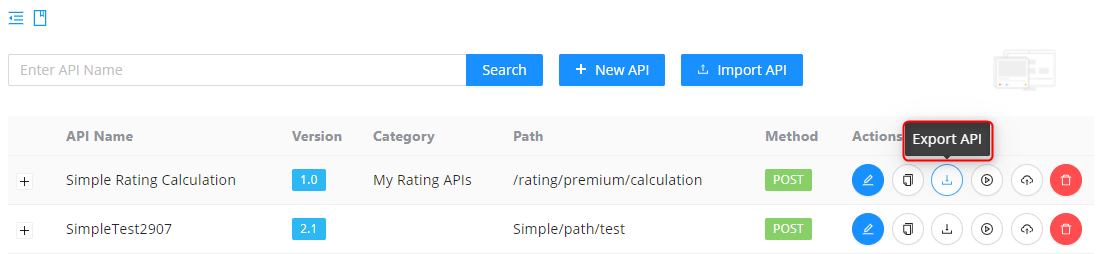
Export API
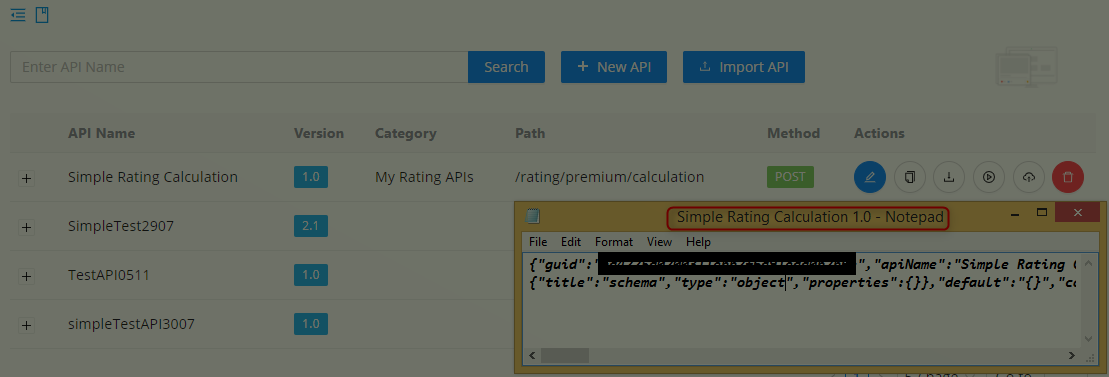
Click Export API, then you will see exported API stored in the system.
Import API
Click Import API to import API.
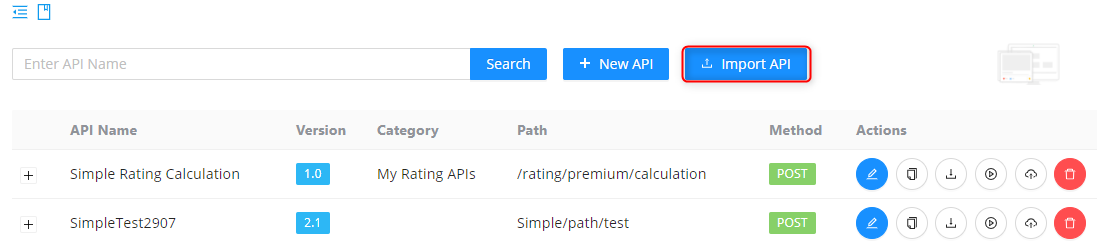
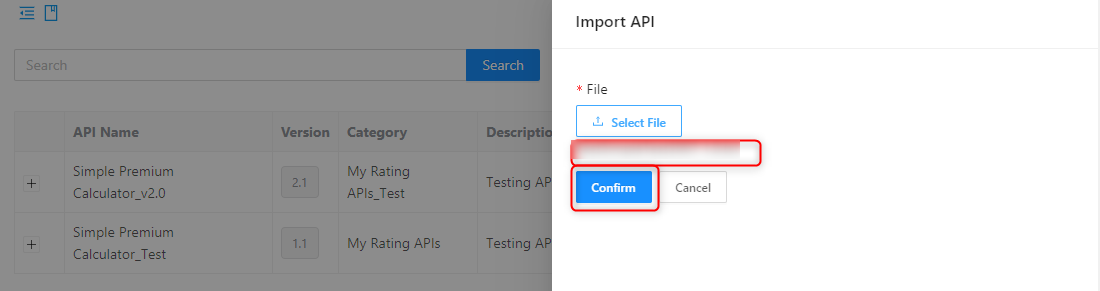
After clicking Import API, you will see below screen. Select the file from any stored location and click Confirm.
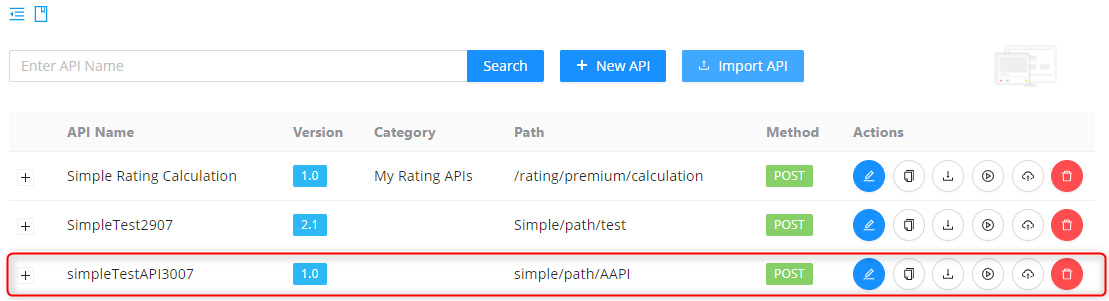
Then you will see uploaded API on the list.
Actions Perform on APIs.
Edit APIs: Click Edit to edit API. Here, you can edit any step of API creation except API name.

New Version: For updating API version
Click New Version.

You will see below screen providing the version of API.
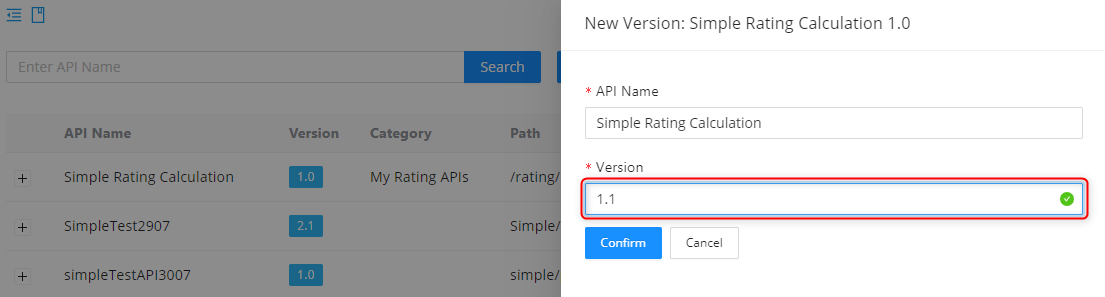
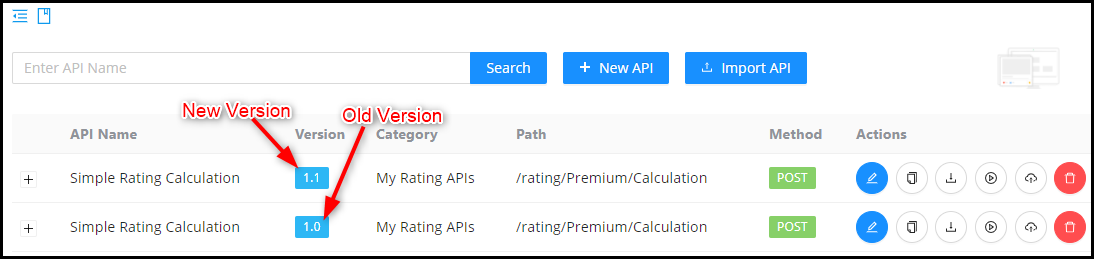
Here you can see the new and old version of API.
Delete
Click Delete to delete the API.

Timeout
Default API gateway timeout value is 2 minutes.
Container gateway 2 minutes timeout message is like below:
{ “timestamp”: 1614060830445, “status”: 500, “error”: “Internal Server Error”, “exception”: “com.netflix.zuul.exception.ZuulException”, “message”: “Read timed out”, “flag”: “This is an error reported by the container gateway. Please contact with the container.”, “chain”: [ { “name”: “RequestHeaderFilter”, “status”: “SUCCESS”, “elapse”: “0ms” }, { “name”: “Servlet30WrapperFilter”, “status”: “SUCCESS”, “elapse”: “0ms” }, { “name”: “PreDecorationFilter”, “status”: “SUCCESS”, “elapse”: “0ms” }, { “name”: “CustomErrorFilter”, “status”: “SUCCESS”, “elapse”: “0ms” }, { “name”: “TenantCheckFilter”, “status”: “SUCCESS”, “elapse”: “0ms” }, { “name”: “VendorKeyHeaderFilter”, “status”: “SUCCESS”, “elapse”: “31ms” }, { “name”: “LogMDCFilter”, “status”: “SUCCESS”, “elapse”: “0ms” }, { “name”: “ServletDetectionFilter”, “status”: “SUCCESS”, “elapse”: “0ms” }, { “name”: “TracePreZuulFilter”, “status”: “SUCCESS”, “elapse”: “0ms” }, { “name”: “SimpleHostRoutingFilter”, “status”: “FAILED”, “elapse”: “120006ms” }, { “name”: “AuthCheckFilter”, “status”: “SUCCESS”, “elapse”: “36ms” }, { “name”: “RequestCacheFilter”, “status”: “SUCCESS”, “elapse”: “0ms” } ] }
FAQs
Q: How many APIs can I create?
A: We haven’t limited the number of APIs that users can create.
Q: Is there a limit to the length of JavaScript?
A: We haven’t limited the script length of users. But if the script is too long, it may affect the execution speed of your API. In this case, we suggest you use Service Factory.
Q: Can I use third-party JS in script?
A: No, you can’t. To ensure security, we prohibit the introduction and use of third-party JS.
Q: Can I call another API of API factory in script?
A: No, you can’t. API factory does not allow circular calls.
Q: Does API Factory support web service?
A: Yes, we support WebService.
Q: Can I catch exceptions in scripts?
A: Yes, you can use the try/catch code block to manually catch the exception, or you can get the exception through the return result of the API.
Q: What is the format of API input and output of API factory?
A: Currently, application/json is supported.