1 Core Value
- From Slow Decisions to Real-Time Insights: Our Data Asset Platform transforms deep industry expertise into ready-to-deploy, reusable data services — enabling production-level decisioning and reporting applications to go live in days, not months. Make smarter decisions faster with confidence.
- From High Costs to Scalable Efficiency: Built on a cloud-native, pay-as-you-go architecture, our platform removes the need for heavy upfront investments. Your spending is tied directly to usage, ensuring maximum cost efficiency, scalability, and operational flexibility as your business grows.
- From Slow Innovation to Rapid Transformation: With our no-code environment, business experts can directly build, adapt, and launch their own data applications — accelerating innovation, reducing IT dependency, and responding to market shifts with agility.
2 Get Started
2.1 Demo Env URL
- URL: https://datamo-demo.insuremo.com/admin/home
- Credential: Log in with user account and credential. Please contact datamo@insuremo.com.
3 Data Source Management
3.1 Source Database
3.1.1 Data Source Type Introduction
Source database would be the legacy source database. DataMo can support multi-type of data source ingestion.
- Relational Database: Oracle, MySQL, Posgre-SQL, MS-SQL, Snowflake
- Non-Relational Database: MongoDB, Dynamo.
- S3: AWS, Oracle.
- File: formatted CSV file
- API - Queue: RabbitMQ, OCI Queue
3.1.2 Data Source Management
The data source management need to use the super-admin authority. Please contact datamo@insuremo.com for user account and credential.
Input user name, password and click Go! for login.

- Data Zones: Data zone is to define the data belong zone.
Click Data Zones to enter Data Zones management UI and click CREATE DATA ZONE to create a data zone.

Fill the zone name. You can tick the tab if it is needed to enable the AI features. Then click CONFIRM.
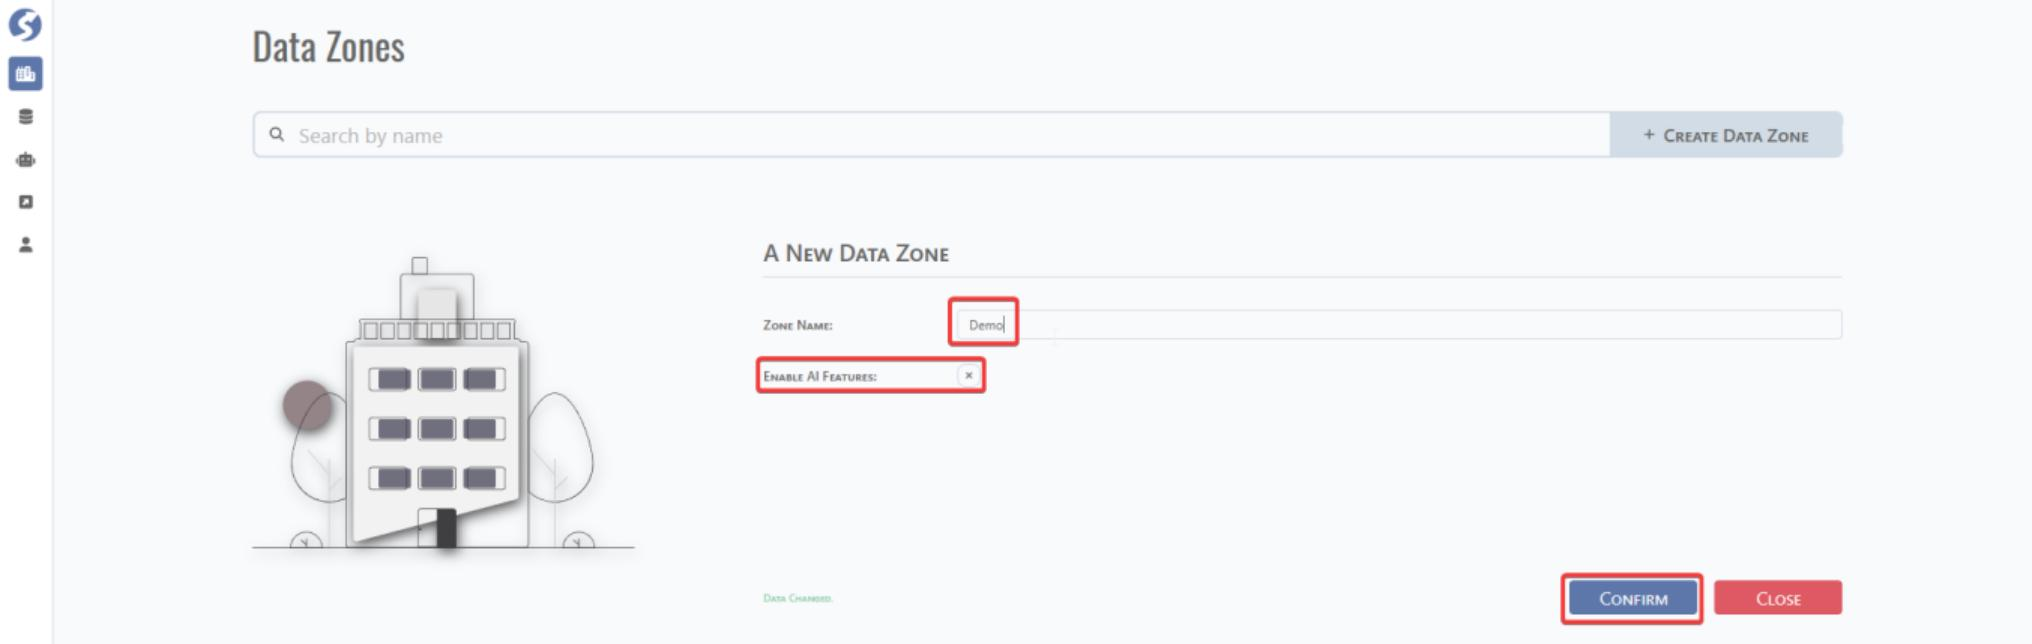
After confirmation, the data zones is shown as below:

- Data Source: This would be the data source configuration and management UI.
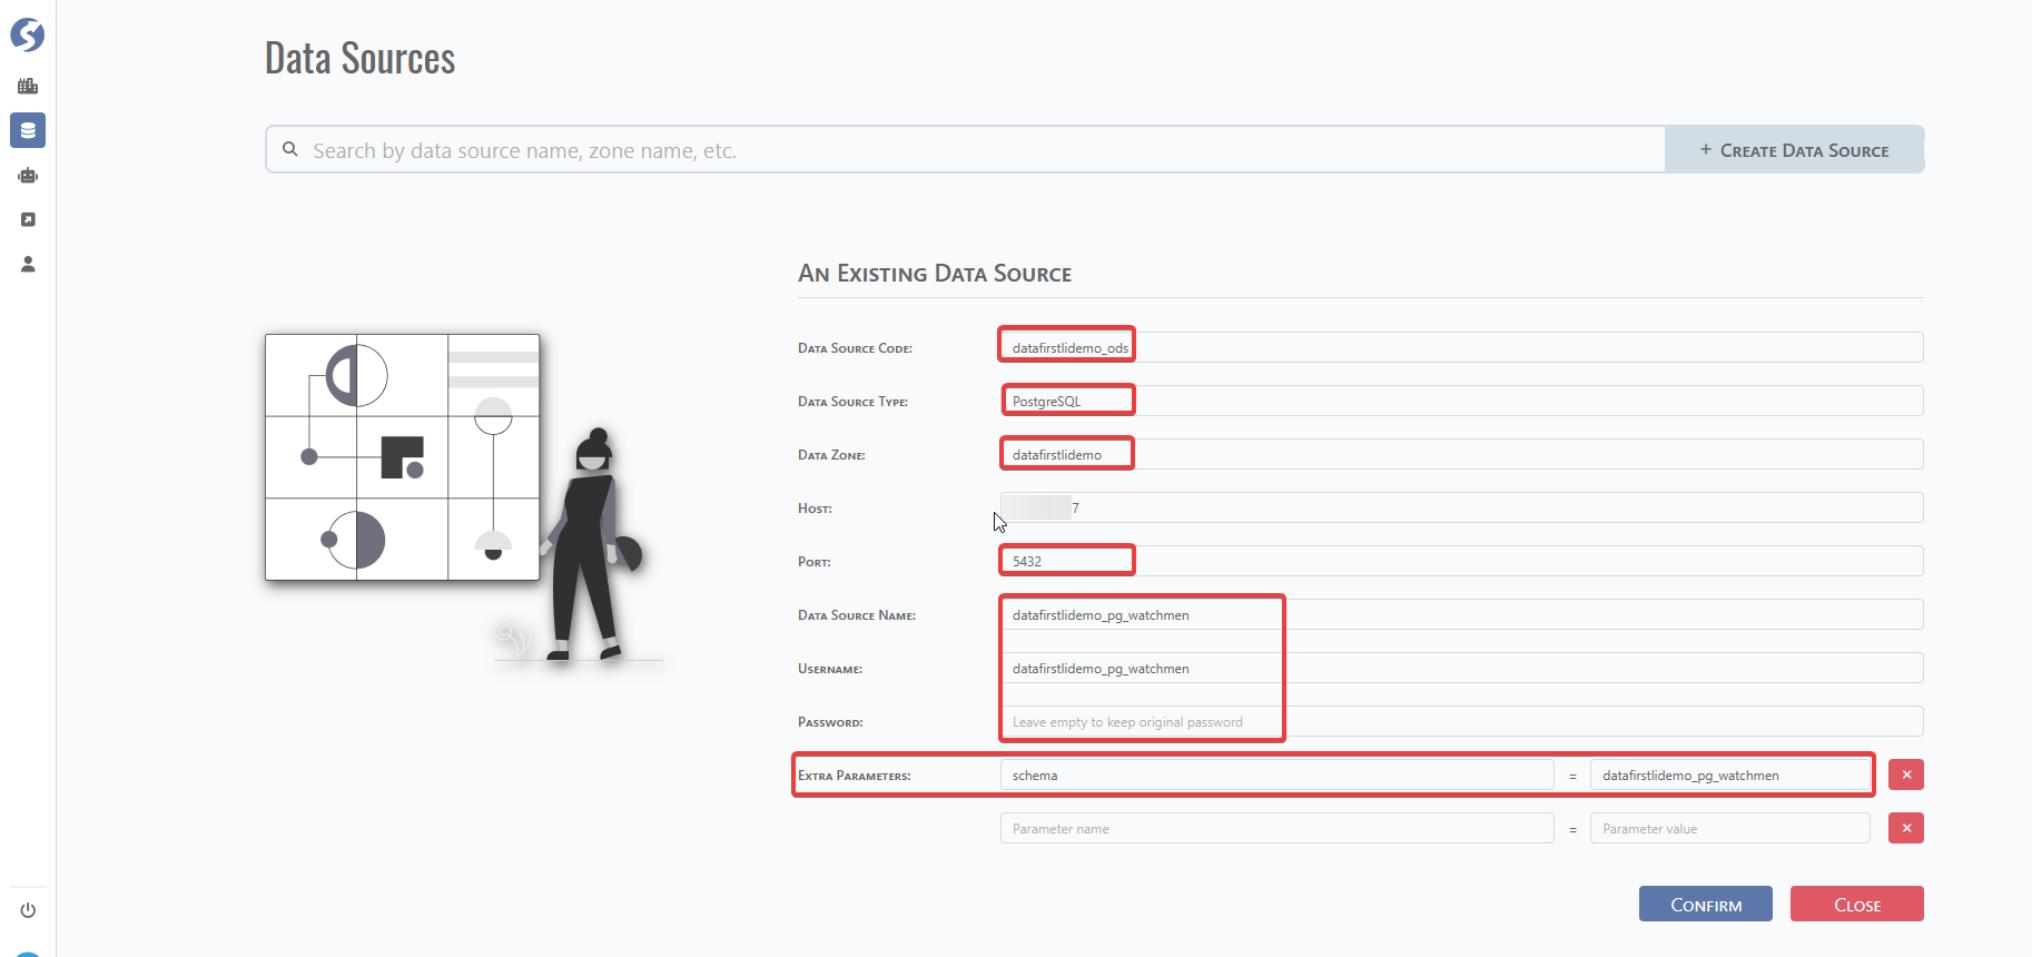
Click Data Source and CREATE DATA SOURCE for new data source configuration.

Data Source Code: Define a data source code. This is for further data source selection in DataMo platform.
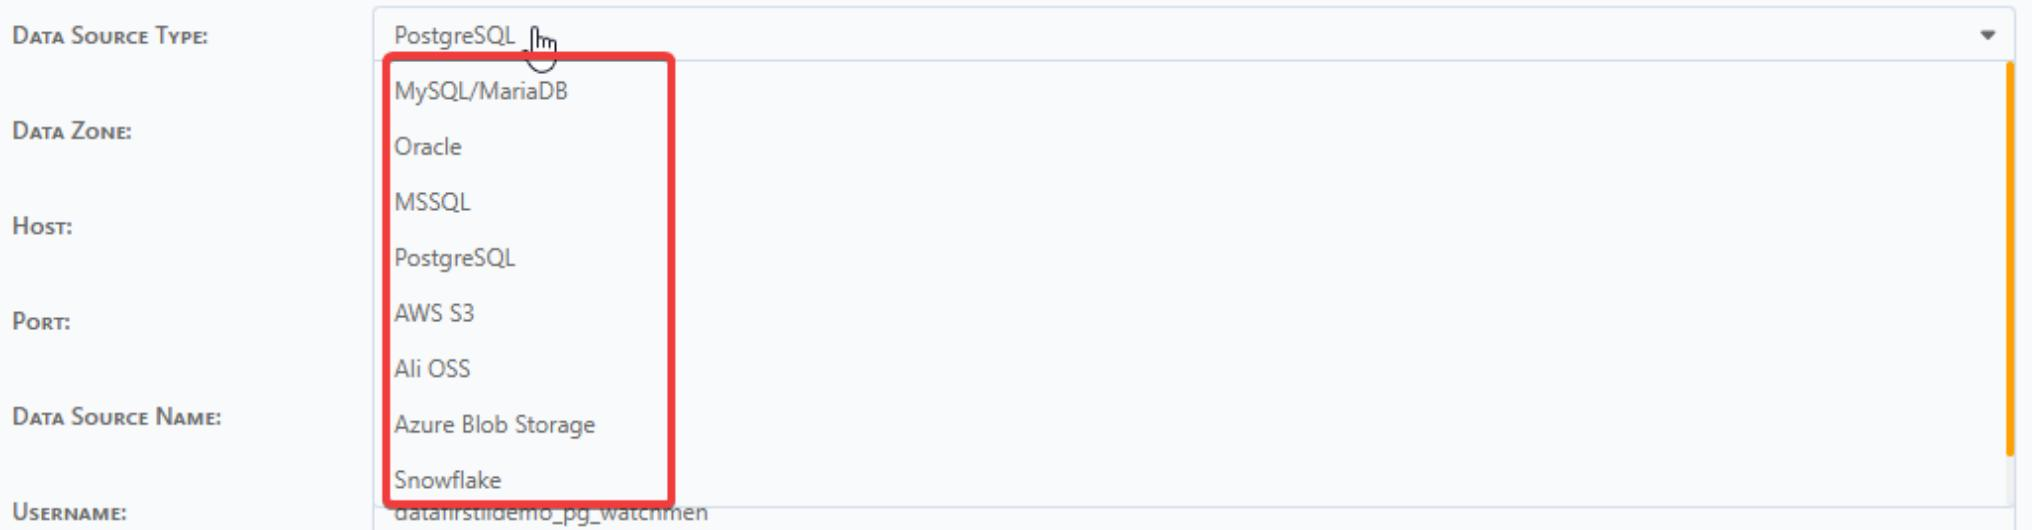
Data Source Type: Select from the dropdown list — Oracle/PG-SQL/MS-SQL/MySQL/AWS-S3.
Data Zone: This is the data zone defined above.
Host: IP of URL of database host server.
Port:
Data Source Name: Database Name Username:
Password:
Extra Parameters: If you need to define external parameter, you can append it.
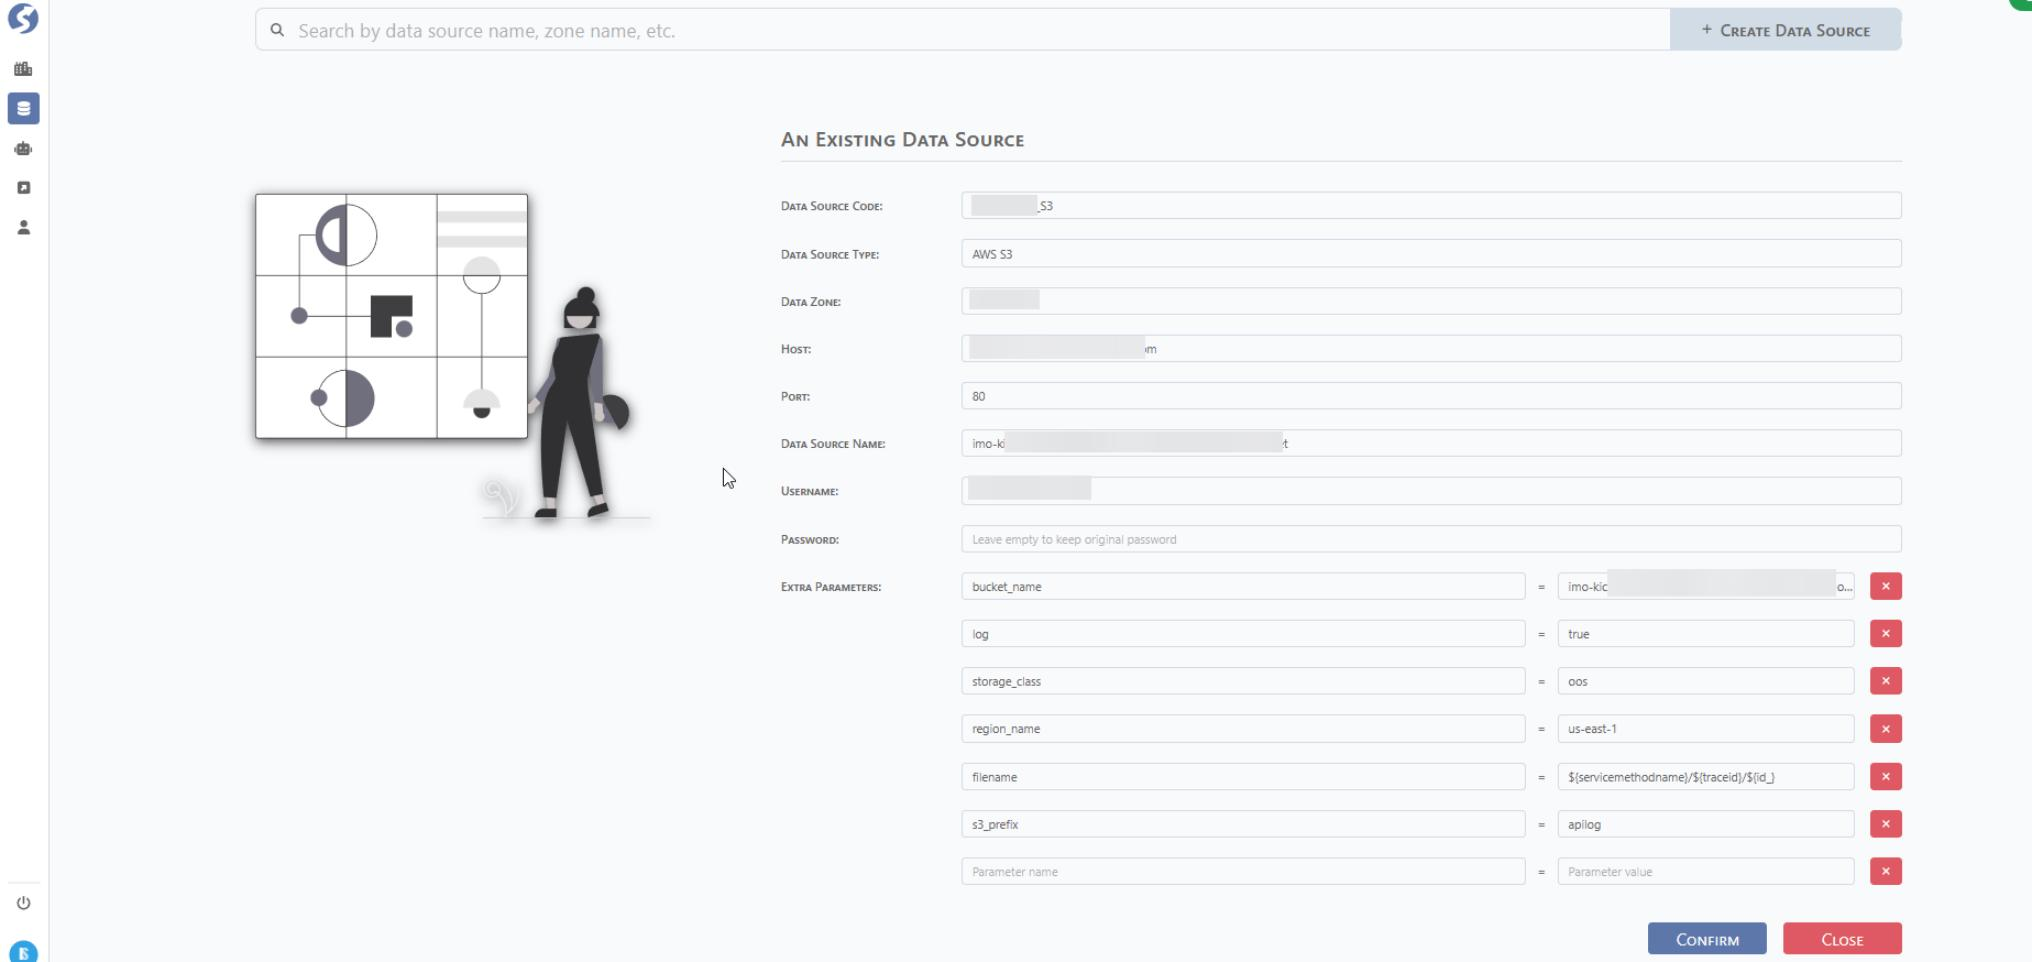
S3 Sample:
3.2 Meta Database
Meta database is the configuration database of DataMo Middle office. All platform configurations including data sources, topics, pipelines, and subjects, are automatically persisted here.
Meta database does not require manual setup within your data source management system. It is initialized upon deployment of the DataMo platform.
3.3 ODS Database
ODS database would be the raw topic and distinct topic storage database. Data source information need to be configured in data management system.

4 Data Ingestion Management
To manage and configure data ingestion tables, switch to a user account that has the normal development role. Contact the DataMo team to obtain the login credentials.

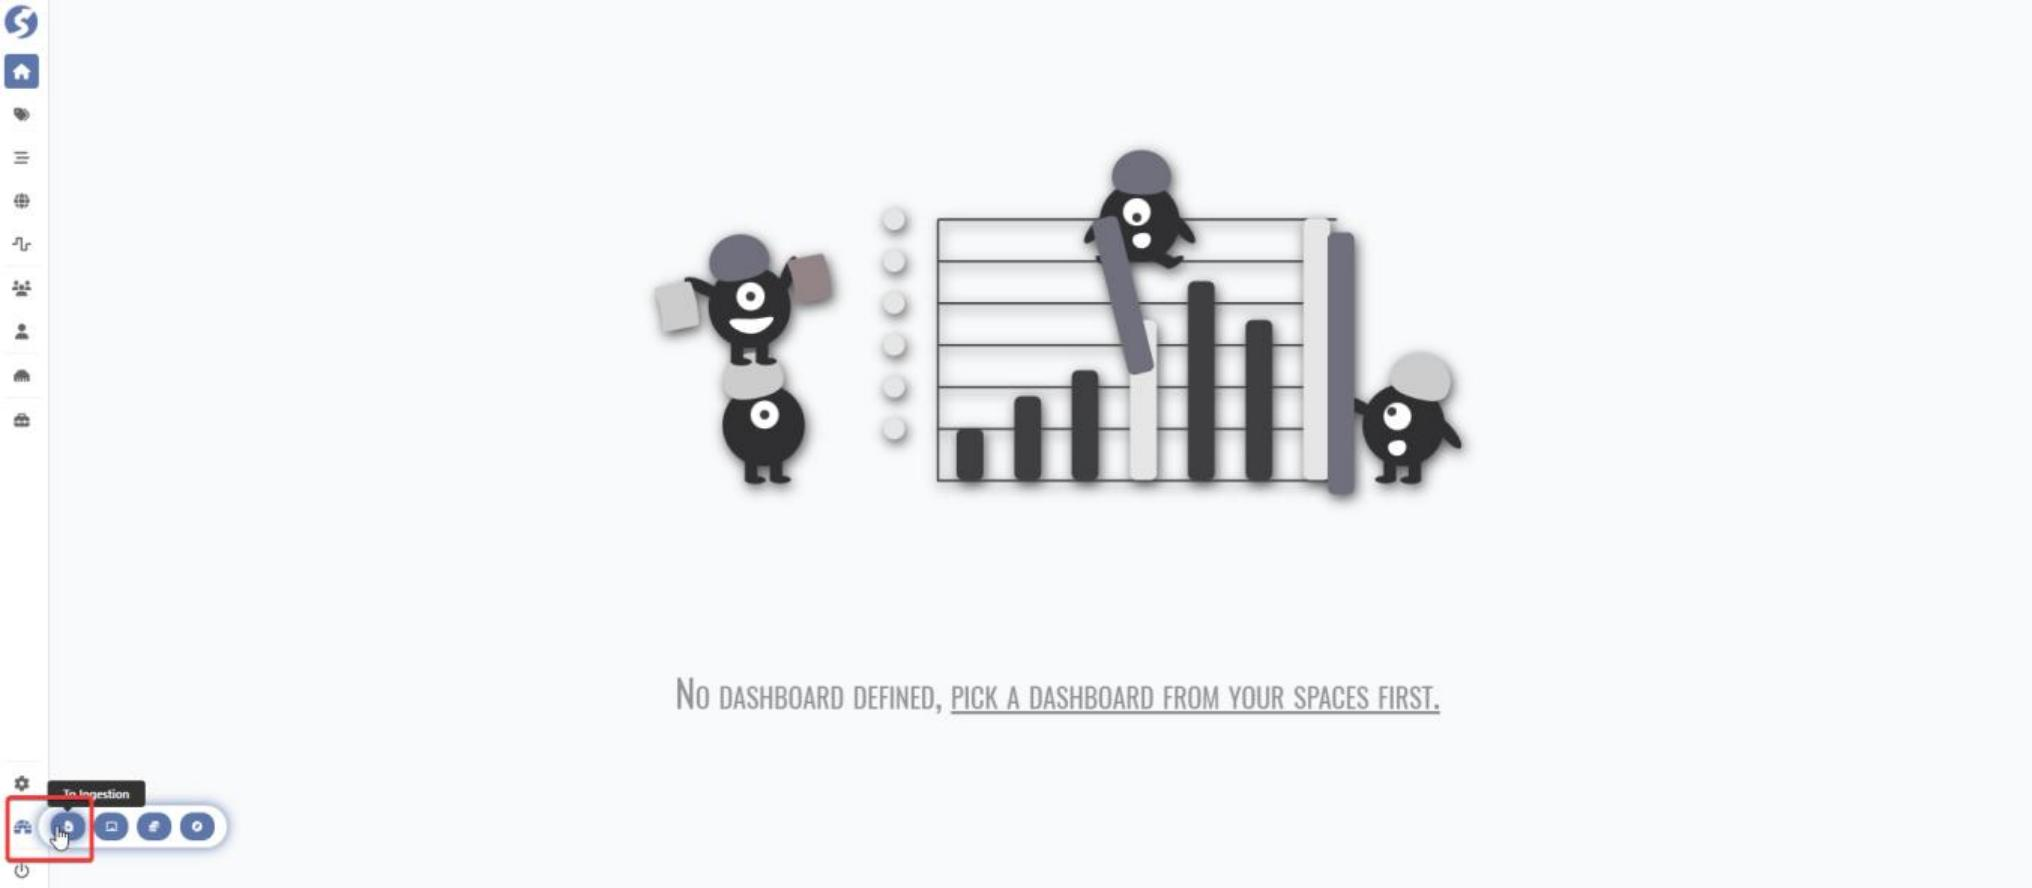
After login, click To Ingestion to go to Ingestion management platform.
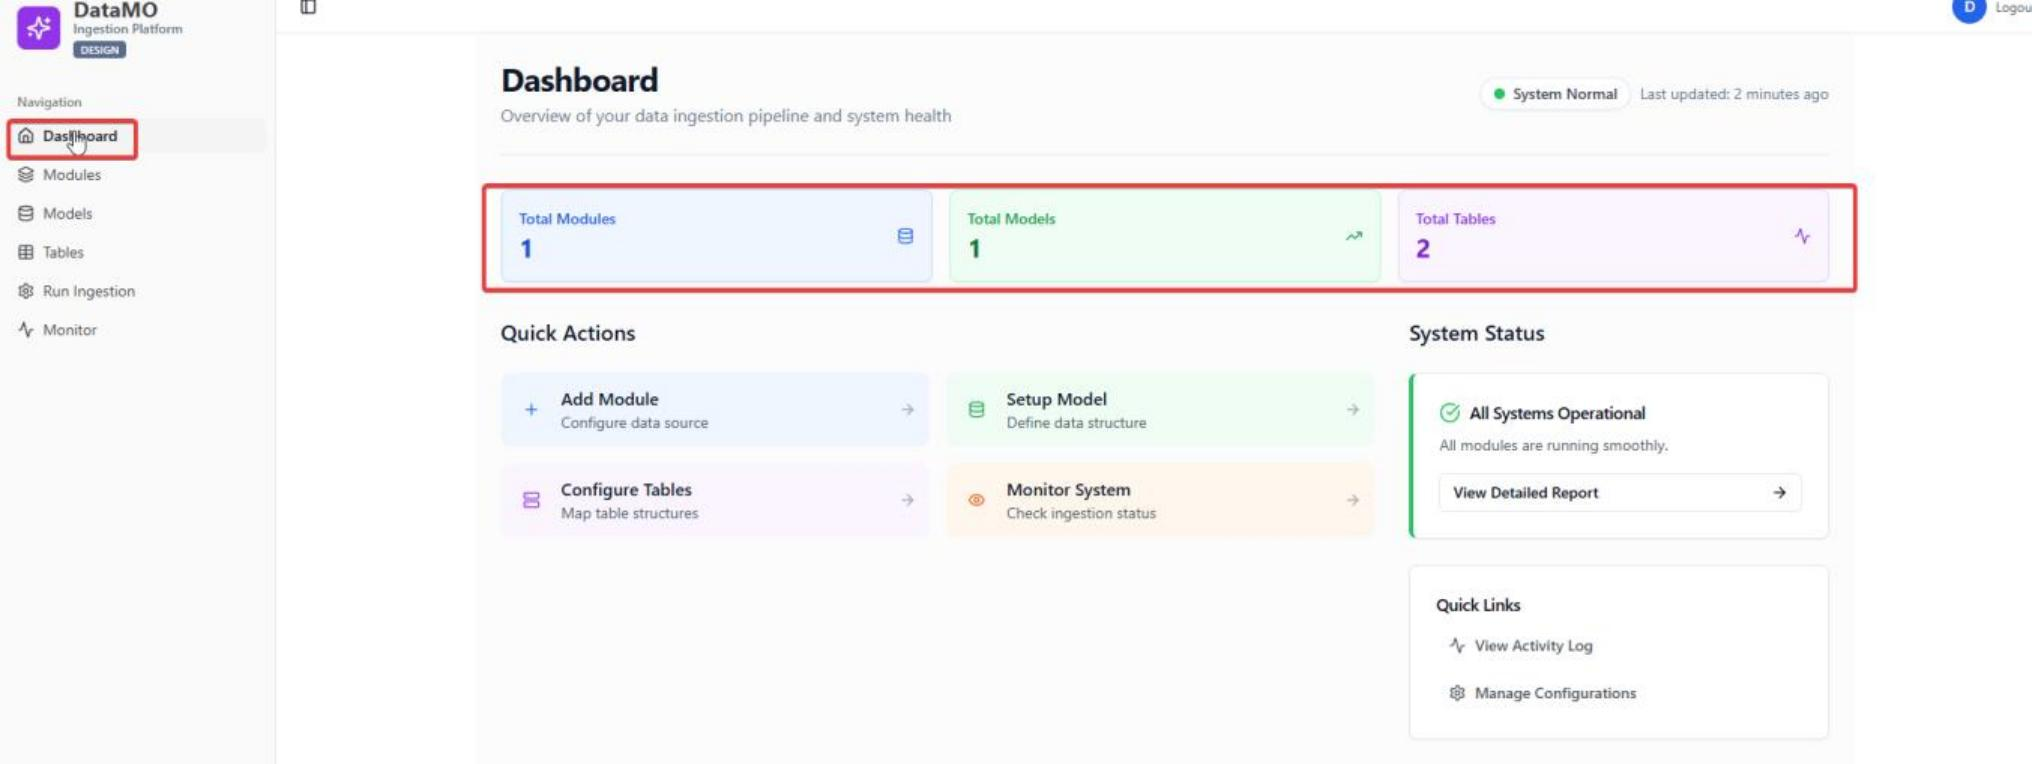
Dashboard: The dashboard displays UI for module, model and table summary information.
4.1 Collector Configuration
4.1.1 Module
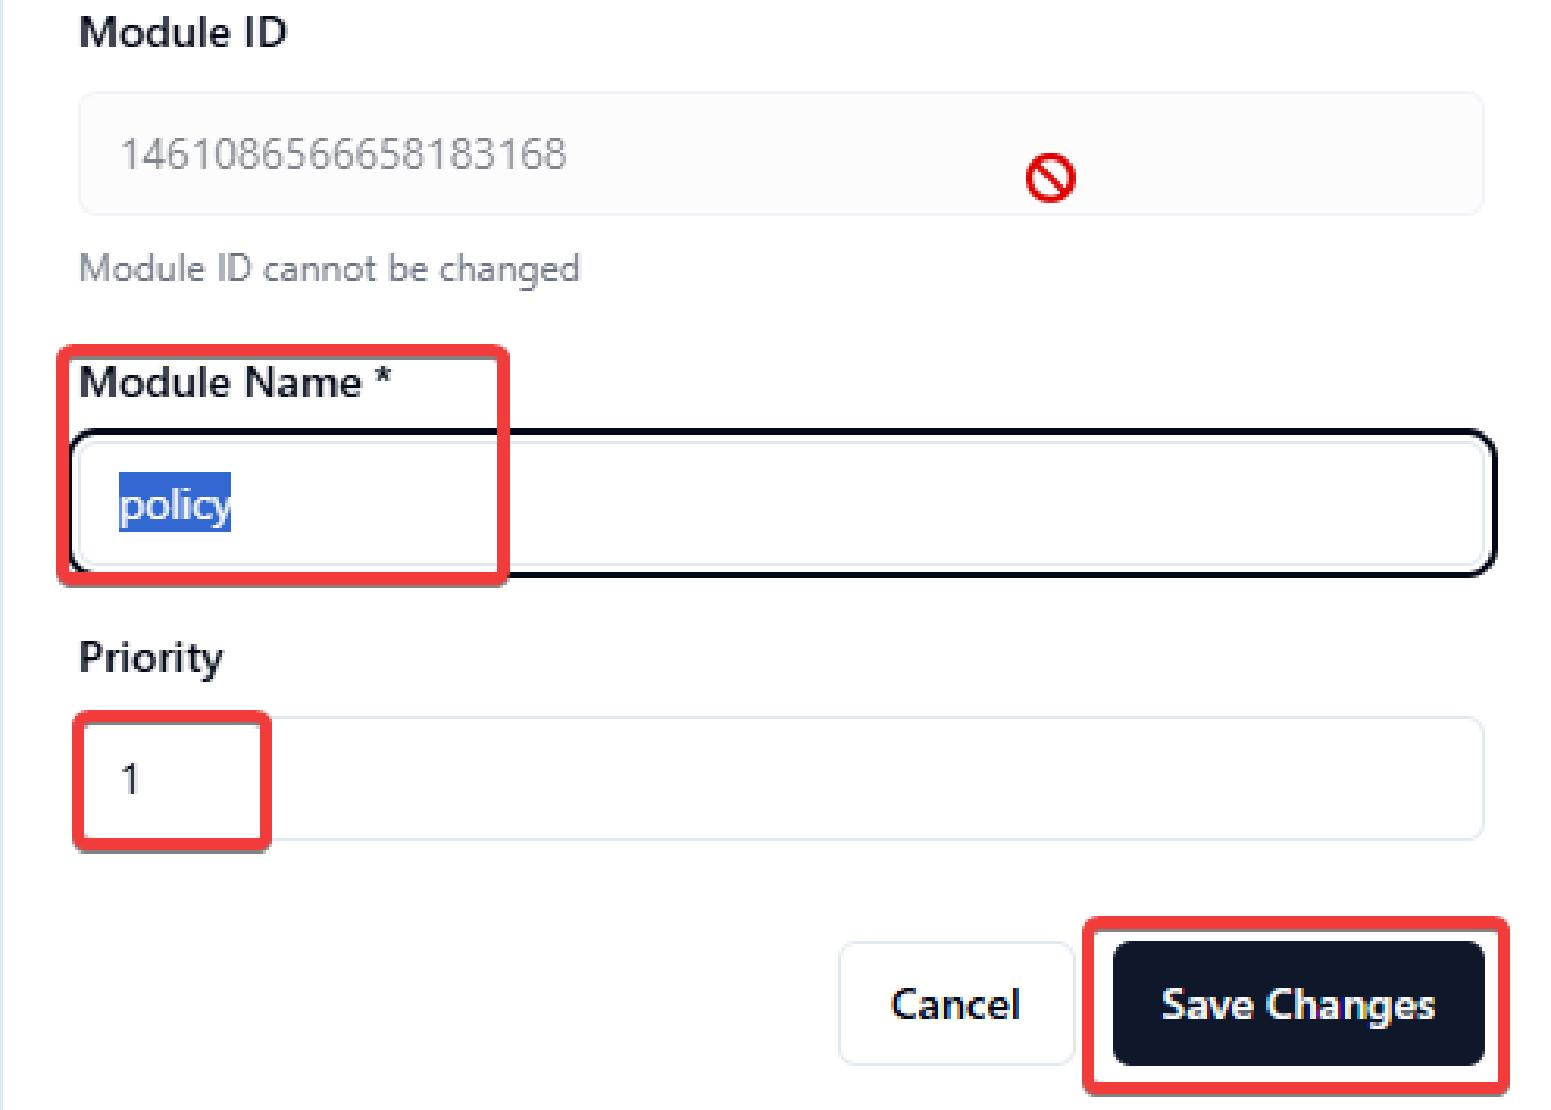
Click Modules and click Create Module for module creation.

Input the module name and set priority and click Confirm for creation and Save Change for changes save. Priority would be data sync priority or dependency.
4.1.2 Model
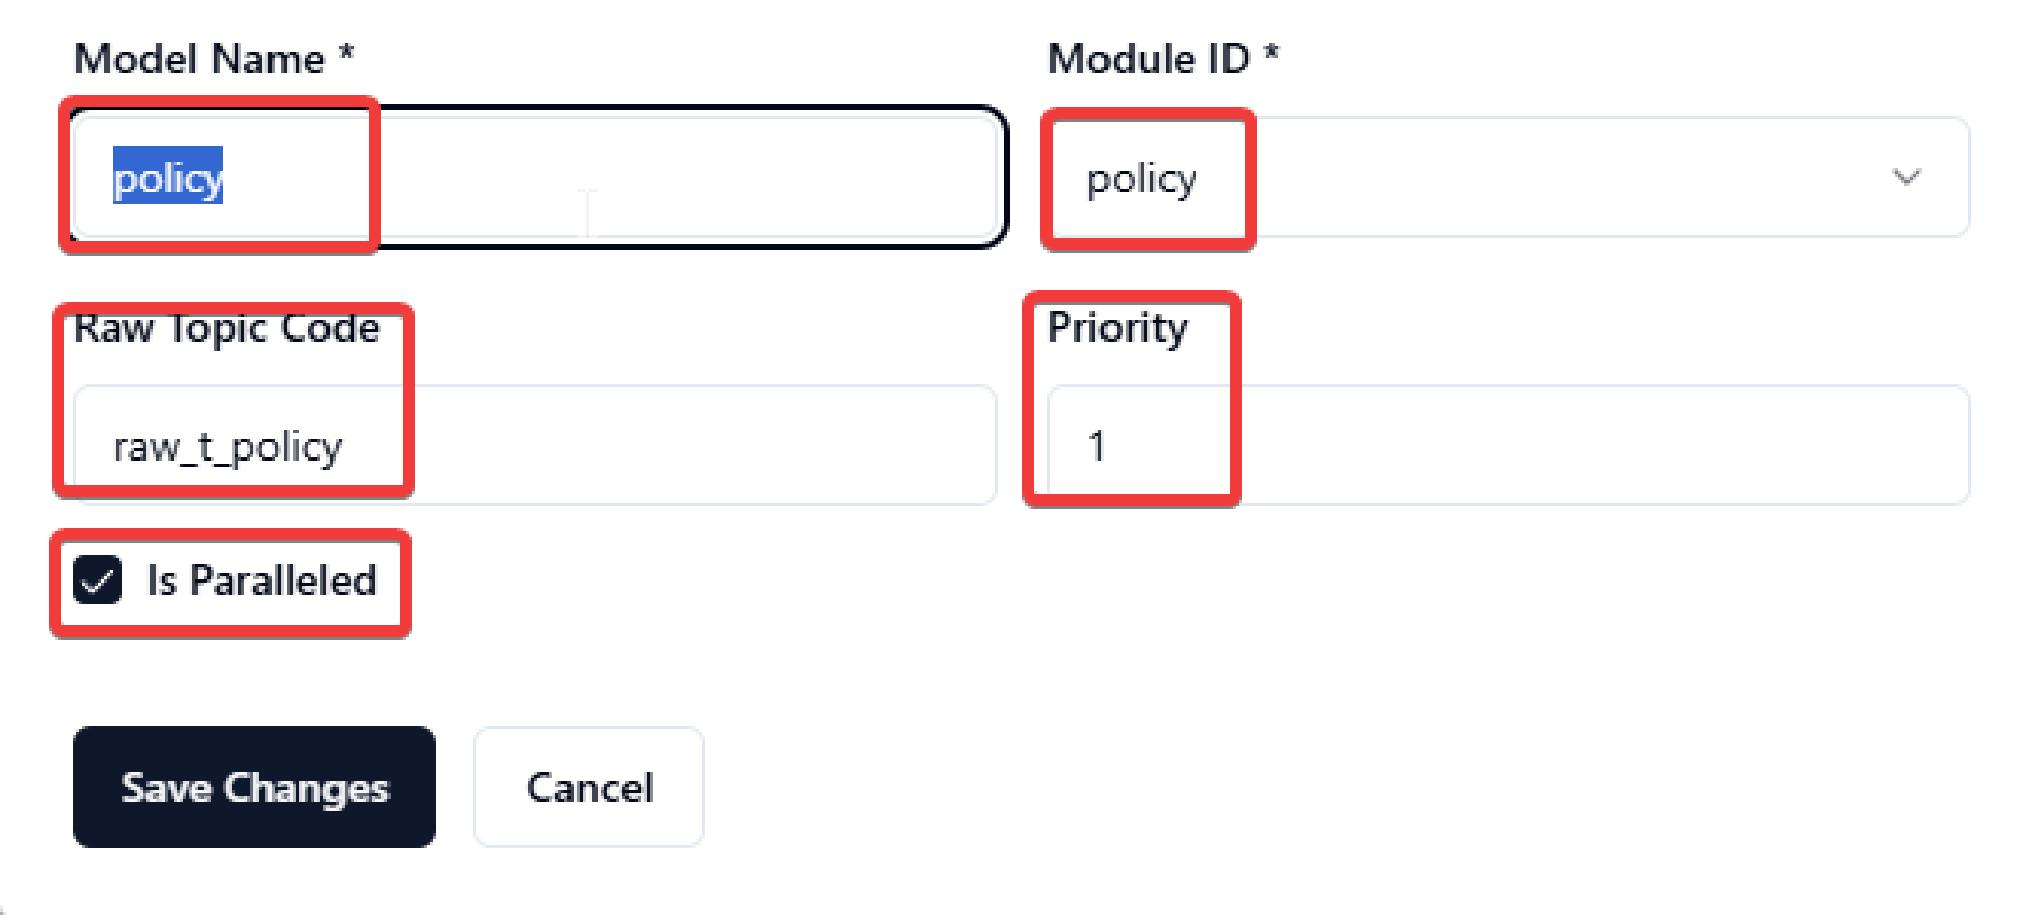
Click Models and click Create Model for Model creation.

Input the model name, choose module from dropdown list, input raw topic code and set priority. Click Confirm for creation and Save Changes for changes save. Priority would be data sync priority or dependency.
4.1.3 Table
Click Tables and click Add New Table for Model creation.
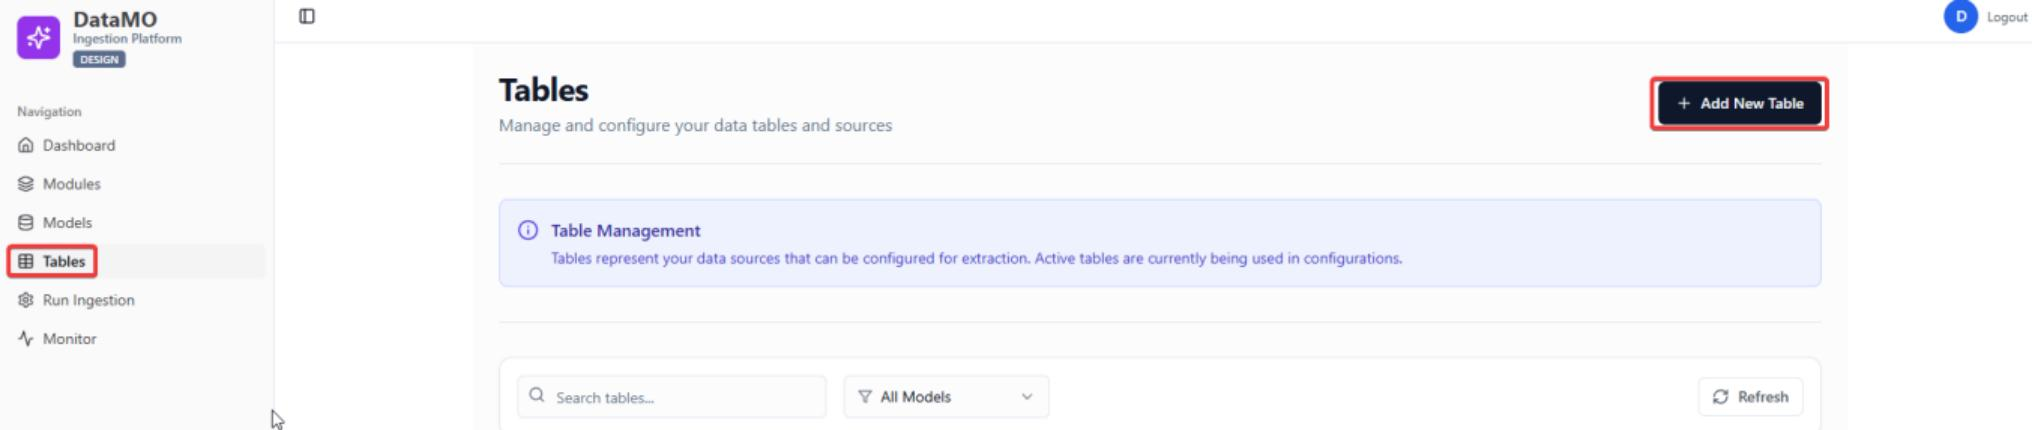
Input Basic Information, key configuration, join keys, data source related info and click Confirm for creation and Save Change for changes save.
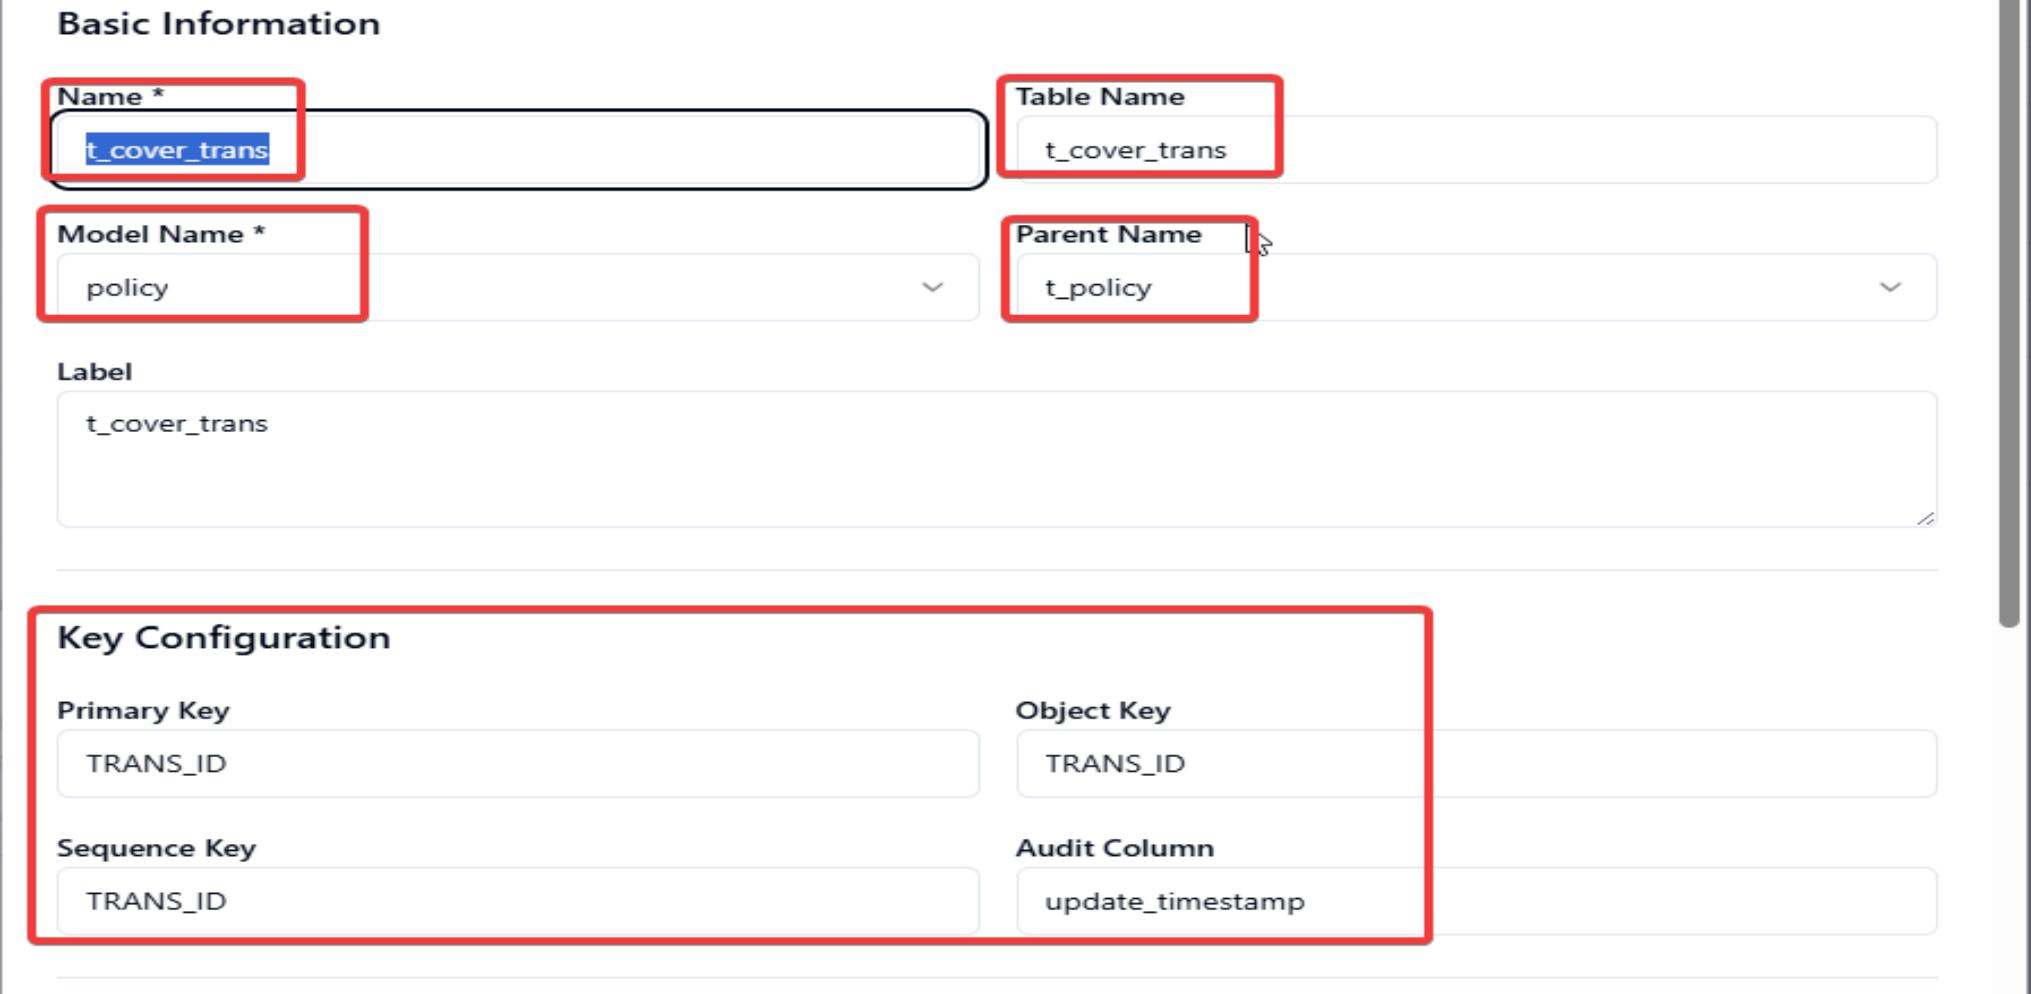
Basic Information:
- Name: Suggest to keep it same as legacy system table name.
- Table Name: Legacy system table name.
- Model Name: The model name which is created in above process.
- Parent Name: If this is a root table, leave blank. Otherwise, enter the name of the parent table.
- Label: suggest to keep it same as table name.
Key Configuration:
- Primary Key: Legacy system table primary key.
- Object Key: Suggest to make it same as Primary Key.
- Sequence Key: Suggest to make it same as Primary Key.
- Audit Column: Database CDC audit column. Normally it will be update_time or update_timestamp.
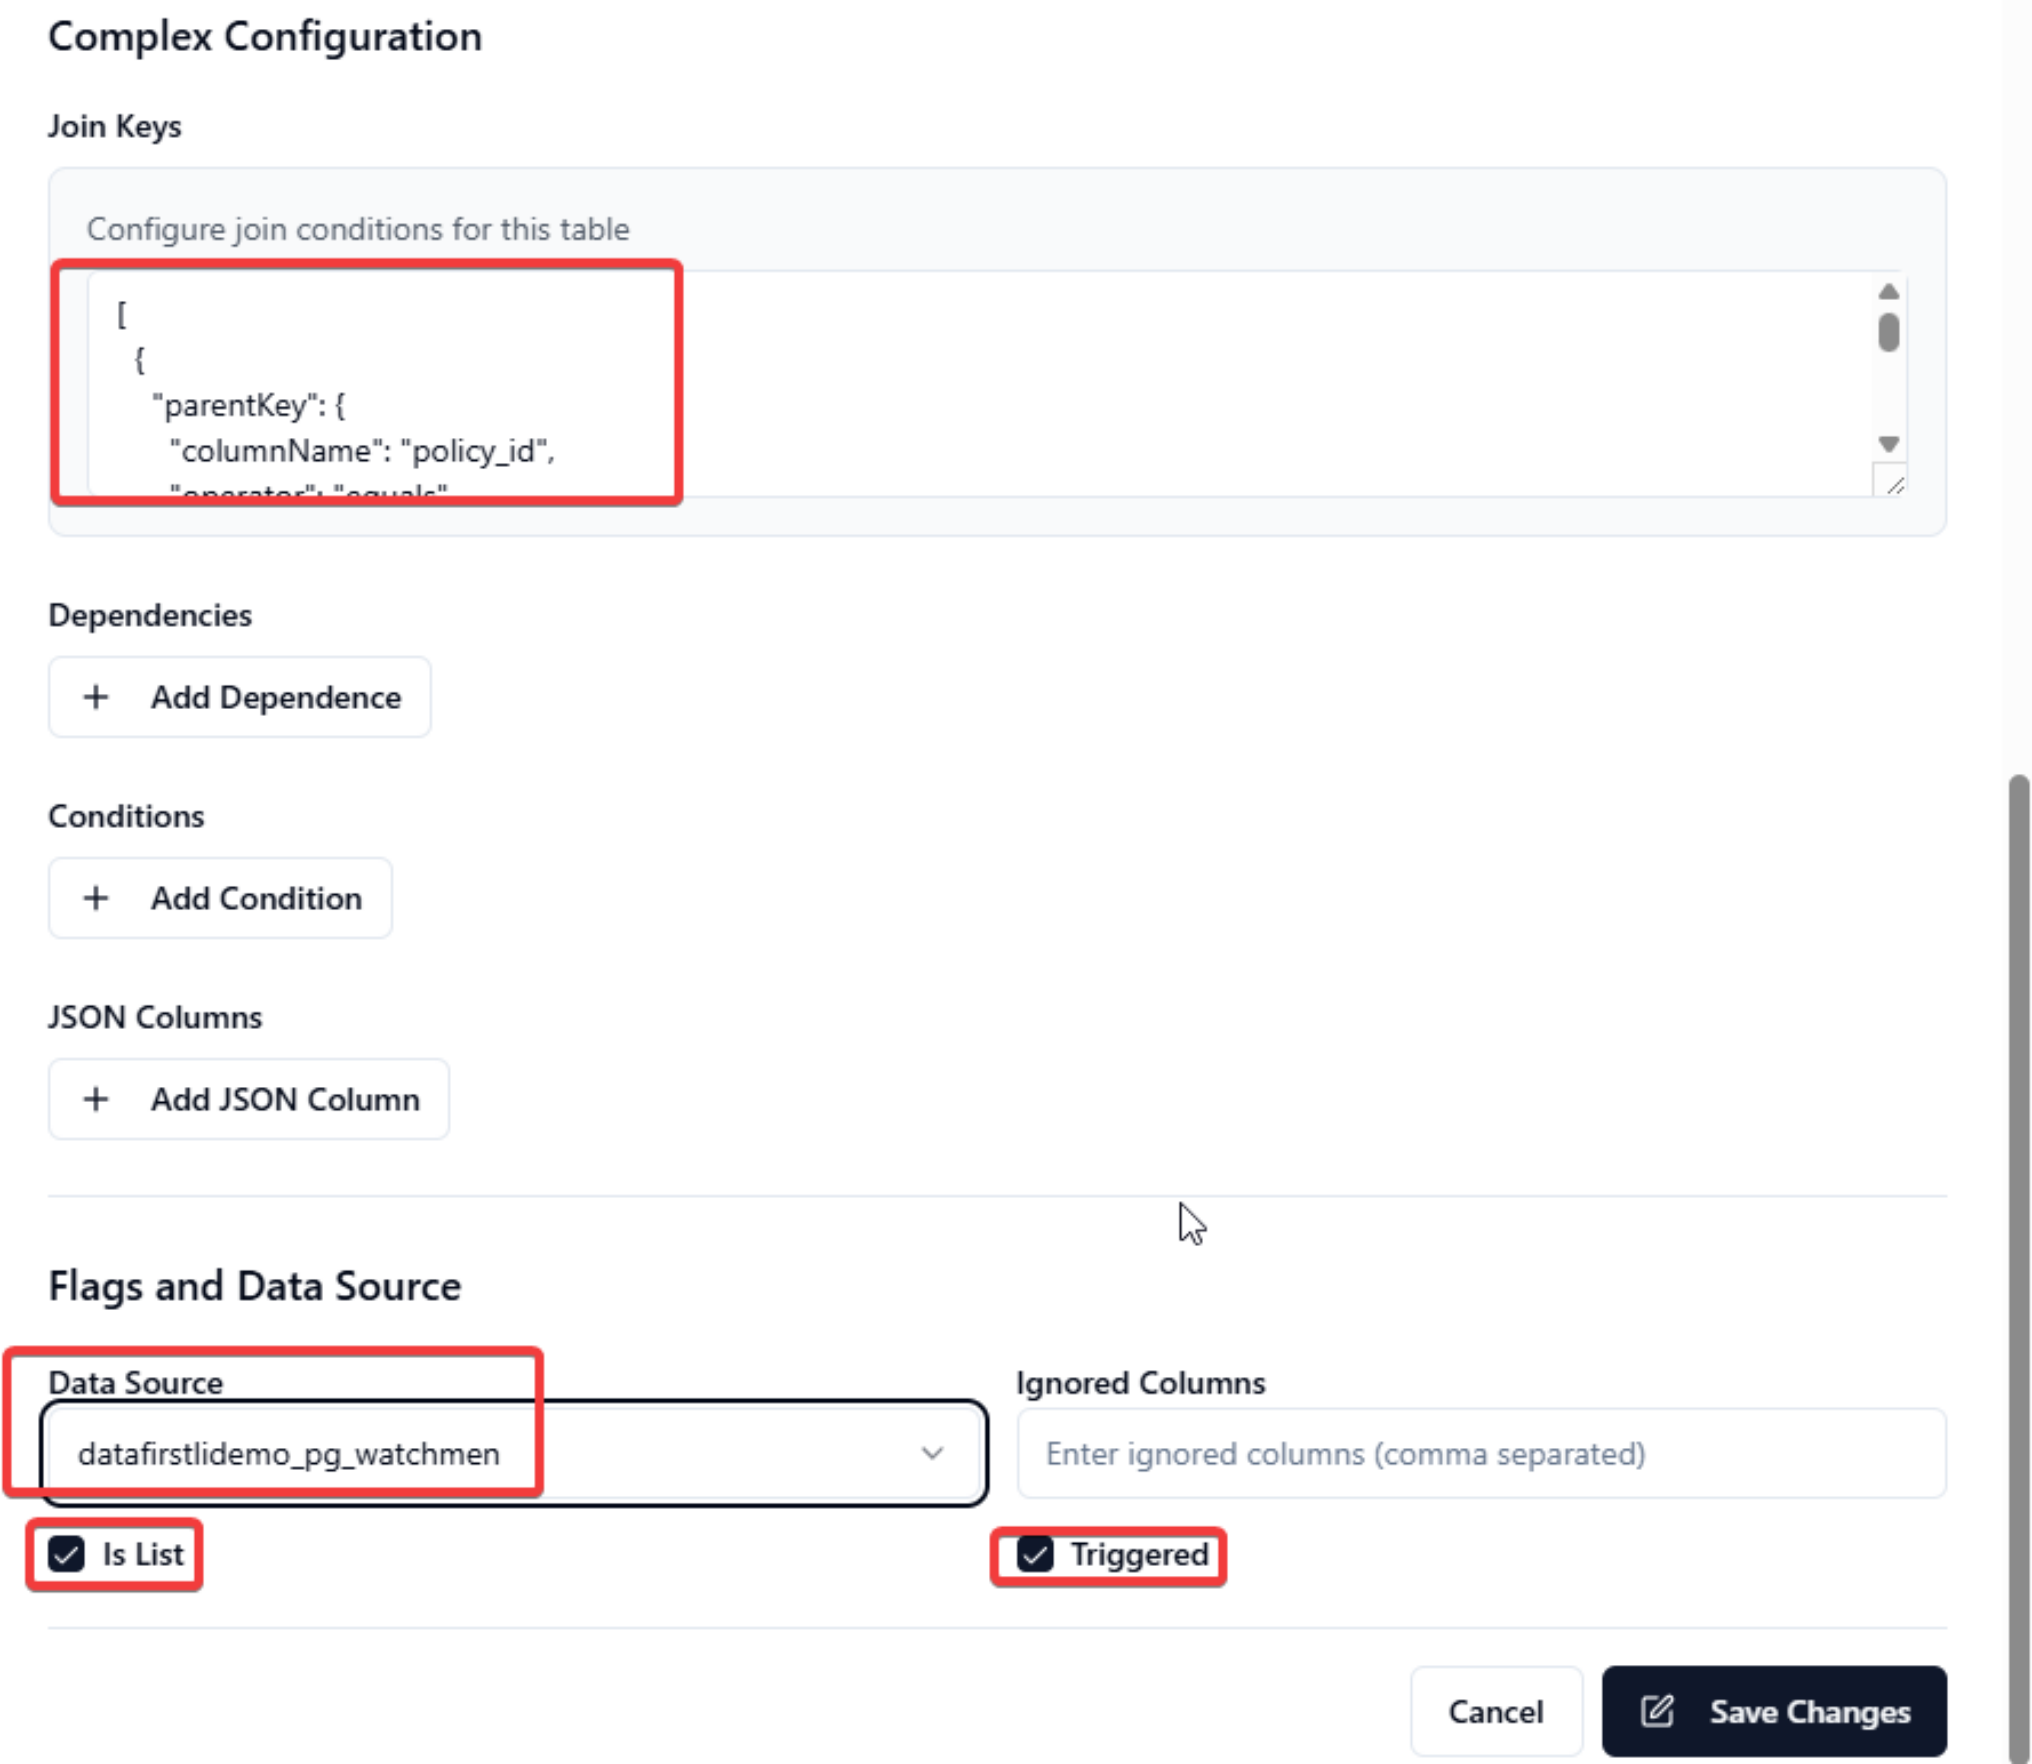
Complex Configuration:
-
Join Key: Parent and child table join key. The sample below is a json format which is to be used.
[{"parentKey": {"columnName": "policy_id","operator": "equals","columnValue": "{policy_id}" },"childKey": {"columnName": "policy_id","operator": "equals","columnValue": "{policy_id}" }}] -
Dependencies: Input the dependency info.

-
Conditions: If you have any condition, you can set here.

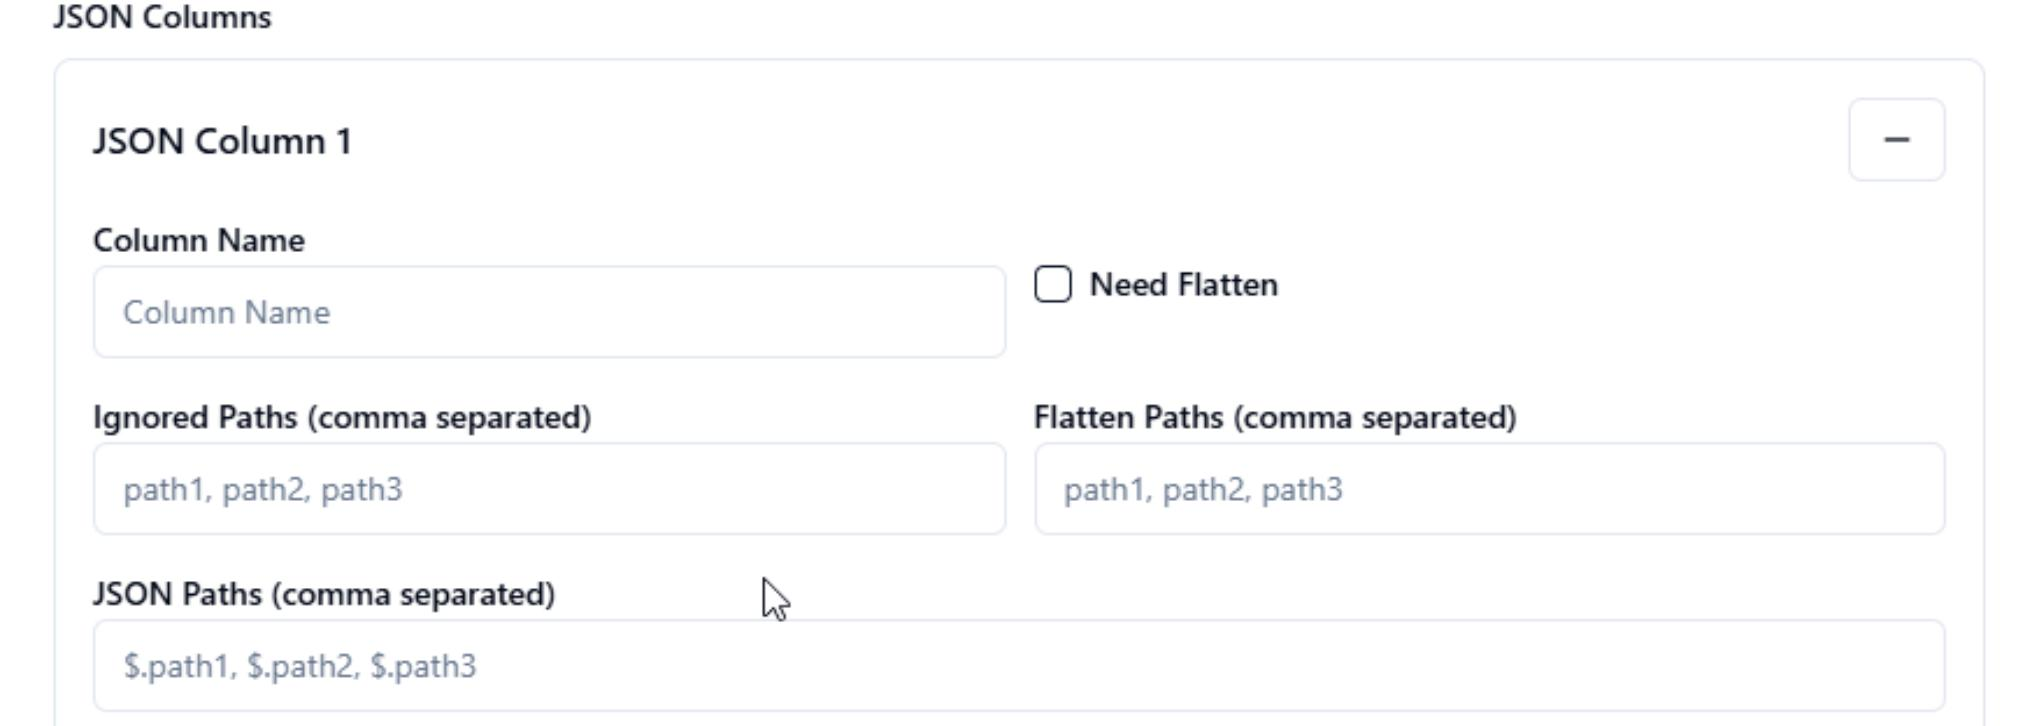
-
JSON Columns: If the field is json, you can set the flatten info.
Flags and Data Source:
- Data Source: The legacy system data source defined in Chapter 1.
- Ignored Columns: If the column does not need to be synced, you can fill the table especially the CLOB field.
Is List: If the child table is listed or arrayed for parent, you need to tick.
Triggered: This flag indicates whether the table can be synchronized automatically from the legacy system. It is checked by default.
4.2 Run Ingestion by UI
To test the ingestion logic, you can use the Run Ingestion function for testing. Click Run Ingestion, chose the module, model and table and click Next Step.
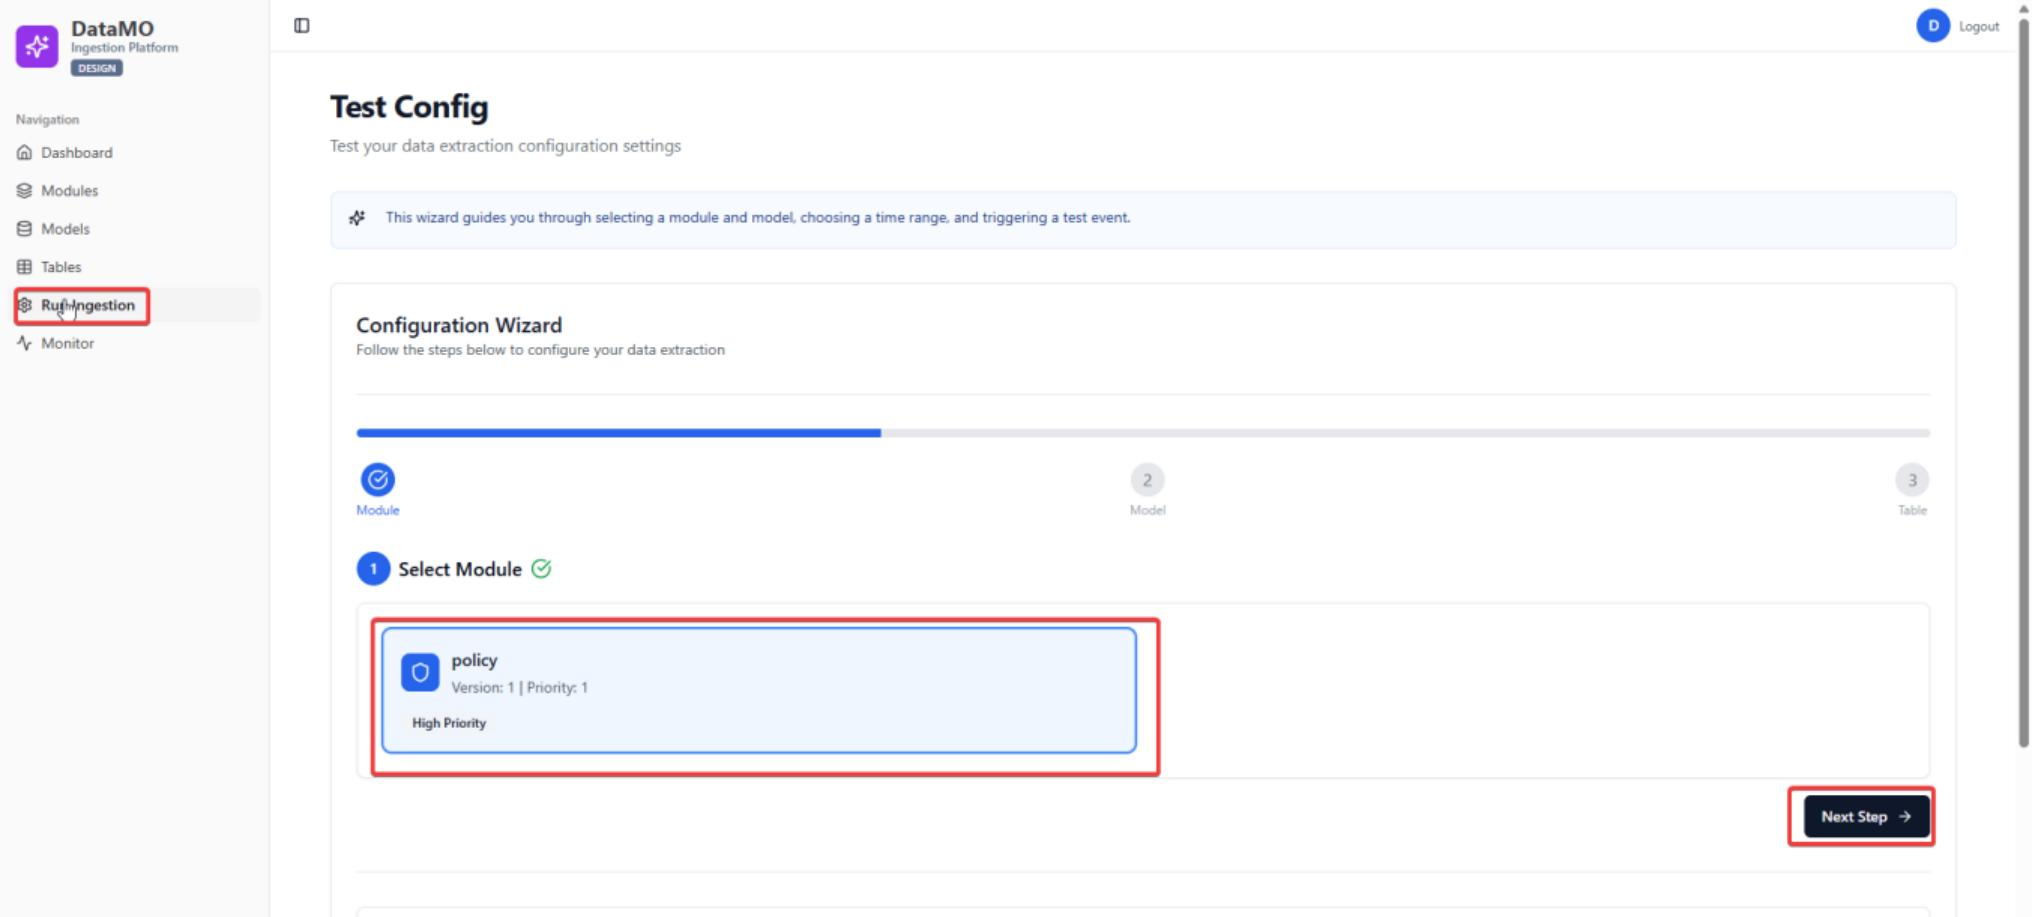
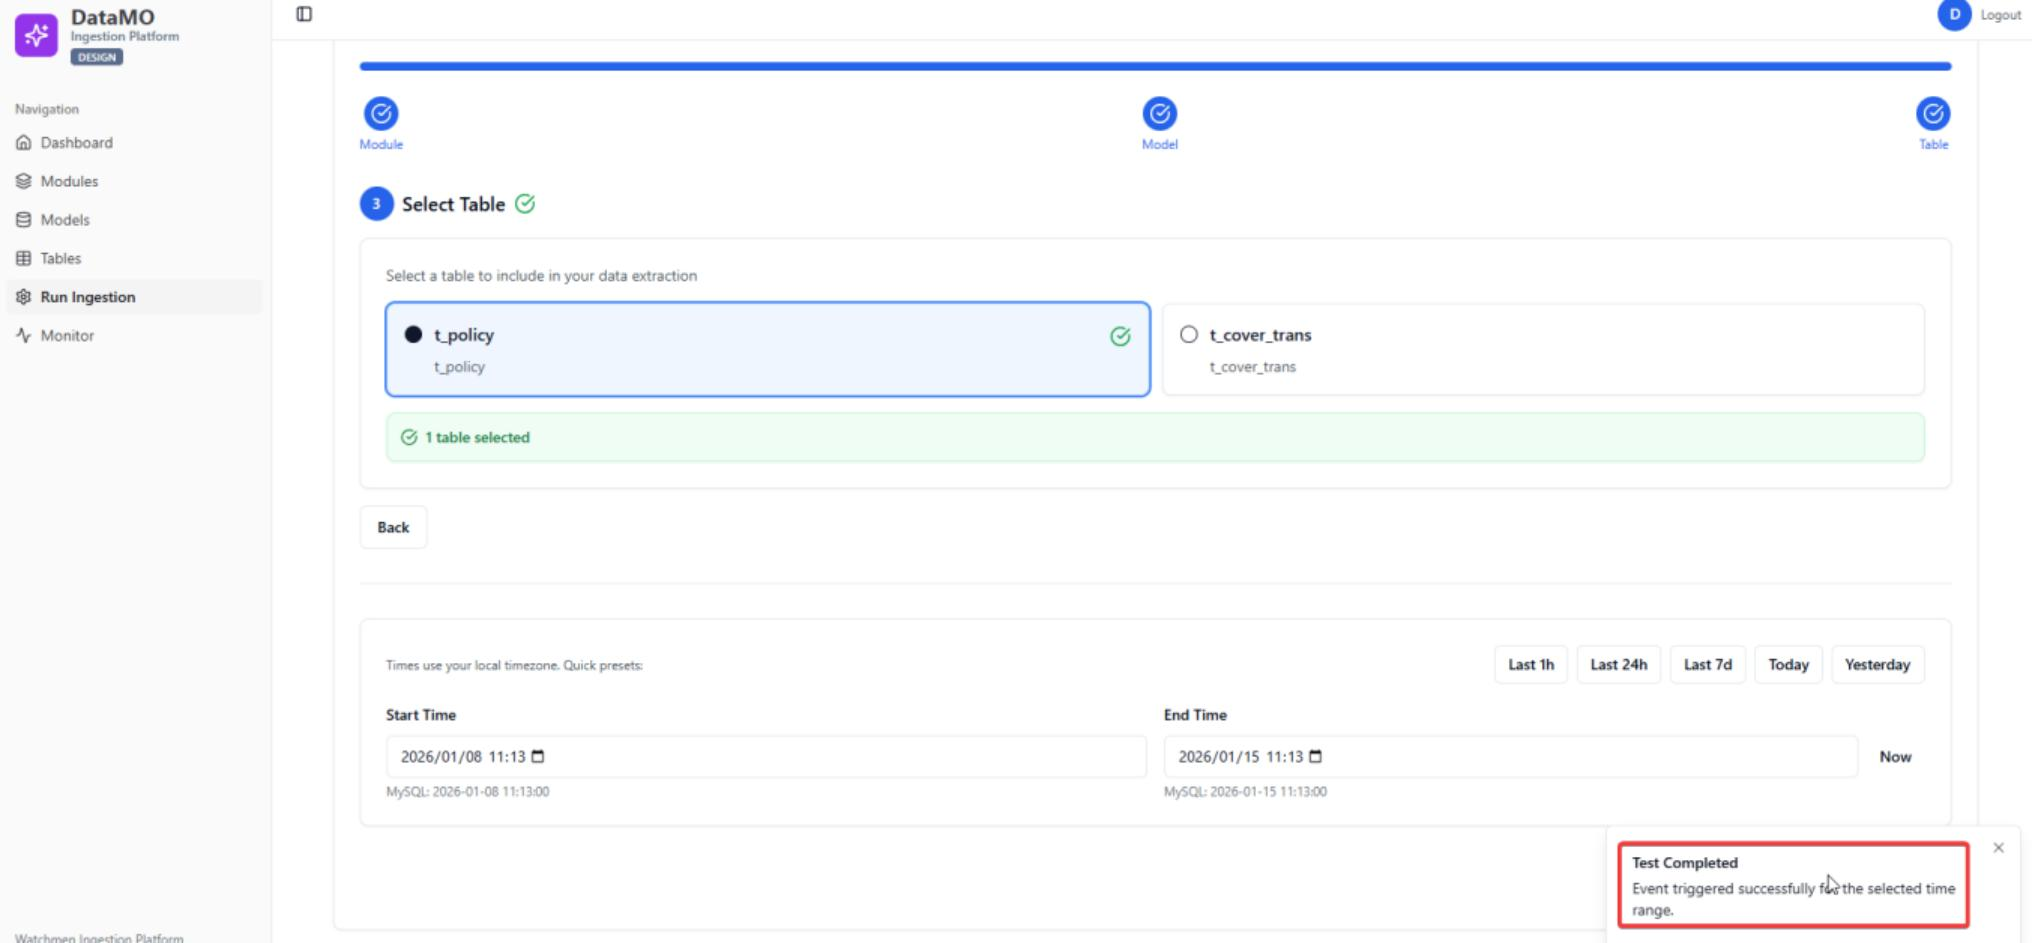
Choose table, configure time range and click Test Configuration.

Status check:
4.3 Ingestion Monitor
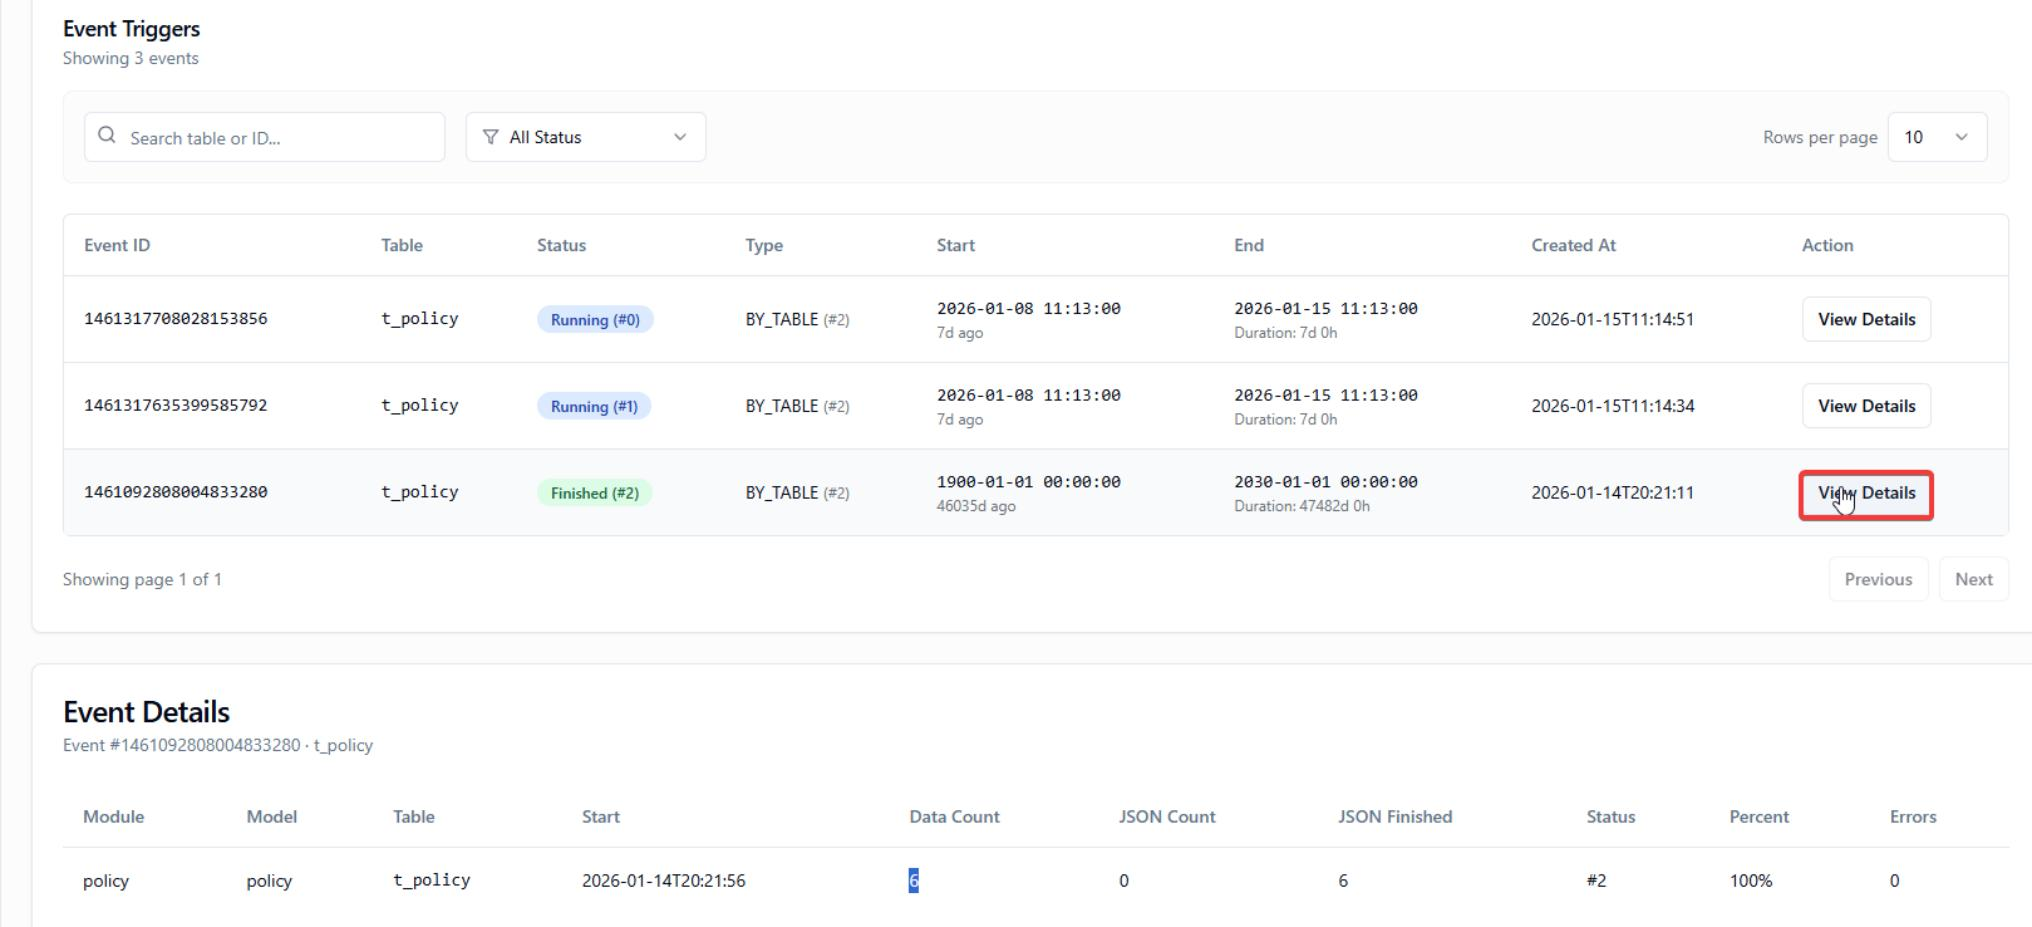
Monitor the record from monitor function.
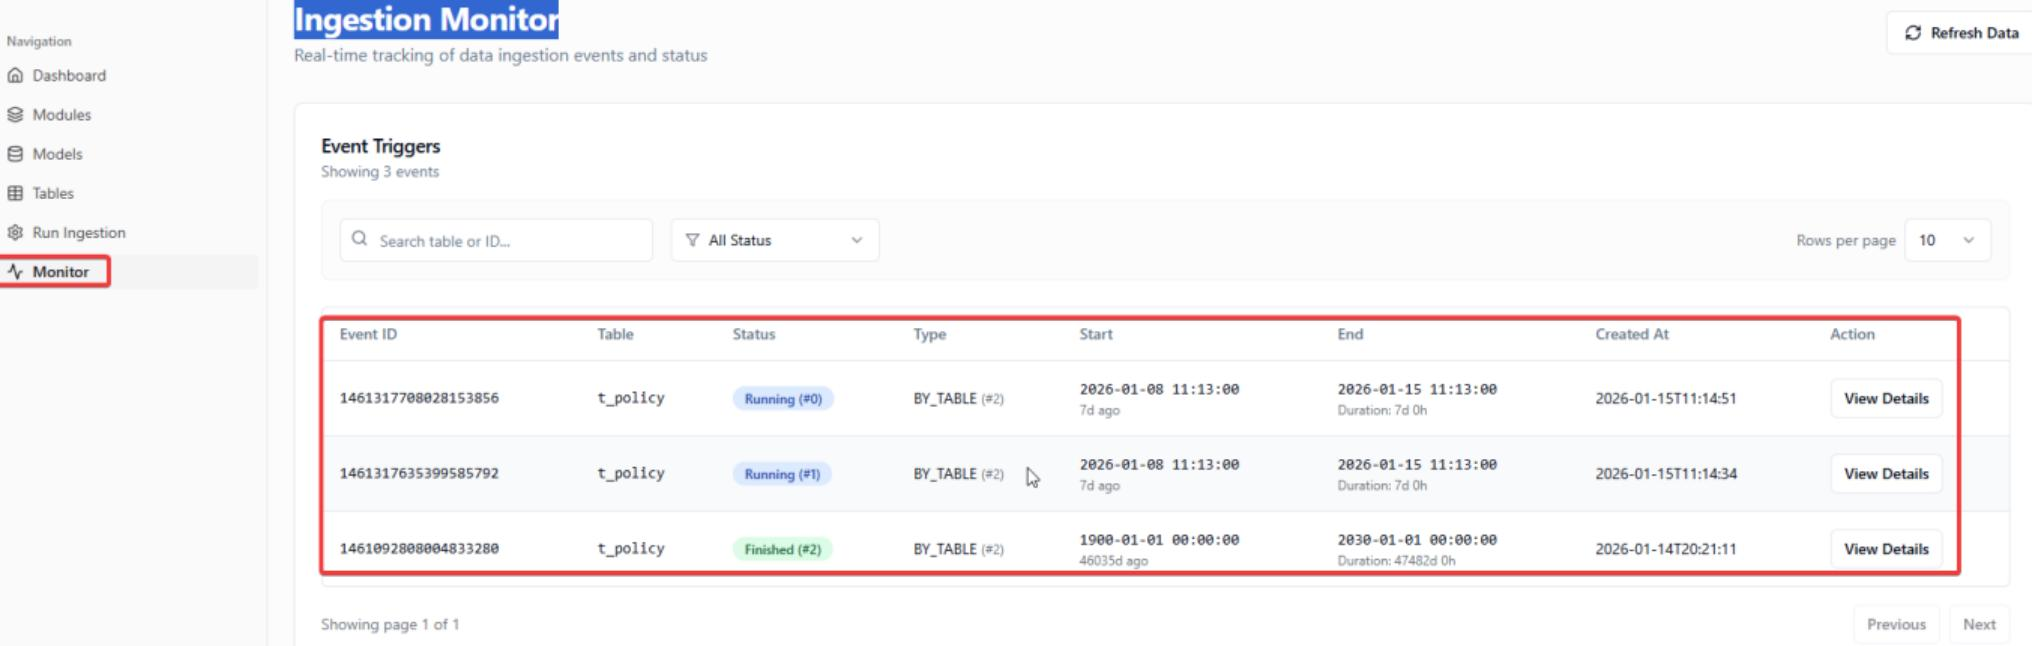
Click View Details for record monitoring.
5 Data Warehouse and Data Mart
5.1 Raw Topic Configuration
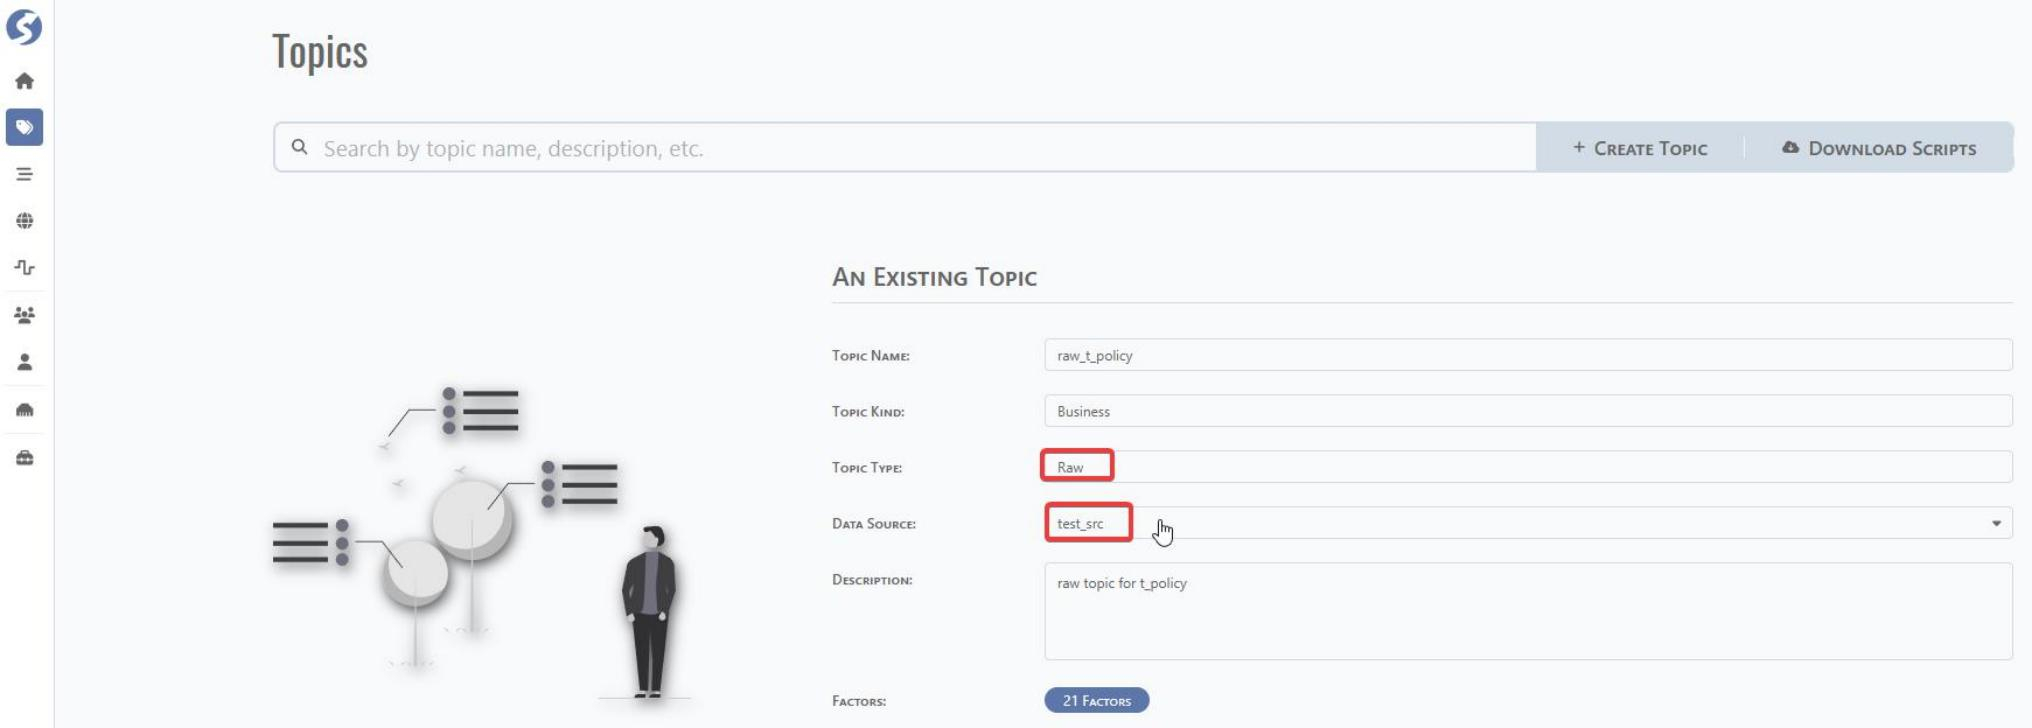
Go to home page of DataMo and click Topics for topic creation and maintenance.

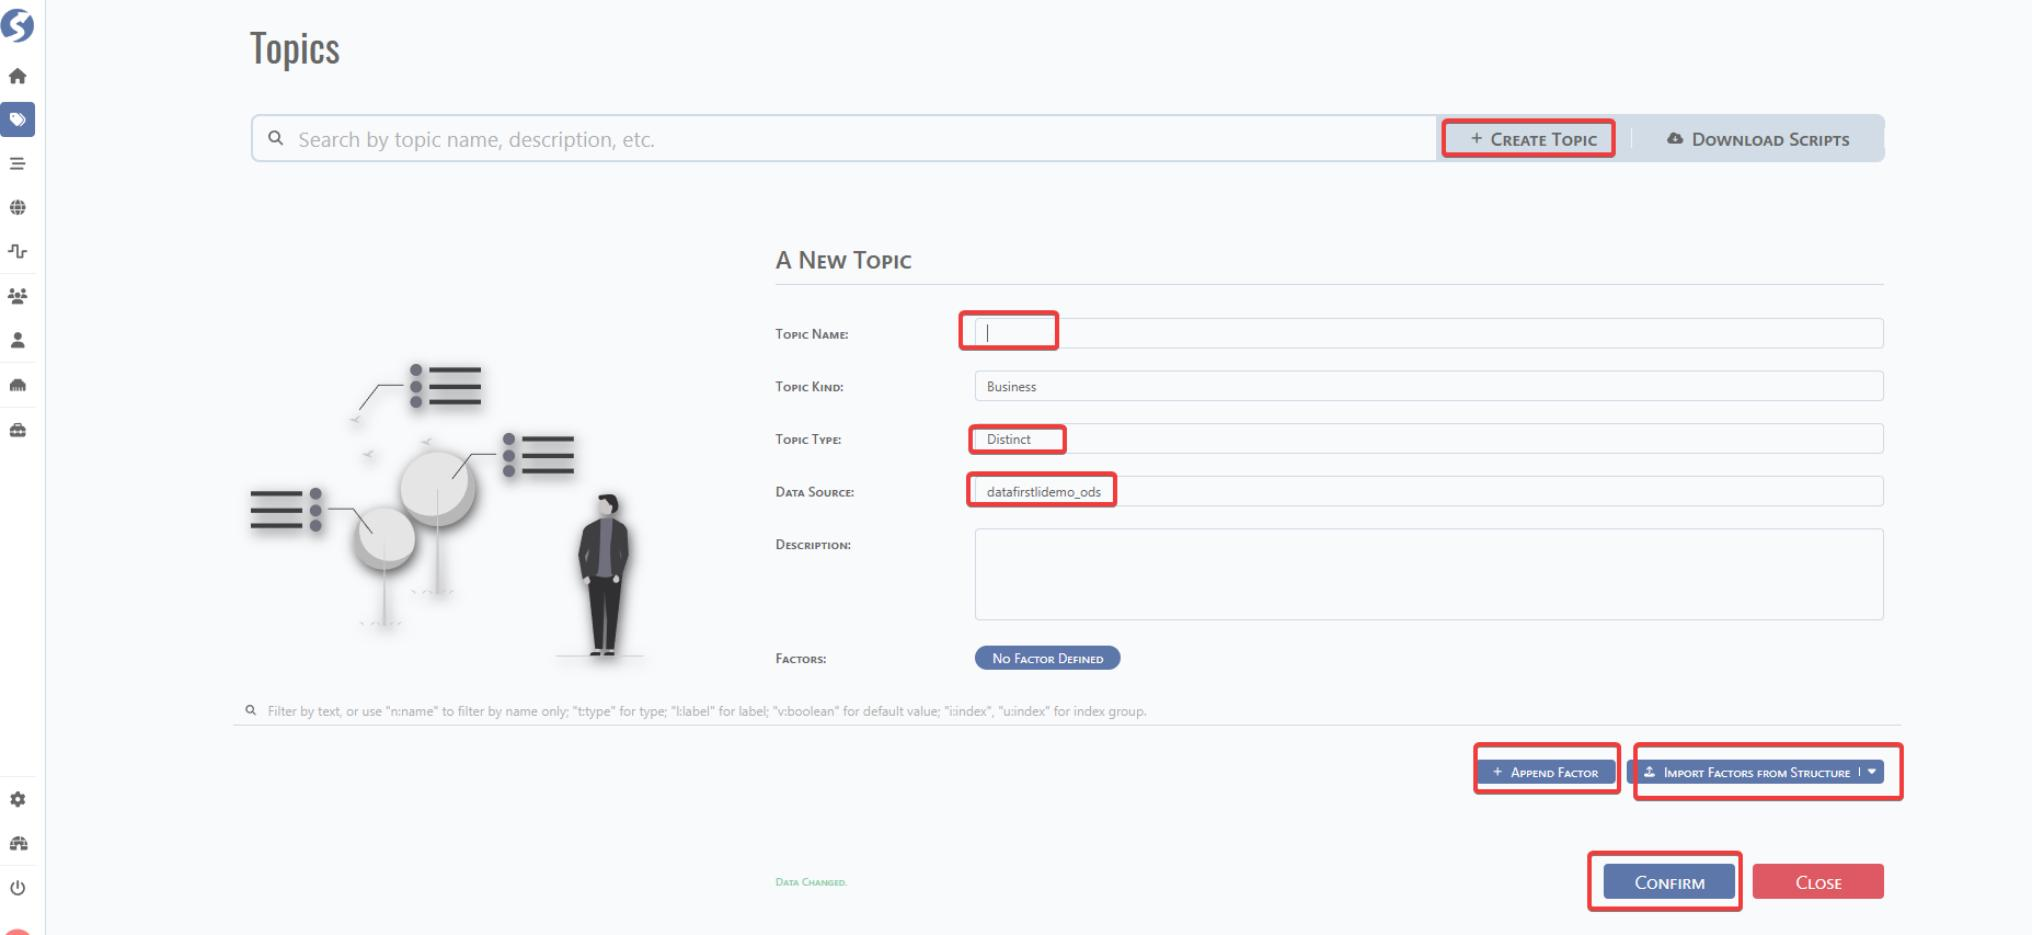
Click CREATE TOPIC and fill related information for raw topic.
Manually append the factor or import by template.
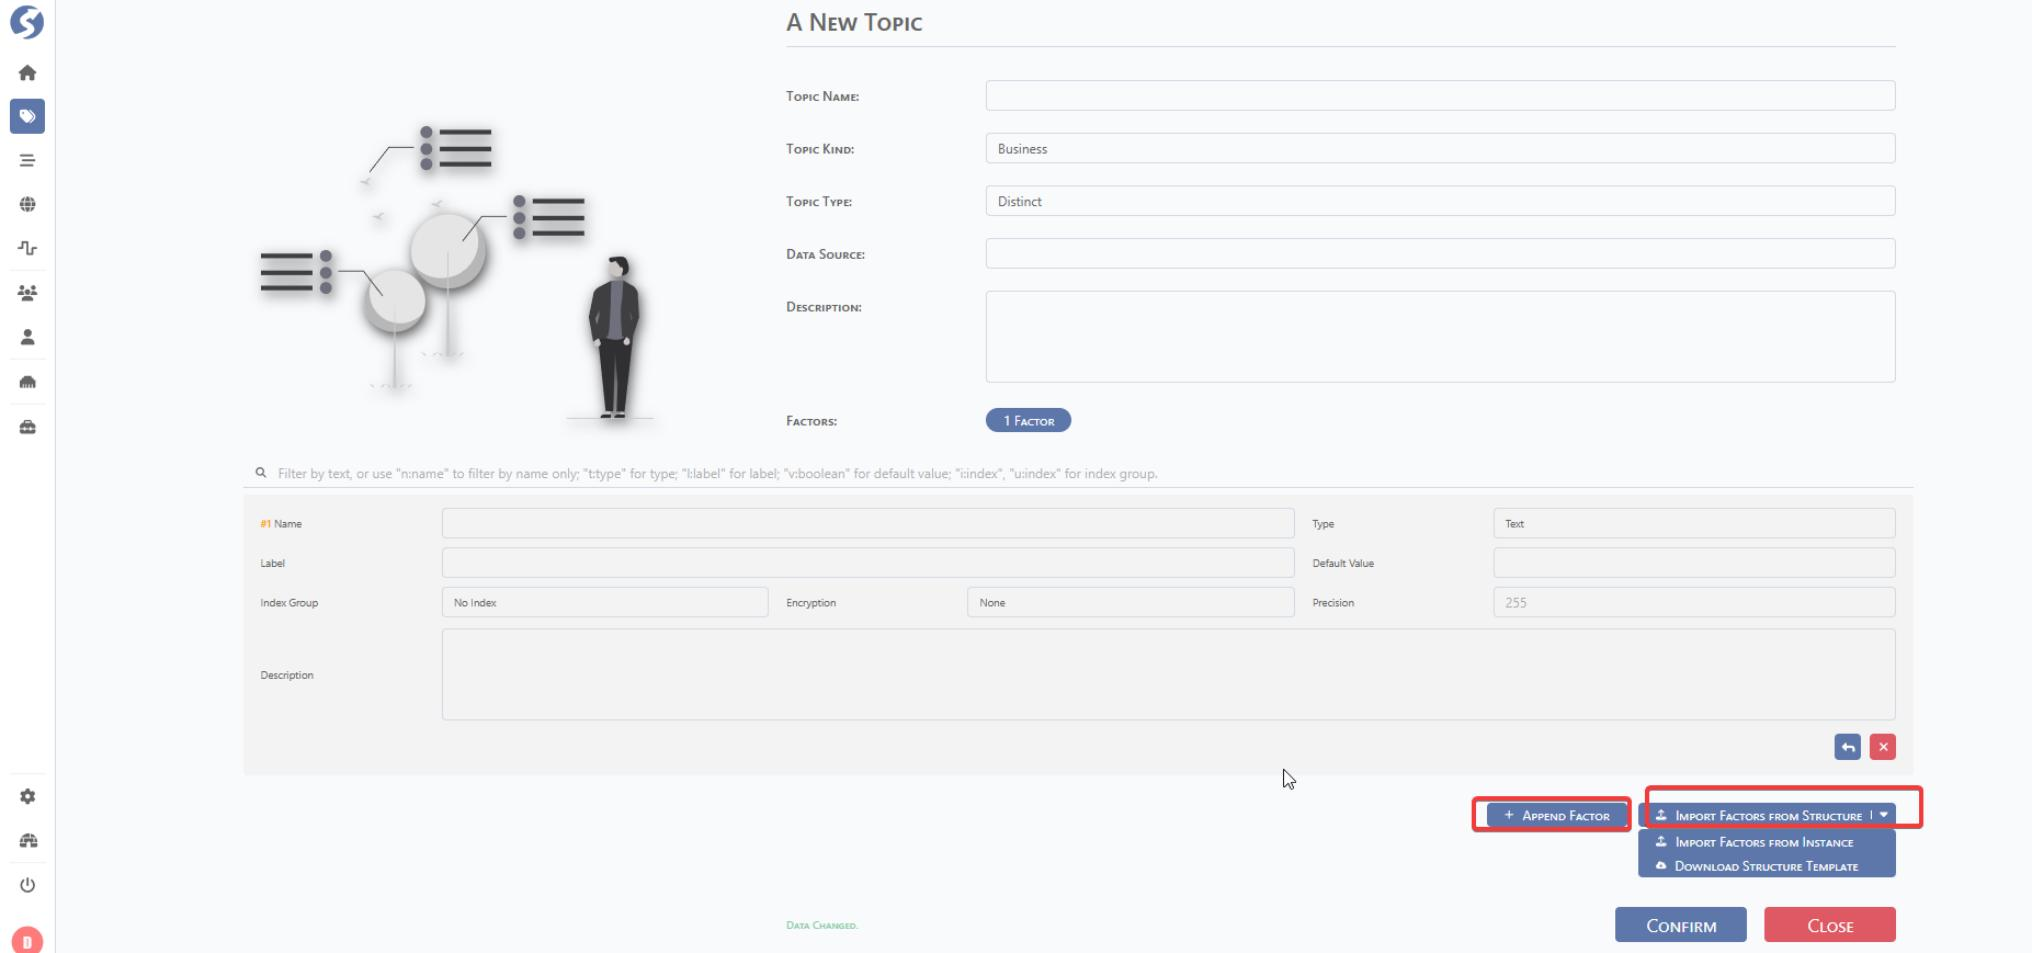
Import by template:
Step#1: Use postman to get the collector info for import template usage.

Modify the json to match the format below, and save it as a json file on your local device.
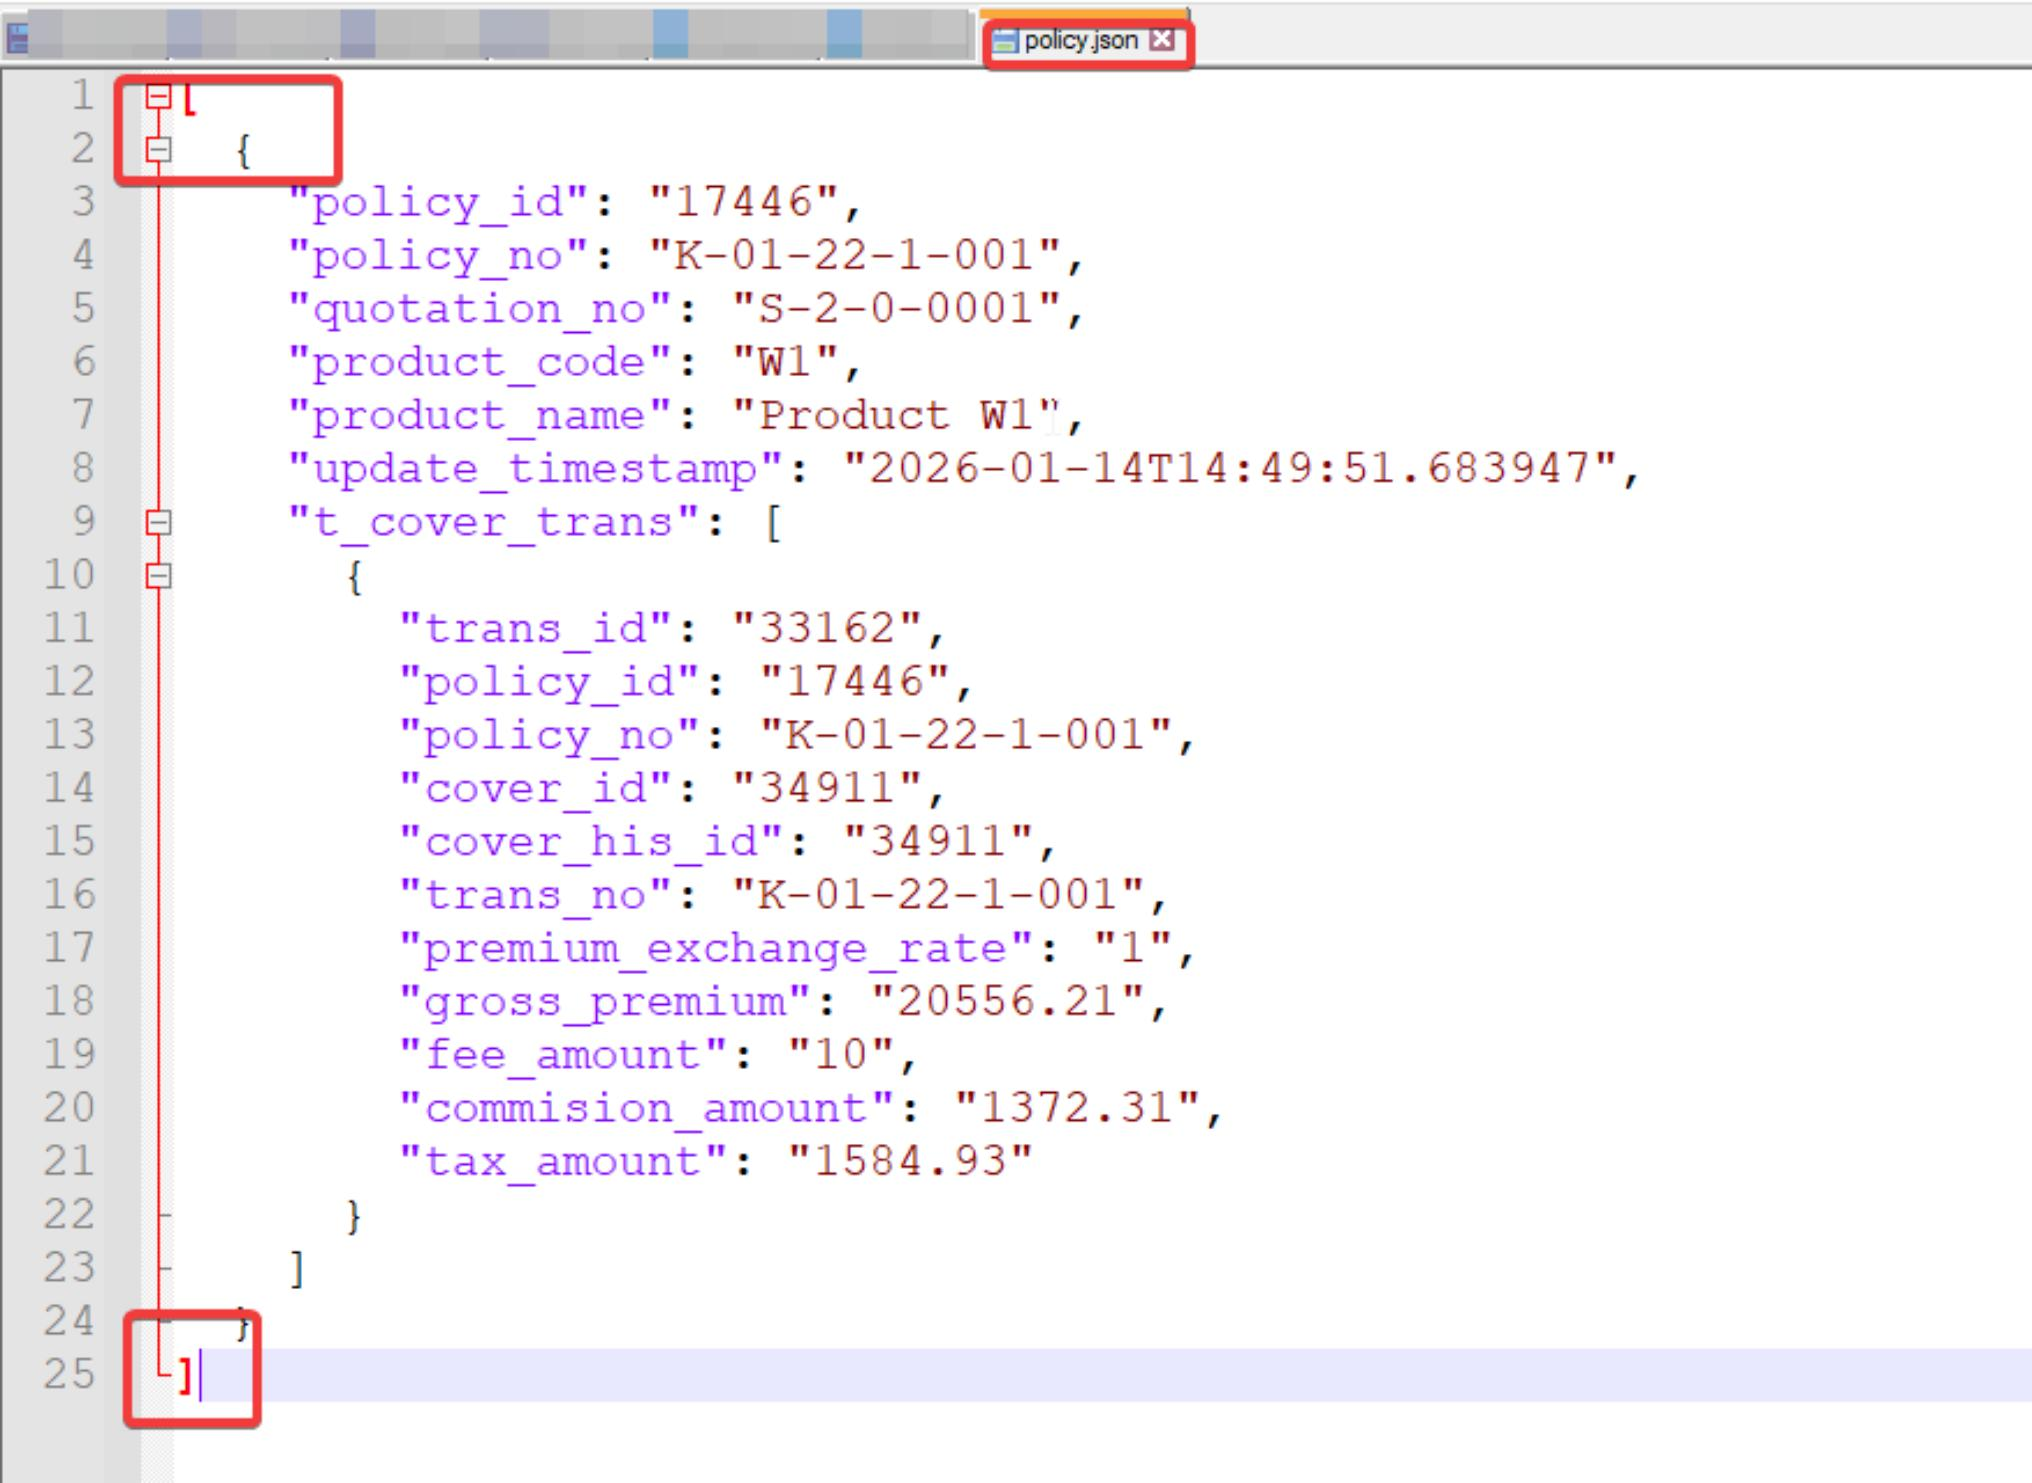
Sample:
[
  {
    "policy_id": "17446",
    "policy_no": "K-01-22-1-001",
    "quotation_no": "S-2-0-0001",
    "product_code": "W1",
    "product_name": "Product W1",
    "update_timestamp": "2026-01-14T14:49:51.683947",
    "t_cover_trans": [
      {
        "trans_id": "33162",
        "policy_id": "17446",
        "policy_no": "K-01-22-1-001",
        "cover_id": "34911",
        "cover_his_id": "34911",
        "trans_no": "K-01-22-1-001",
        "premium_exchange_rate": "1",
        "gross_premium": "20556.21",
        "fee_amount": "10",
        "commision_amount": "1372.31",
        "tax_amount": "1584.93"
      }
    ]
  }
]
Upload from local device and confirm.
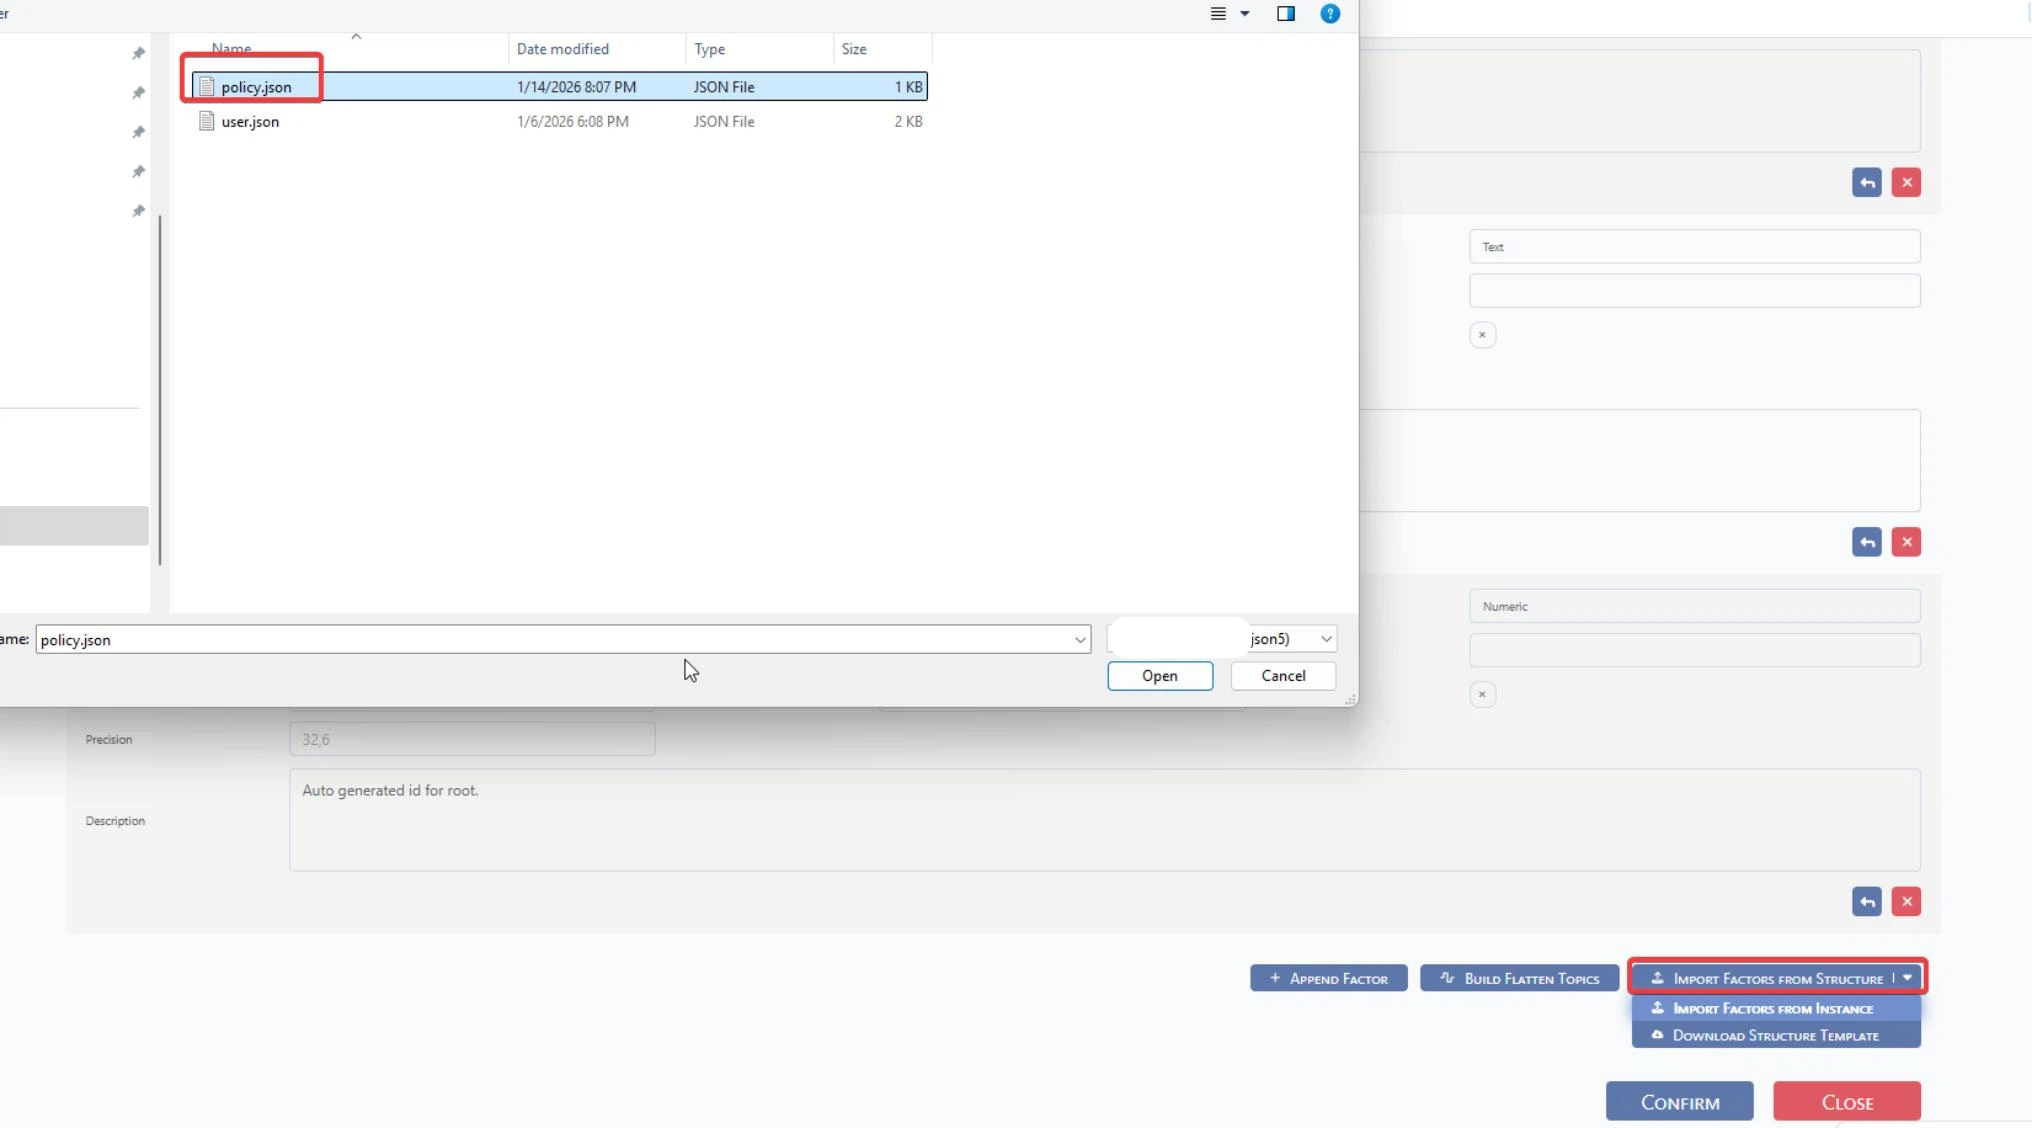
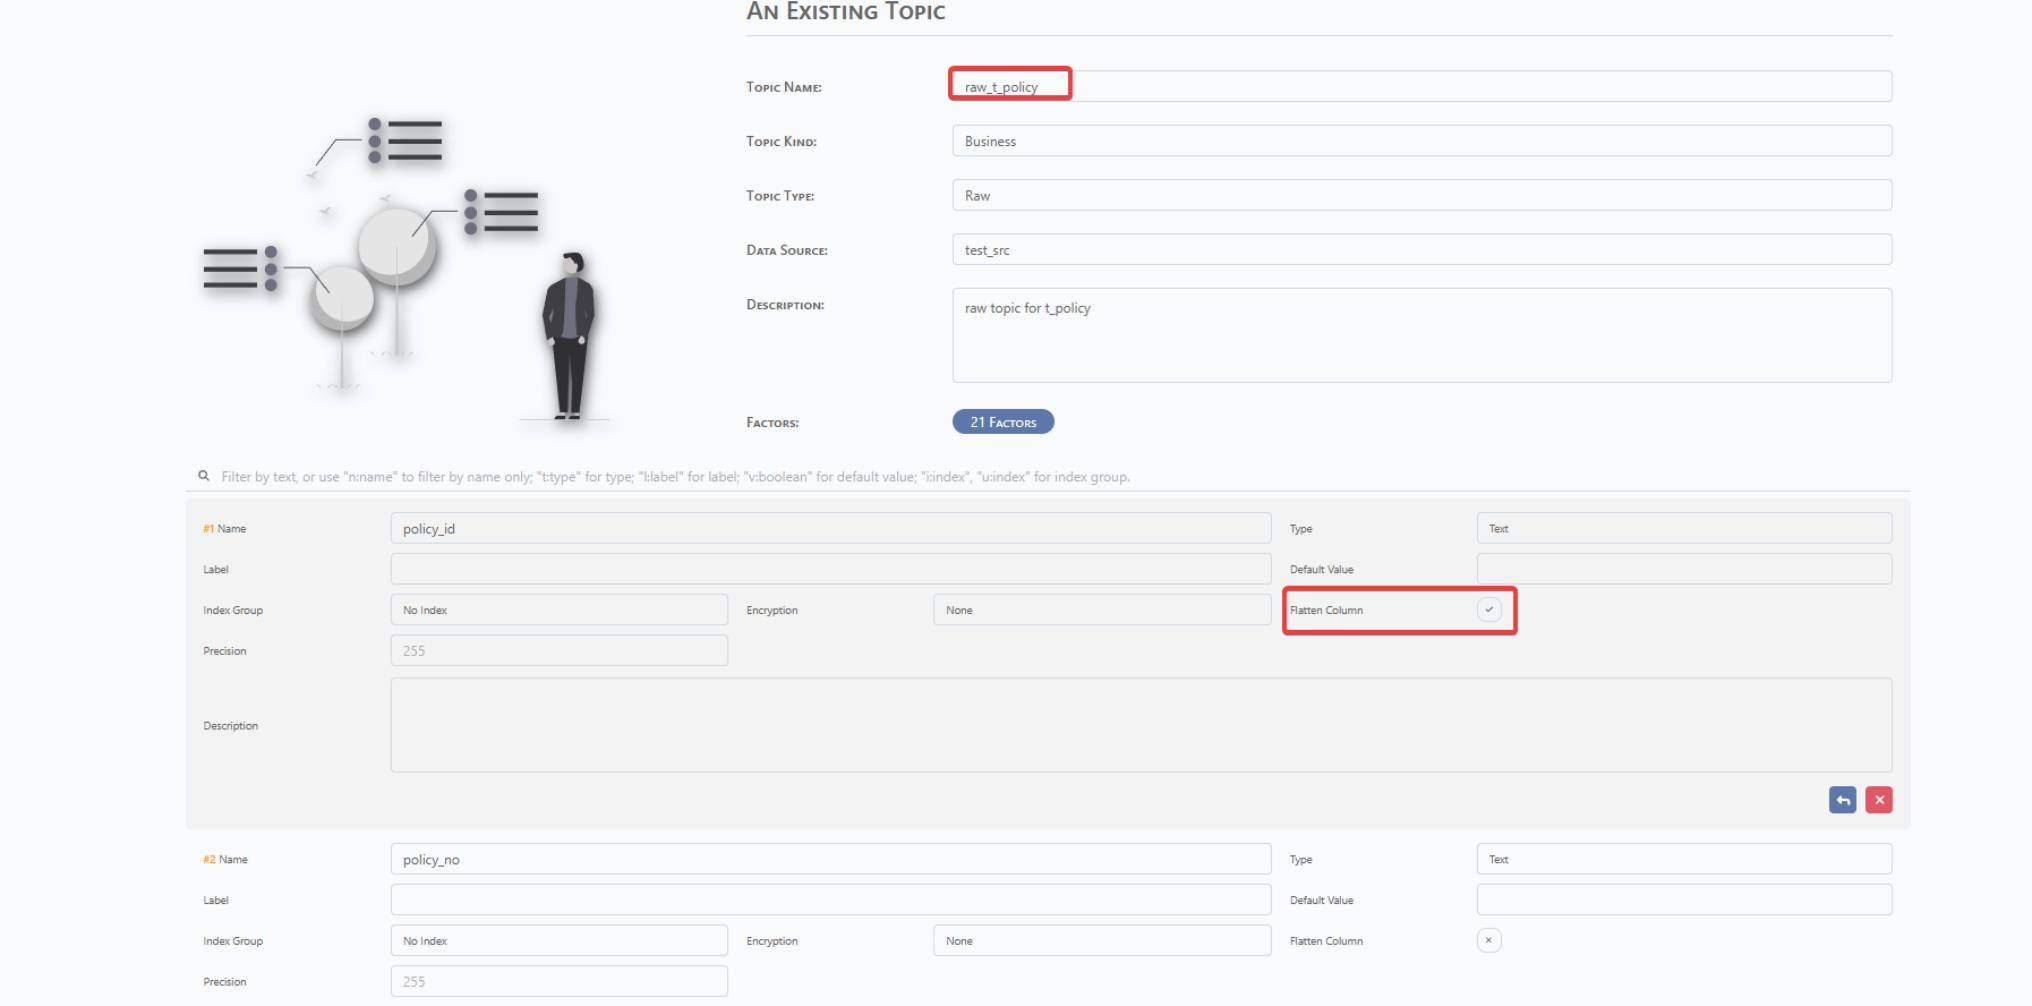
After check the factor, tick the Flatten Column for raw topic and confirm for changes save.
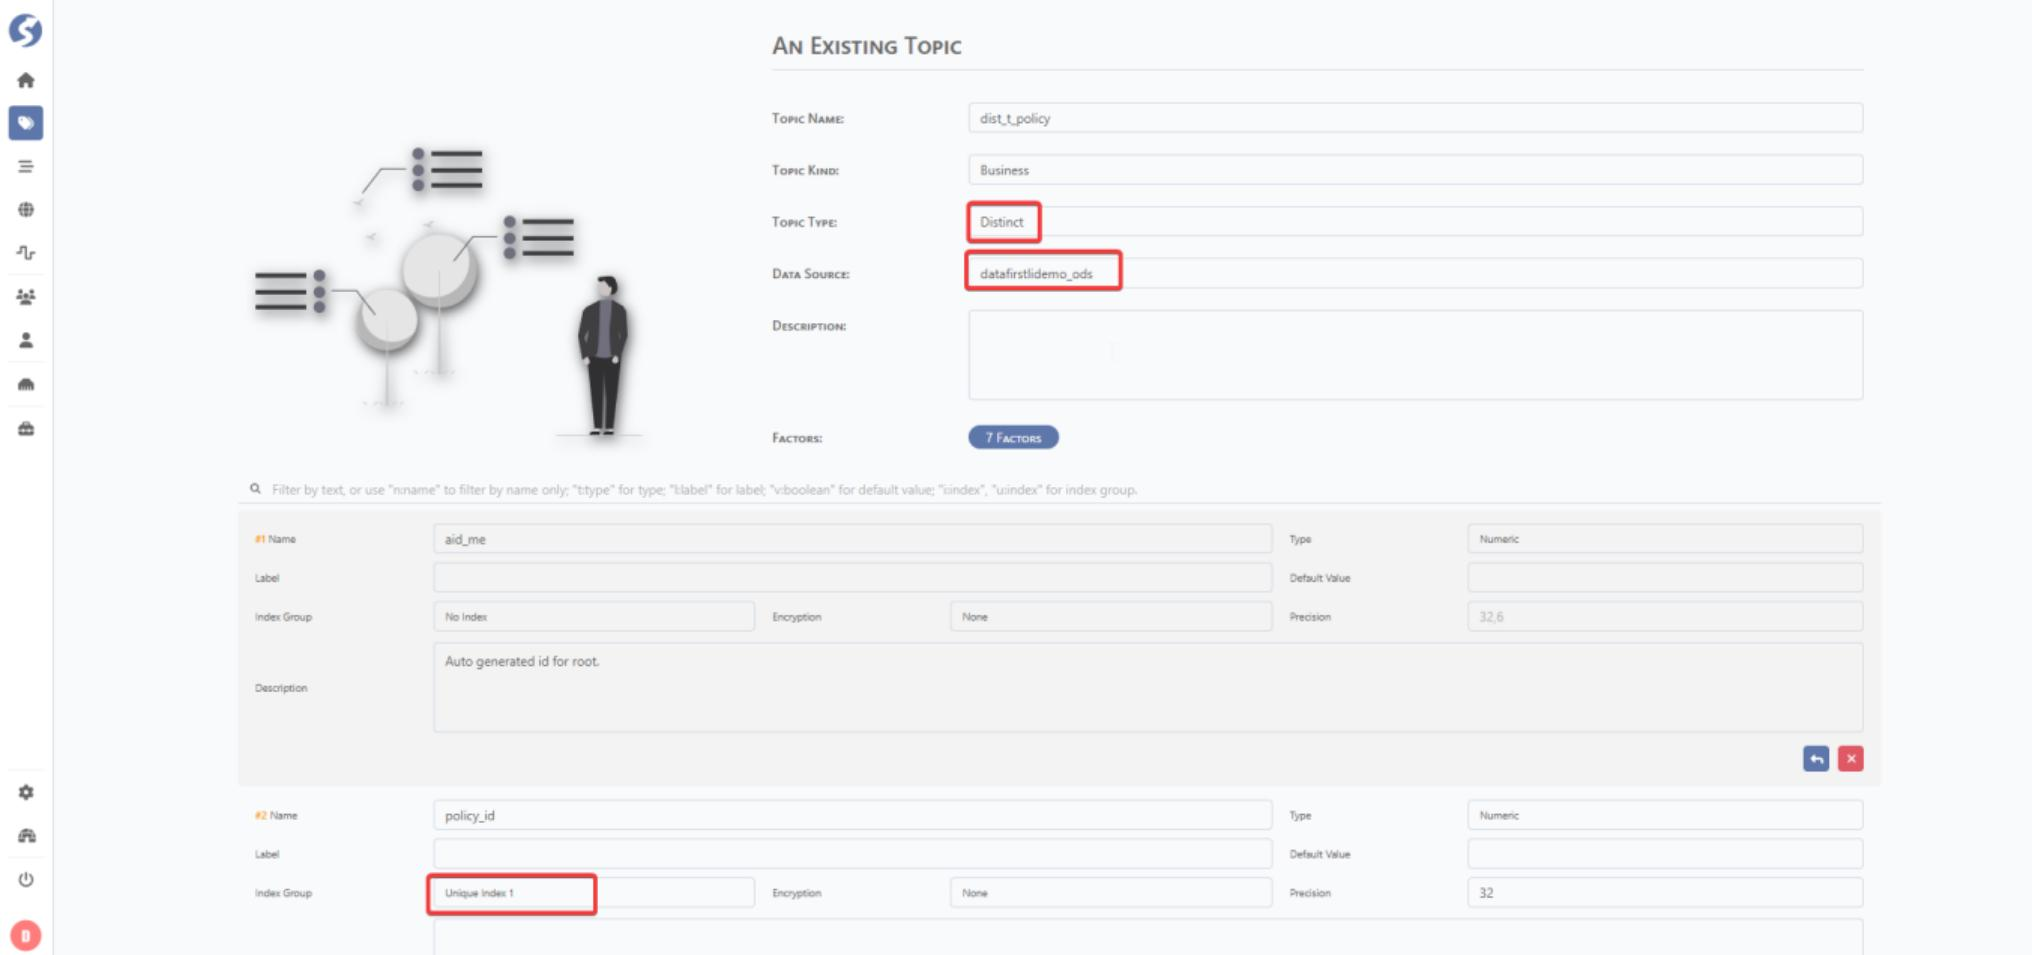
5.2 Dist Topic Configuration
The dist topic can be manually created by CREATE TOPICS and can be automatically created under raw topic.
Manual Creation:
Auto Creation:
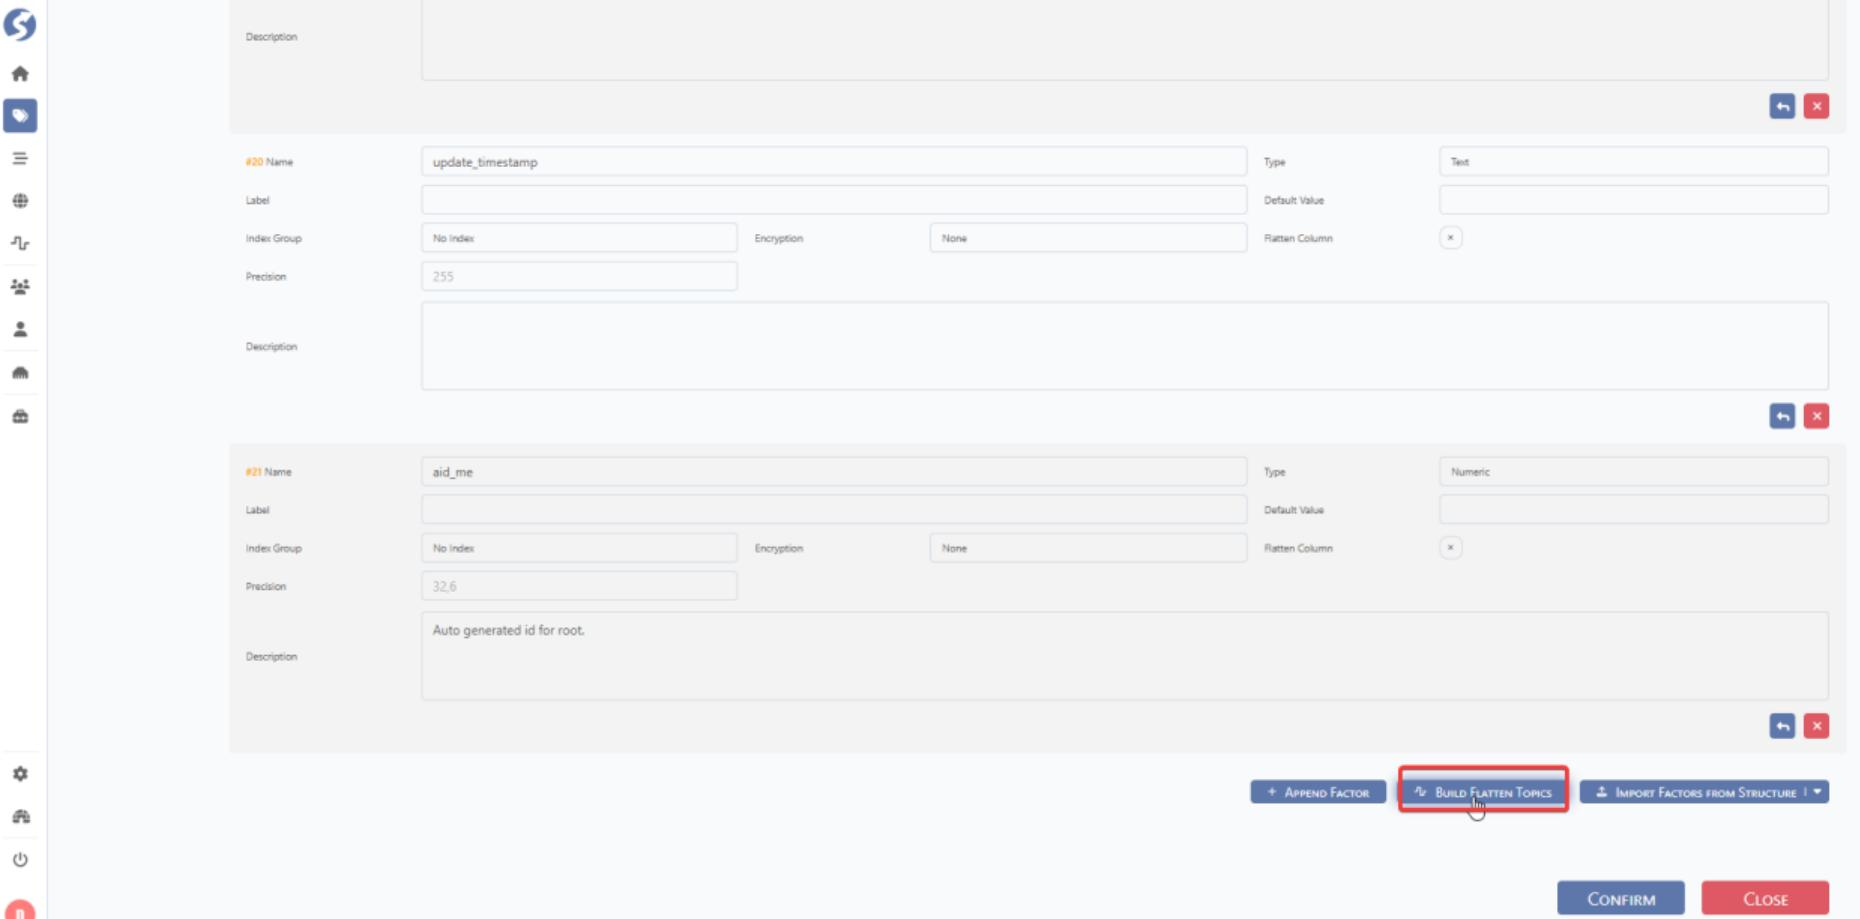
Step#1: Click BUILD FLATTEN TOPICS.
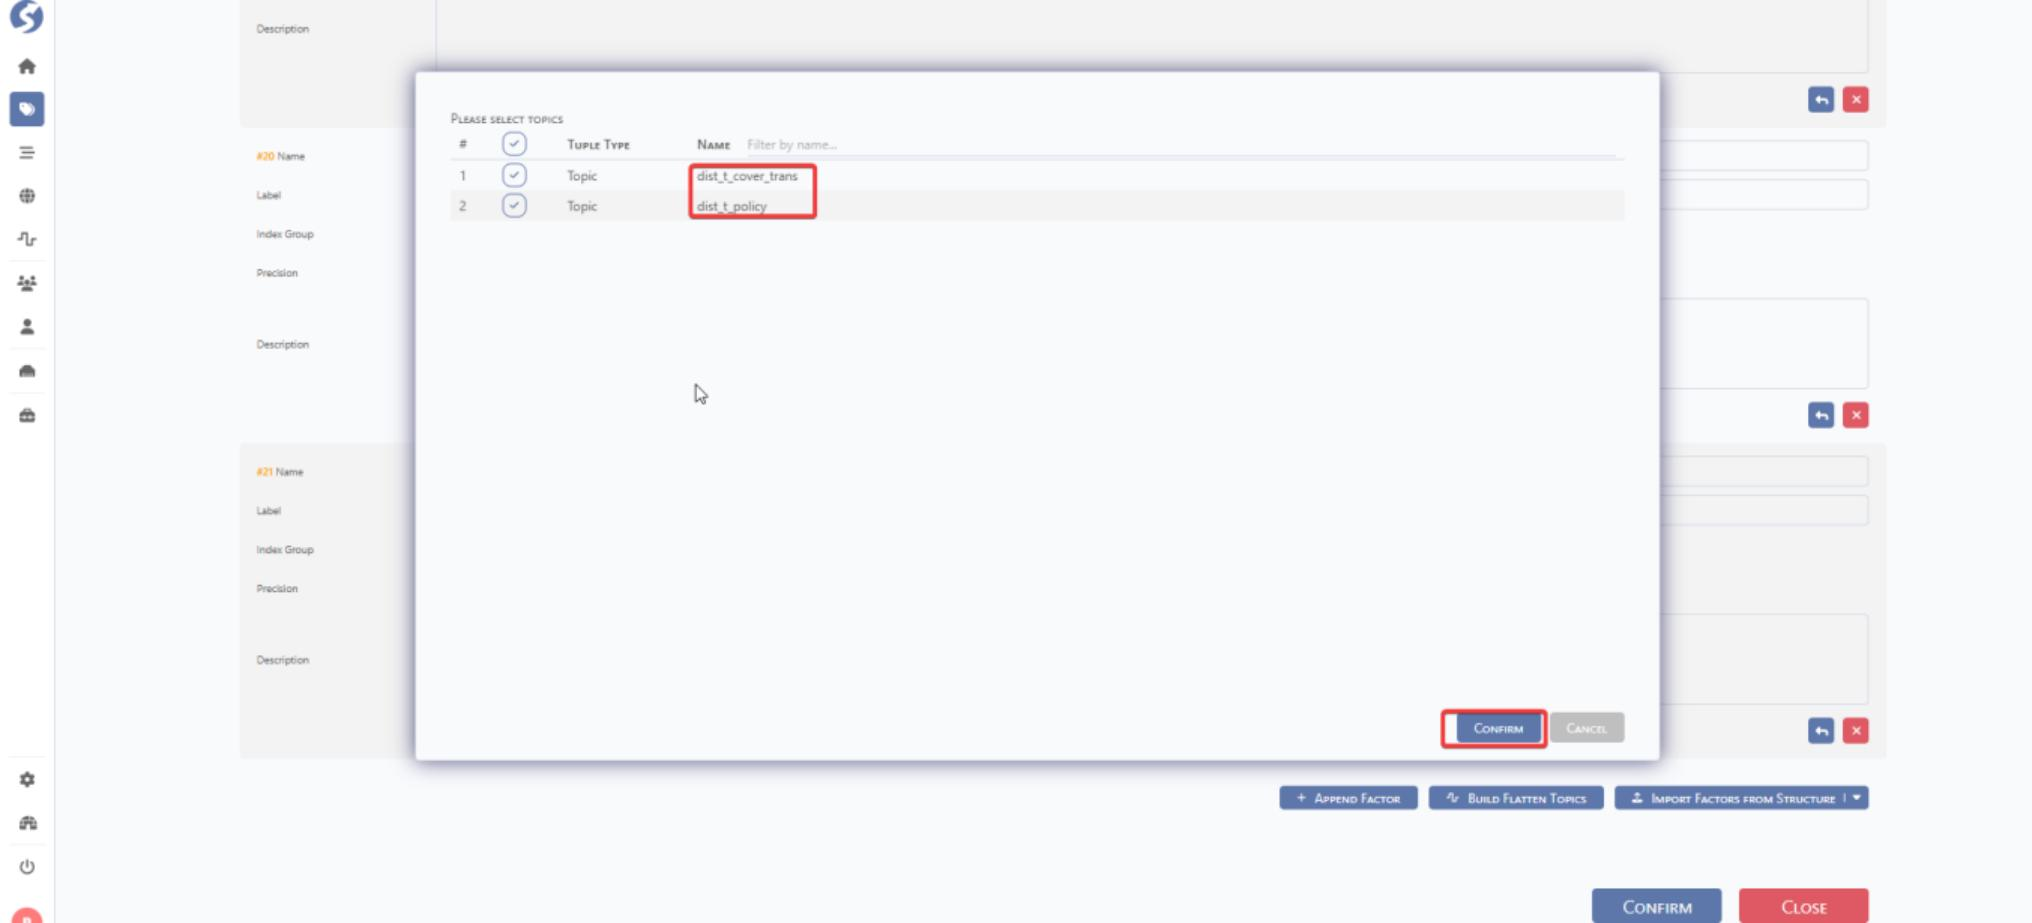
Step#2: Choose the dist topic which is needed to be created and then update the name. Click CONFIRM. DataMO can automatically provide a dist topic name by the raw topic node as below.
Update the key for dist topic and review the configuration.
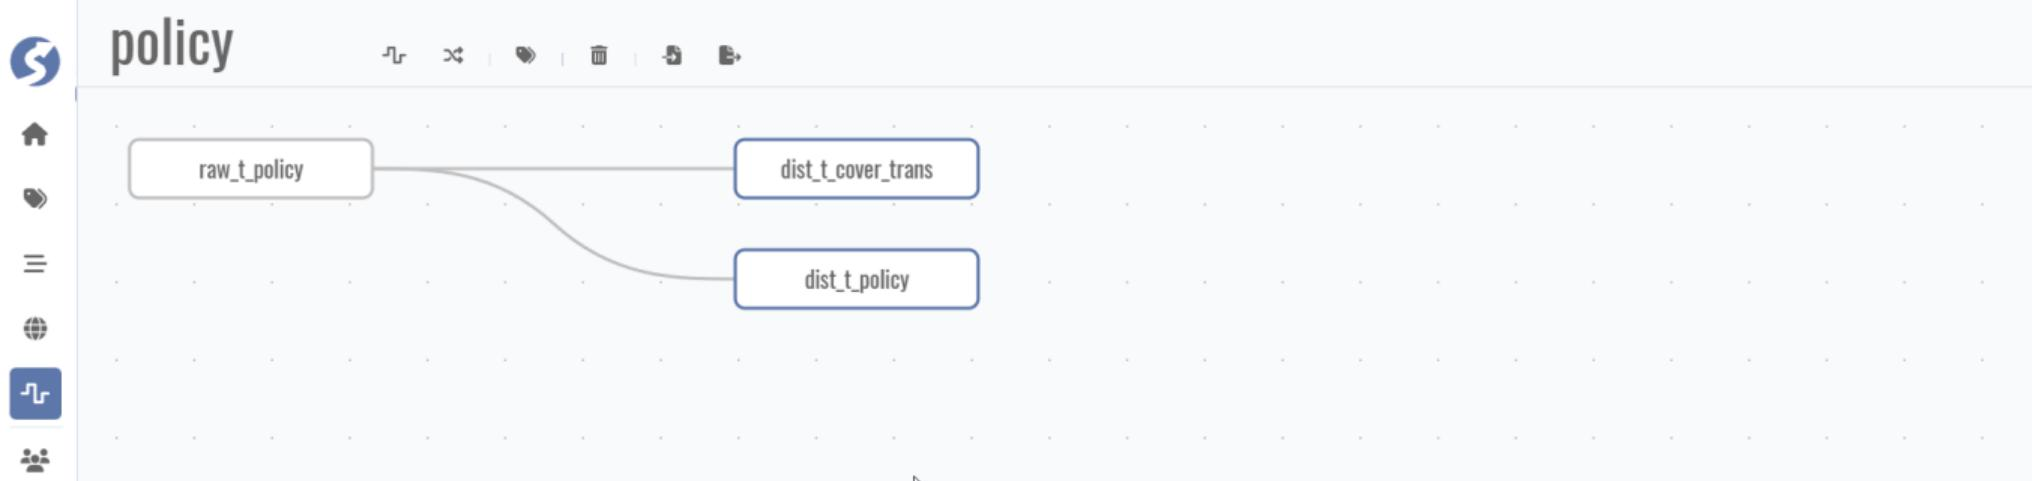
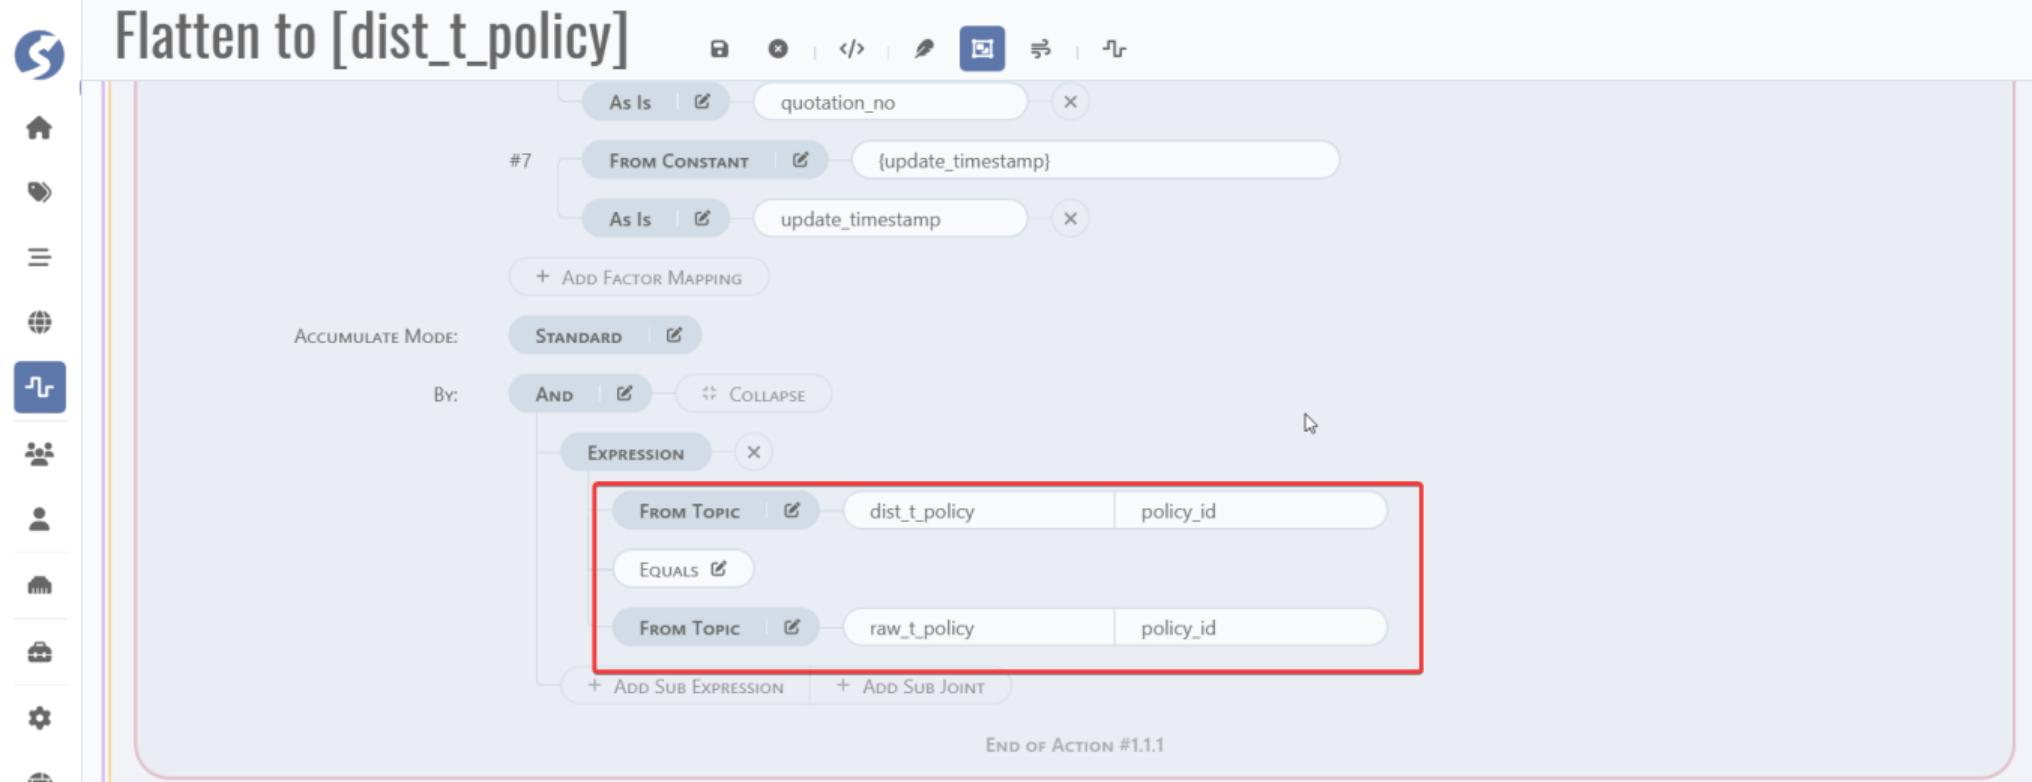
5.3 Pipeline Configuration
Pipeline similar to ETL Pipeline describes the data flow between topics, which is triggered by the insertion or update of topic data.
Go to DataMo home page and follow the steps below for new pipeline creation.
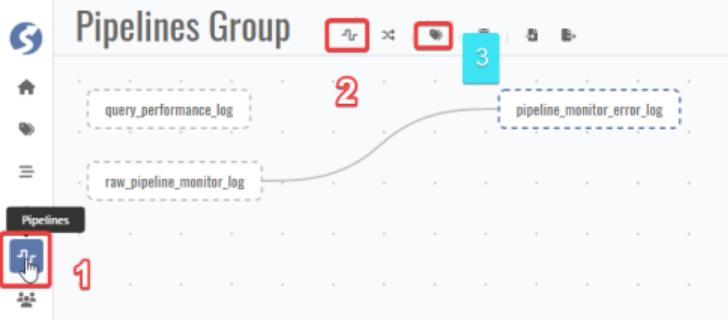
Pipeline layout:
Factor mapping:
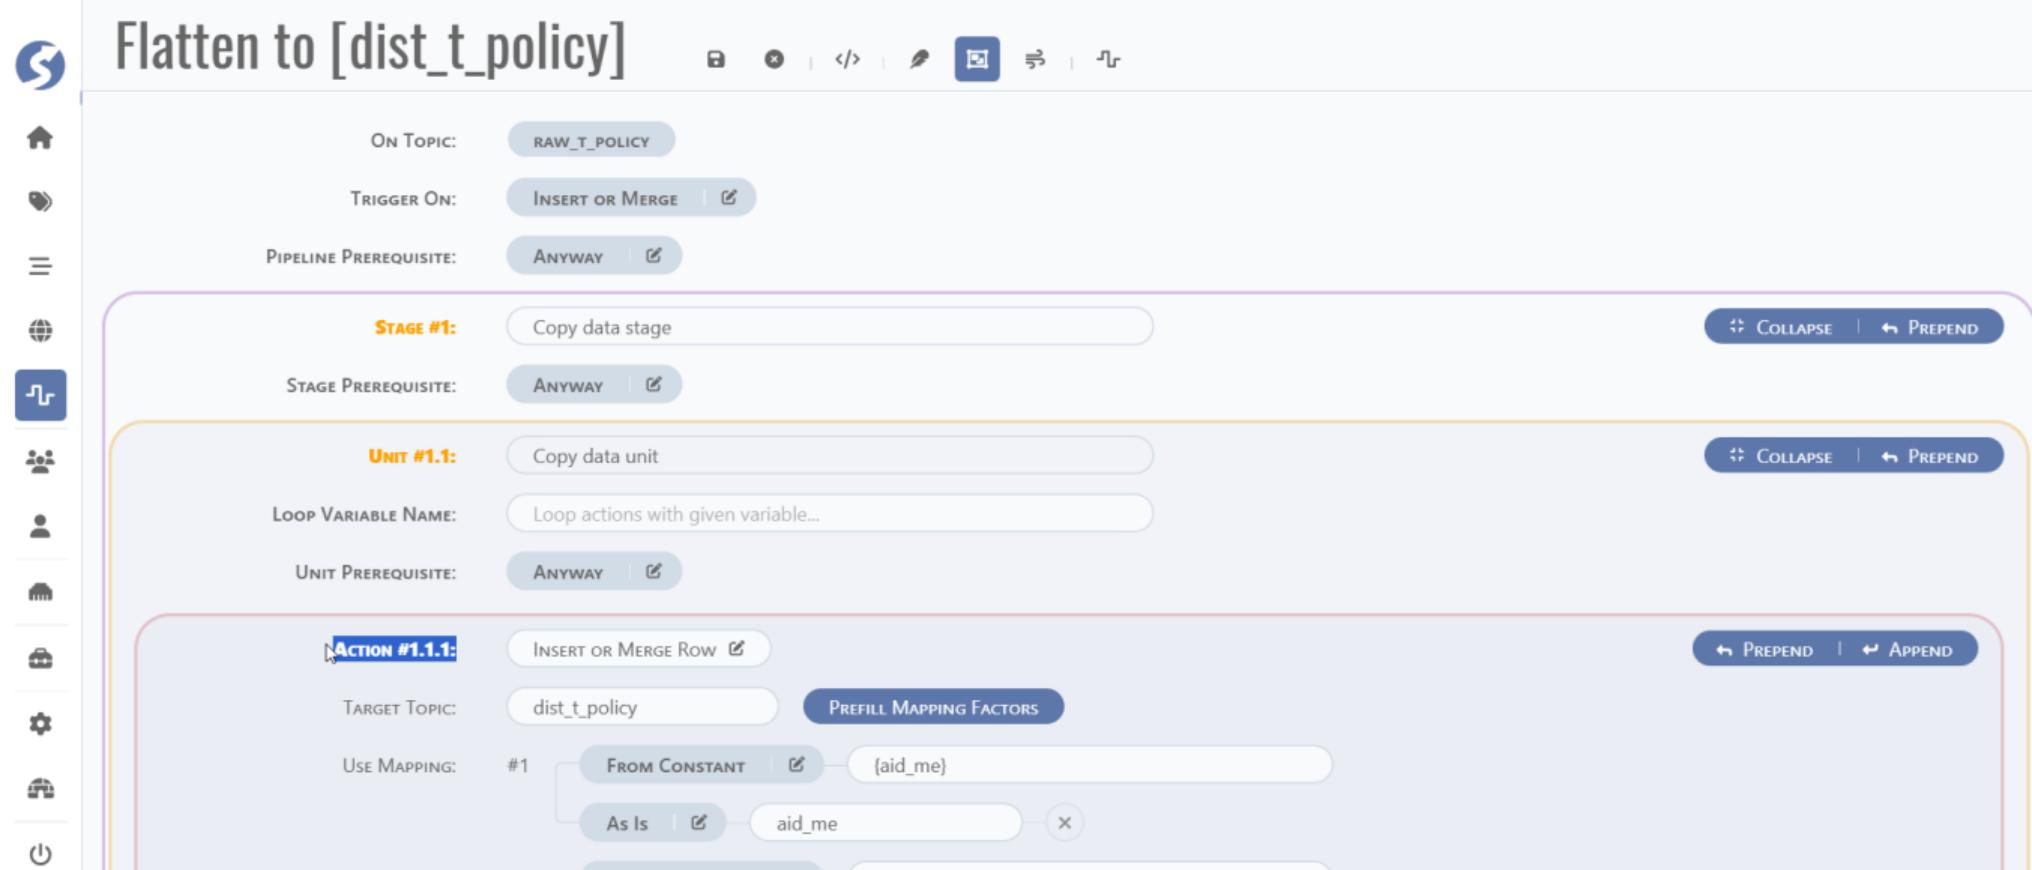
Merge key join logic:
6 Data service and API
6.1 Authority configuration
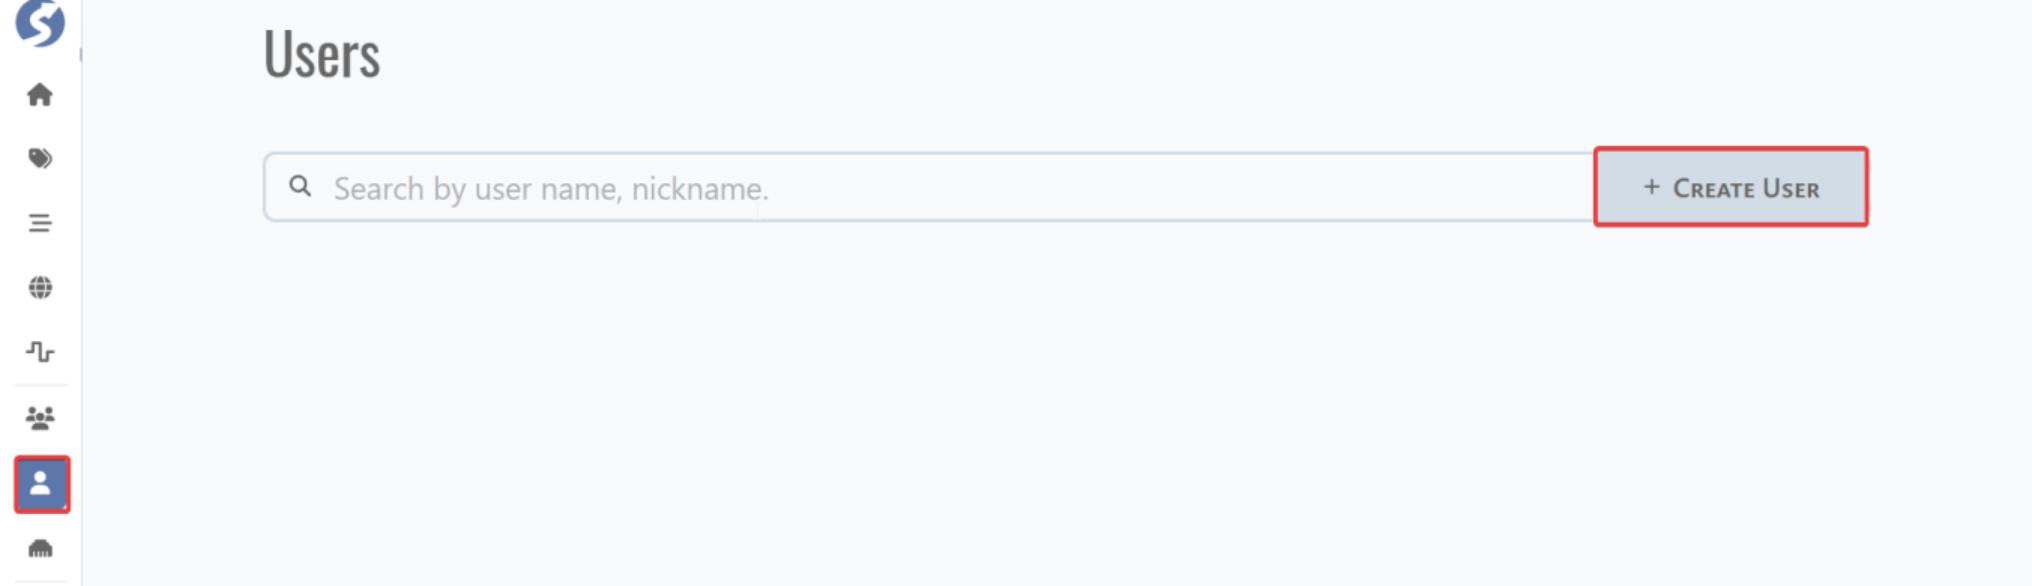
6.1.1 User
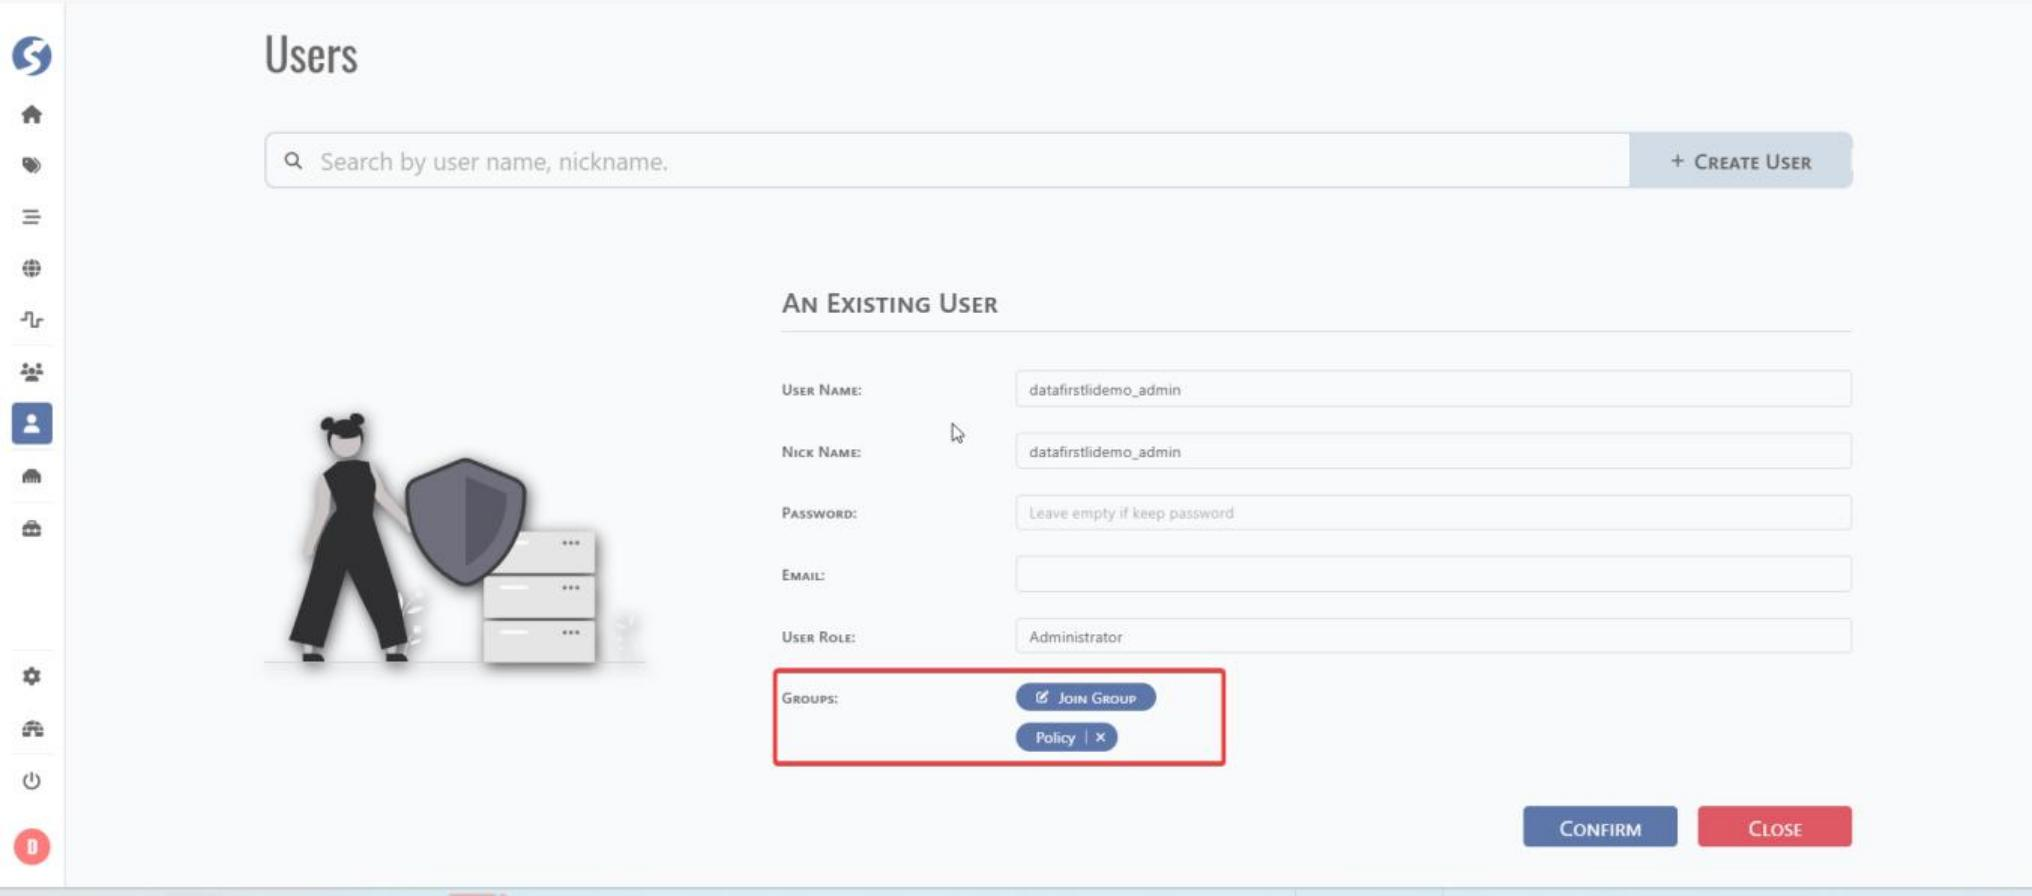
Go to home page and click user tab and click CREATE USER for user creation.
Fill user name and assign a user group. If the user group does not exist, create a new user group.
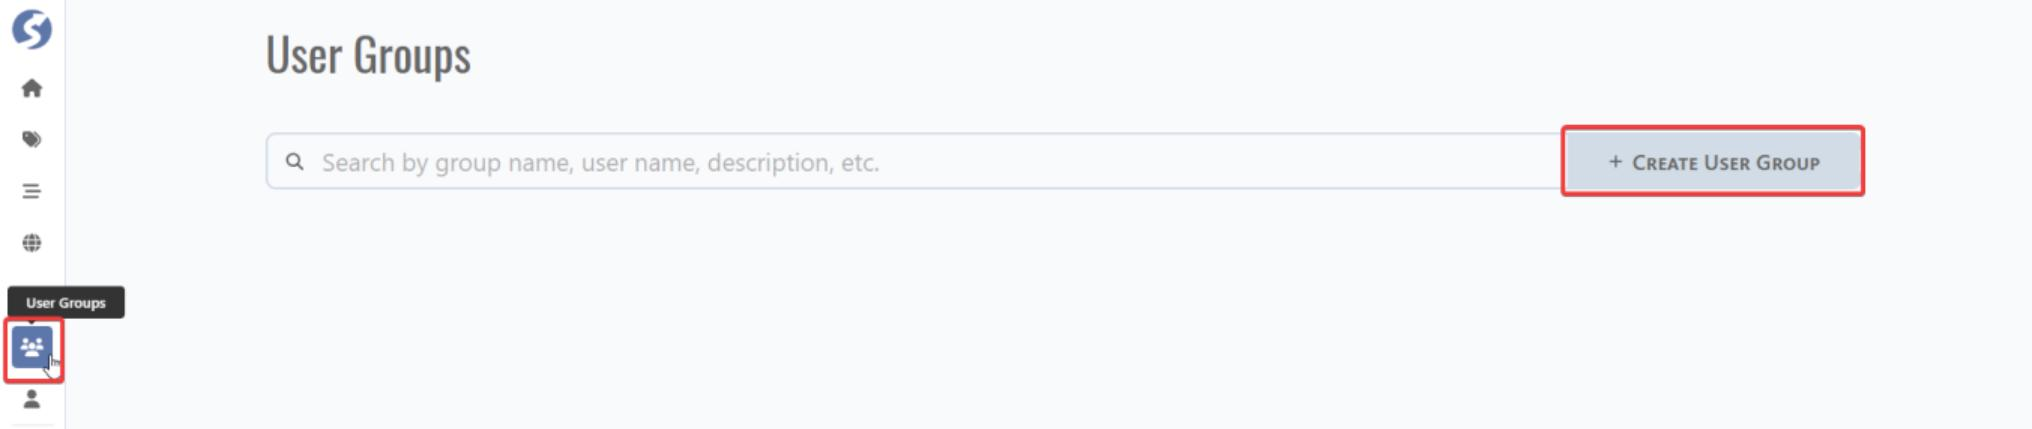
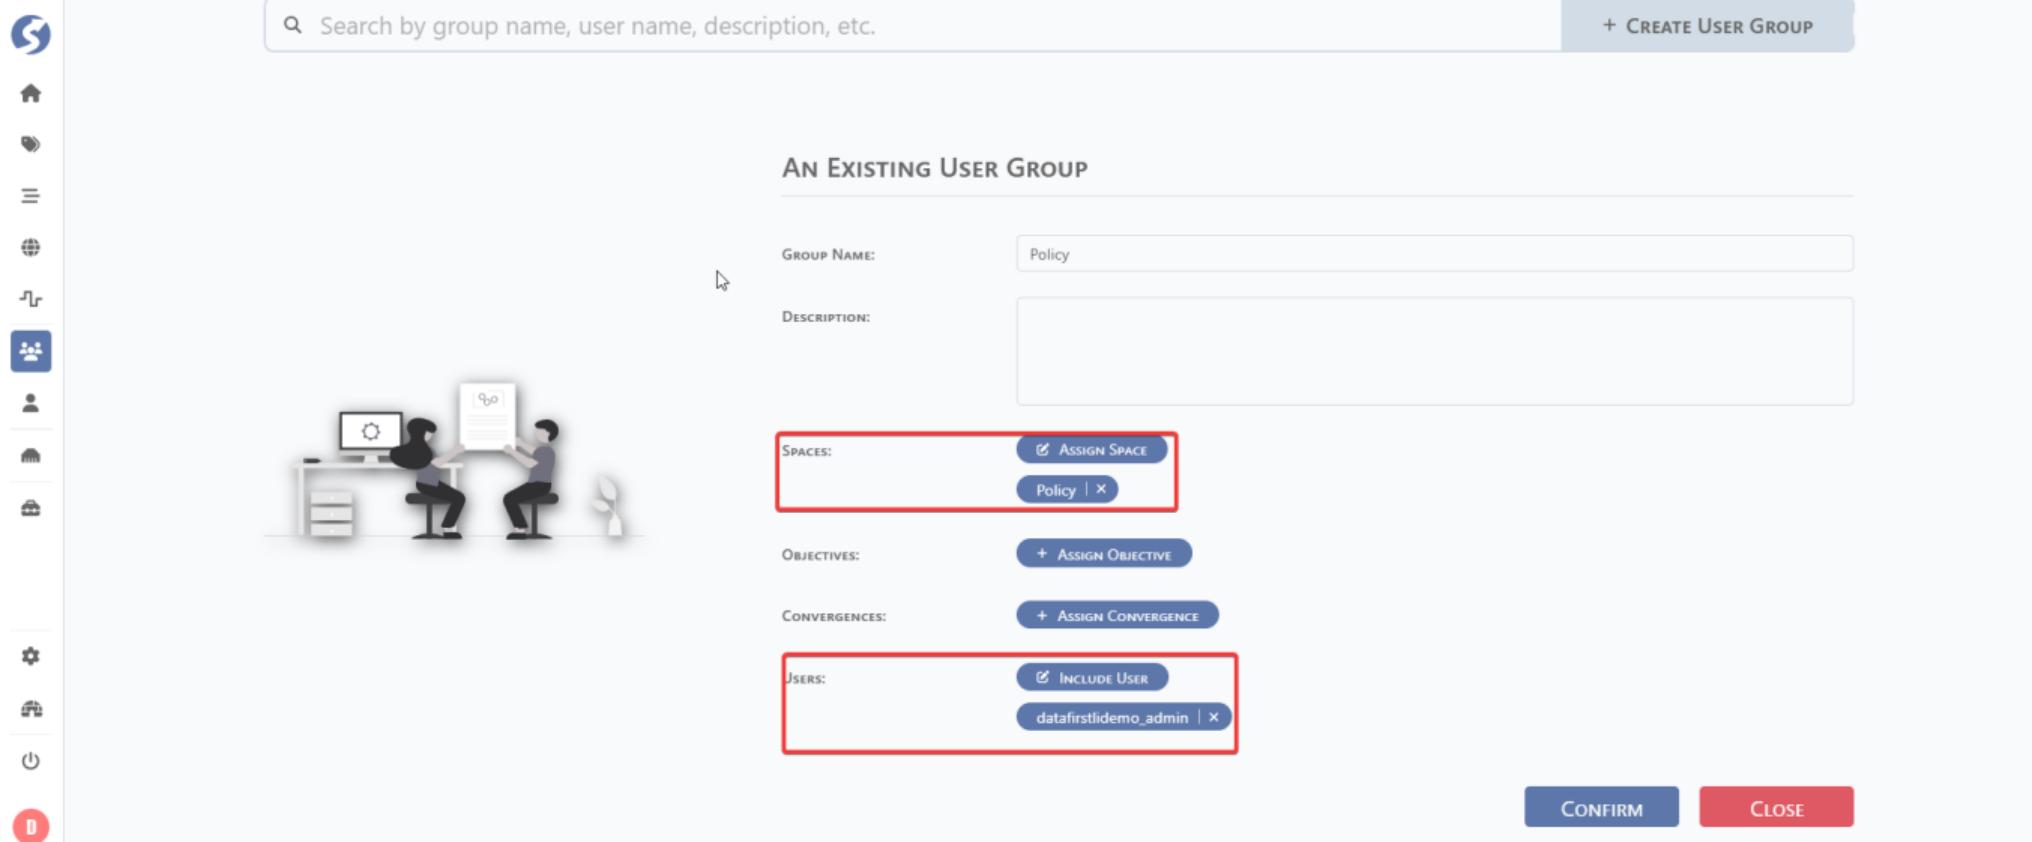
6.1.2 User Group
Go to home page and click User Groups tab and click CREATE USER GROUP for user group creation.
Fill user group name and assign a user and space. If the space does not exist, create a new space.
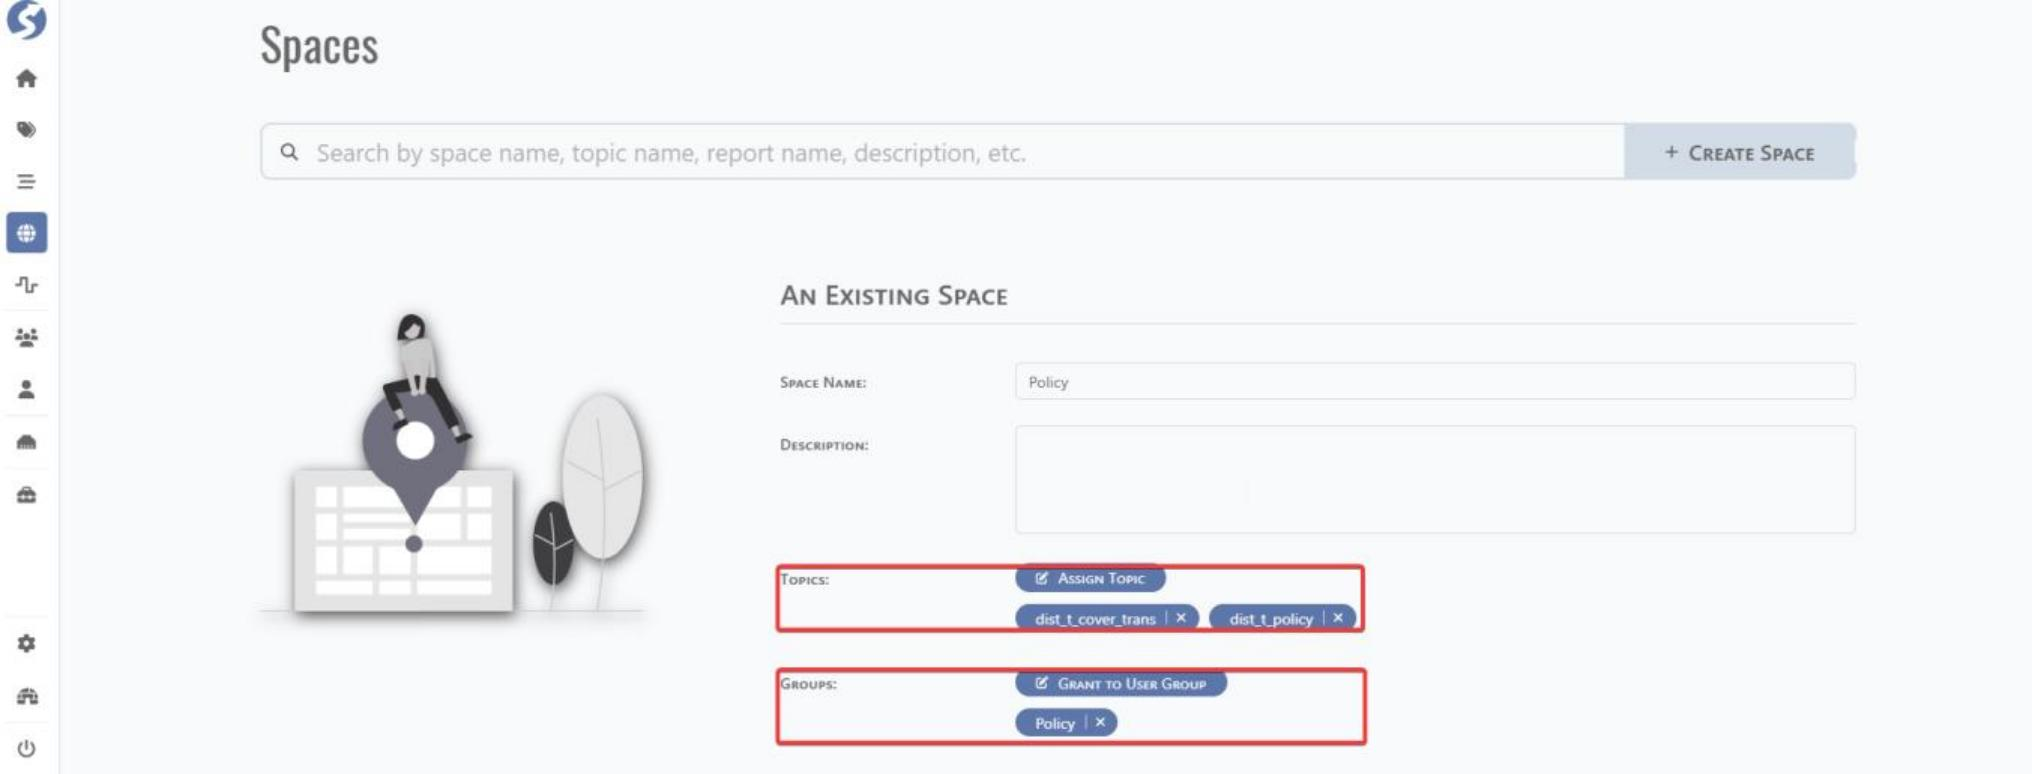
6.1.3 Space
Go to home page and click Spaces tab and click CREATE SPACE for Space creation.

Fill space name and assign a user group and topic.
6.2 Console Configuration
Go to home page and click Go Console tab for console configuration.

6.2.1 Subject
Connect to the space created in above chapter 6.1.3 as below step.
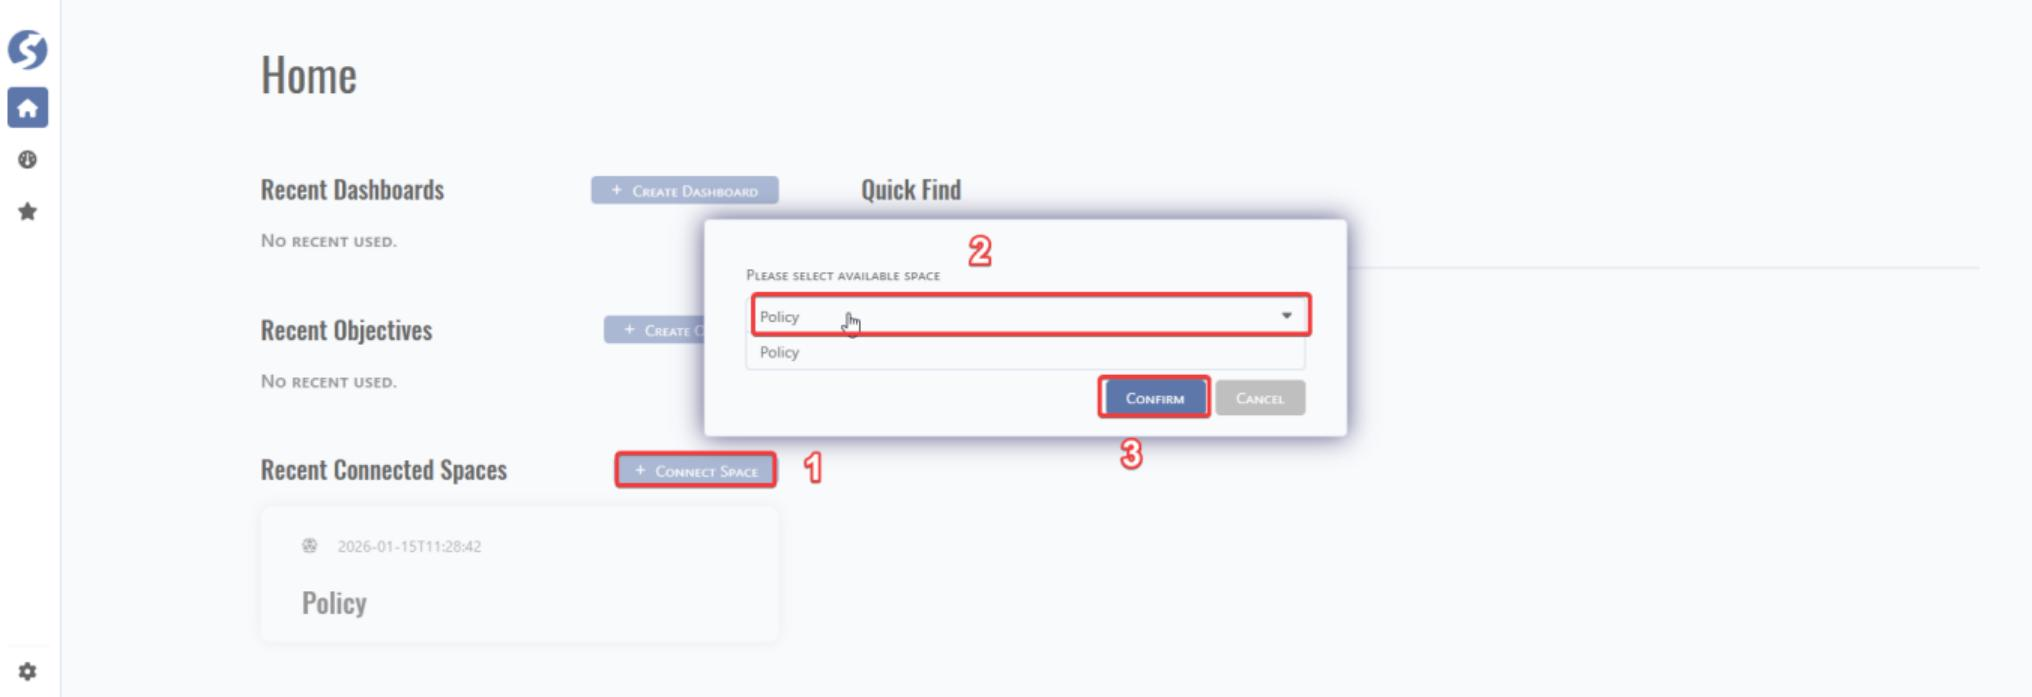
Step#1: Fill the space name. Step#2: add new subject.

Follow the process to complete Subject definition.

Click ADD COLUMN button to add column.

Filter similar as database where condition, can click create one to add.
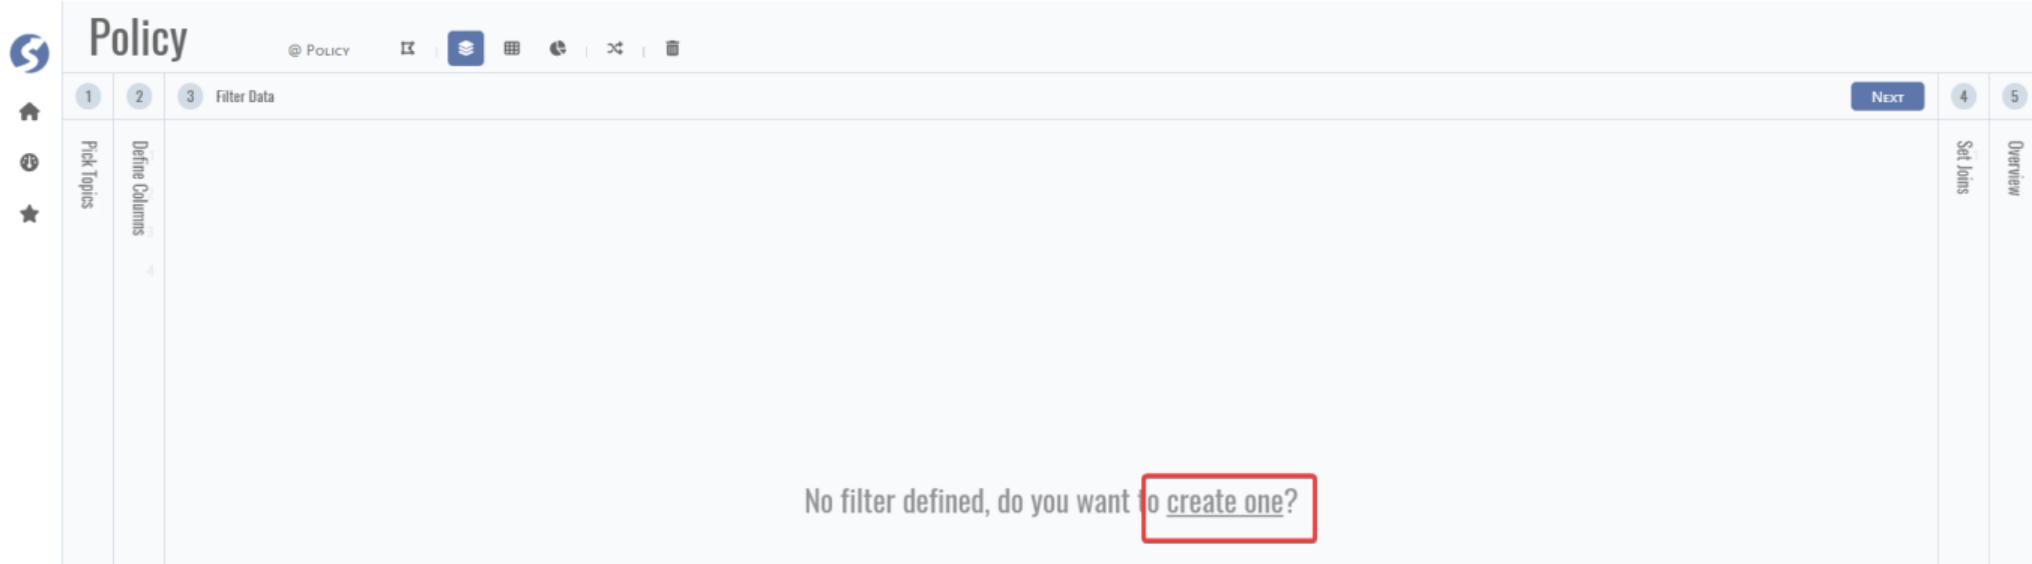
Use the join to build the topic connection logic.

Overview of the subject as below.

6.2.2 Dataset
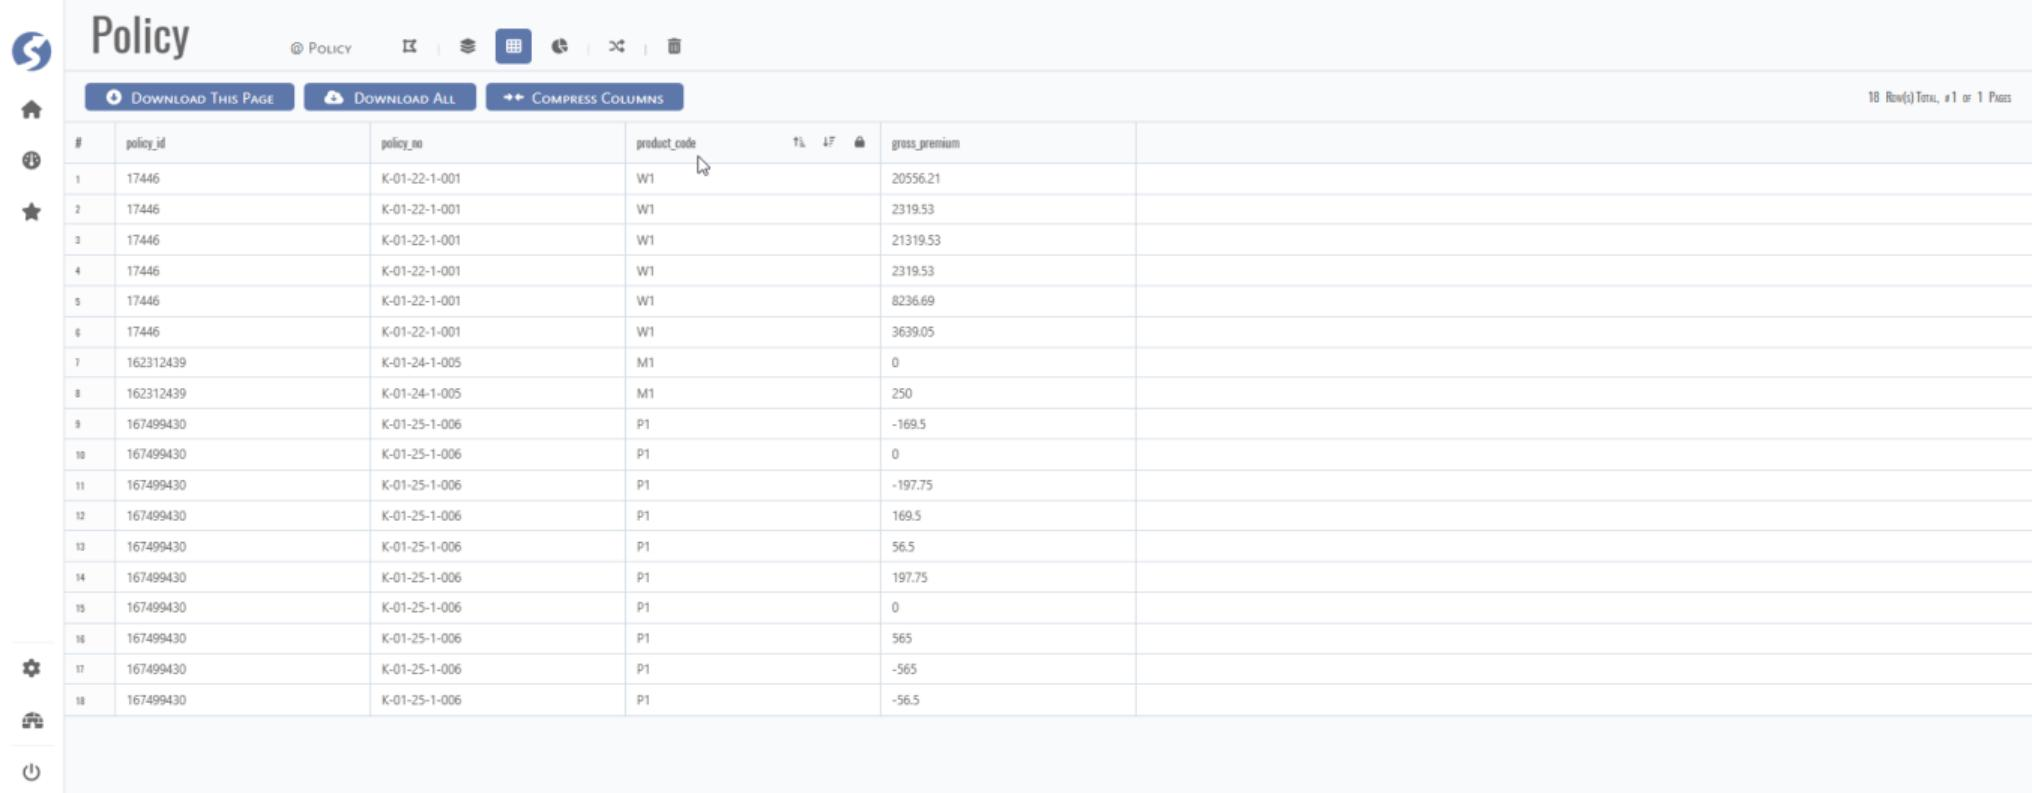
Click the DATASET tab to go to dataset.

If the data is available and displayed below, click DOWNLOAD ALL to download the dataset into csv file.
6.3 API Service
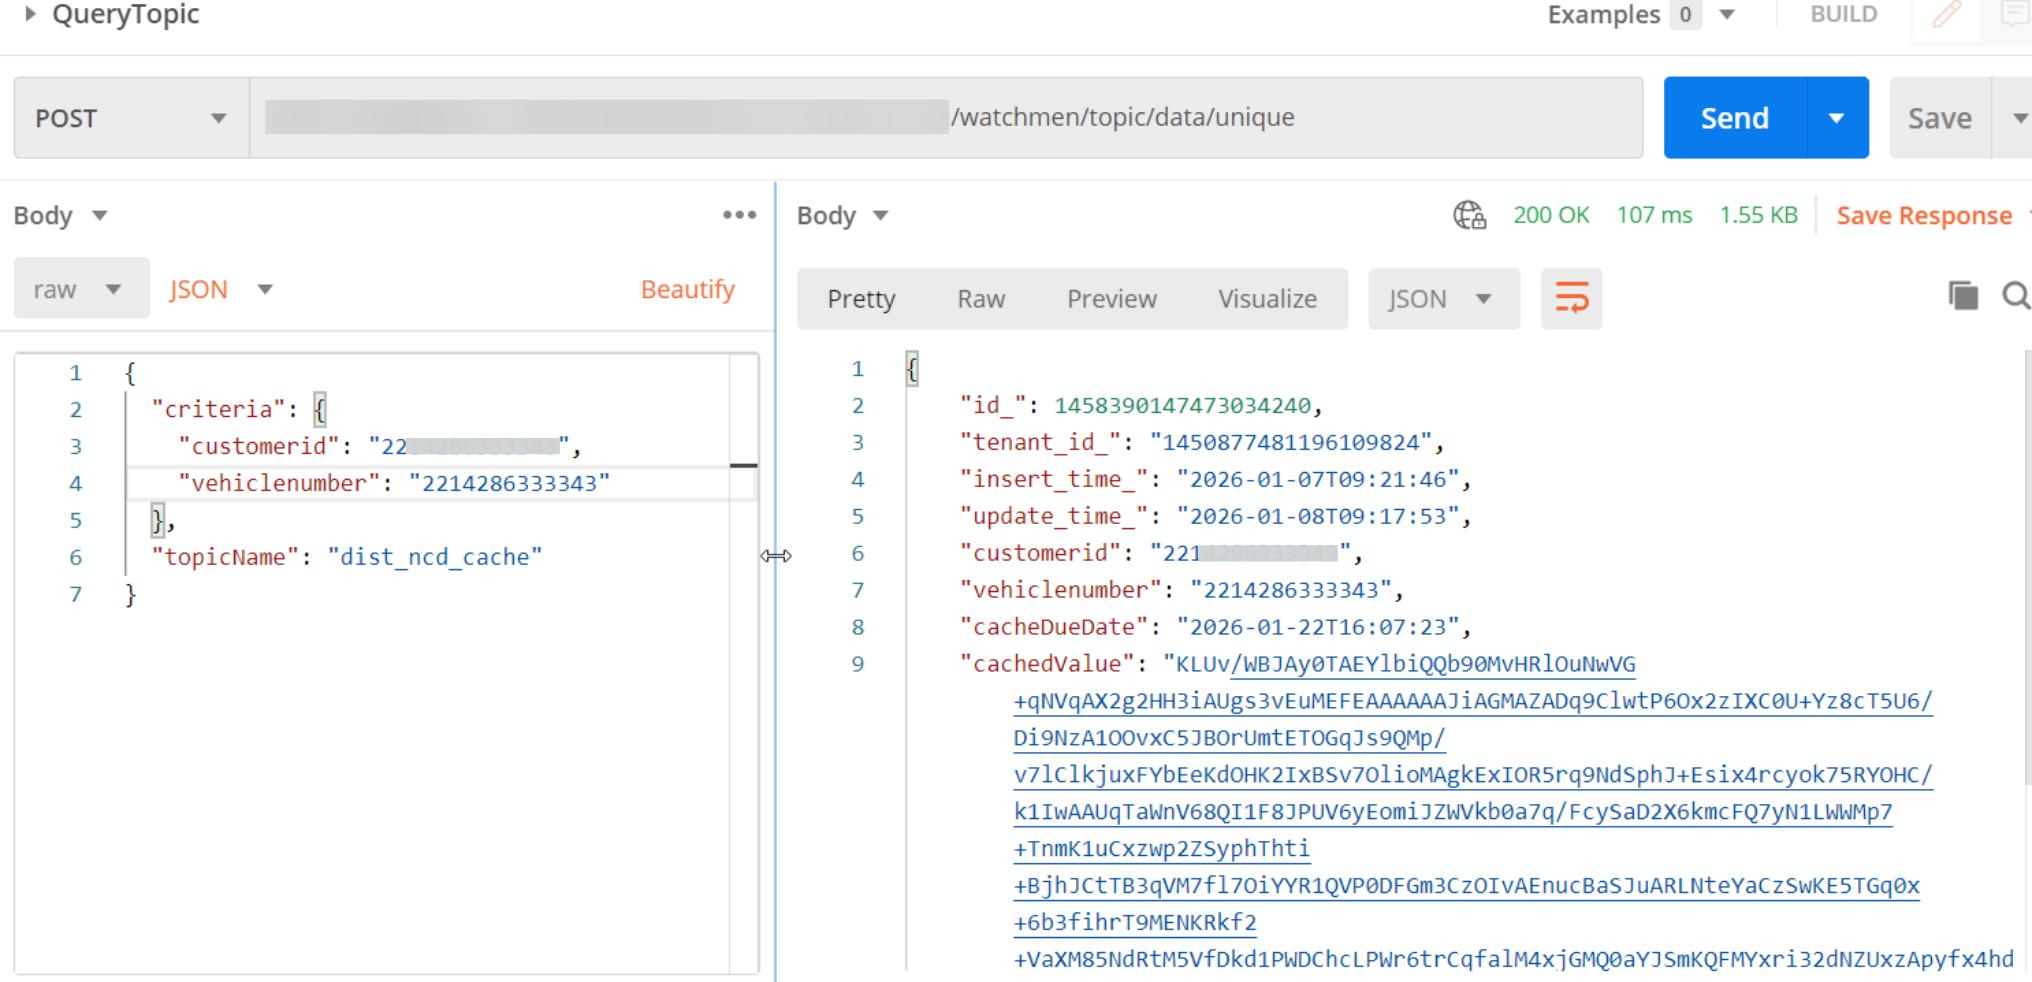
6.3.1 Topic API
For some business scenarios like NCD cache, DataMO platform provides topic API for cache info retrieve to avoid direct connection into database.
Applicable for high-frequency short transactions like aggregator quoting platform.
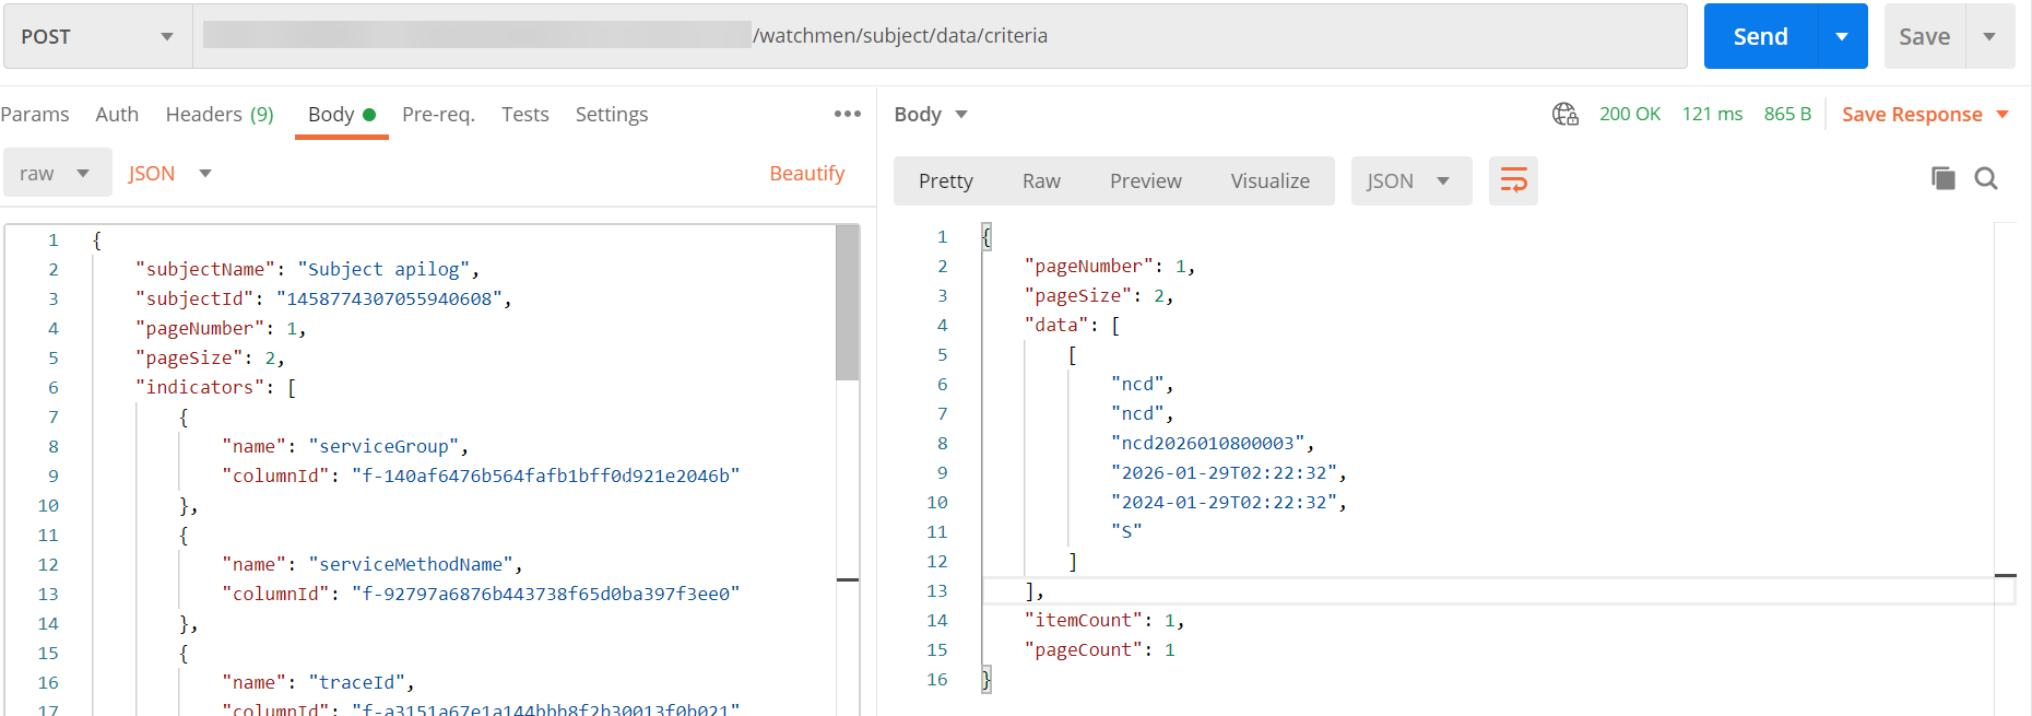
6.3.2 Dataset API
For some business scenarios like log query, DataMO platform provides dataset API for defined dataset consuming API.
7 Test by API & Troubleshooting
The API call to verify data syncing Instructions:
The data pushing APIs of CollectorV2 mainly include the following 3 APIs:
- {domain_name}/watchmen/collector/trigger/event
- {domain_name}/watchmen/collector/trigger/event/table
- {domain_name}/watchmen/collector/trigger/event/record
If it is a single-order test, then select event/record.
If you need to test by table_name, select event/table.
After all models have passed the validation, call trigger/event at the end.
Please note that due to the limited resources of the MC environment and the shared use by each tenant, the invocation of triggers/events is prohibited in the MC environment.
If you need to test trigger/event, please call it in the runtime environment.
7.1 Trigger by Event
API: {domain_name}/watchmen/collector/trigger/event Authorization: pat token Method: POST Request:
{
  "startTime": "1900-01-01 00:00:00",
  "endTime": "2001-01-01 00:00:00"
}
Instructions:
Pass the corresponding time intervals for startTime and endTime to extract data from the source db.
Response:
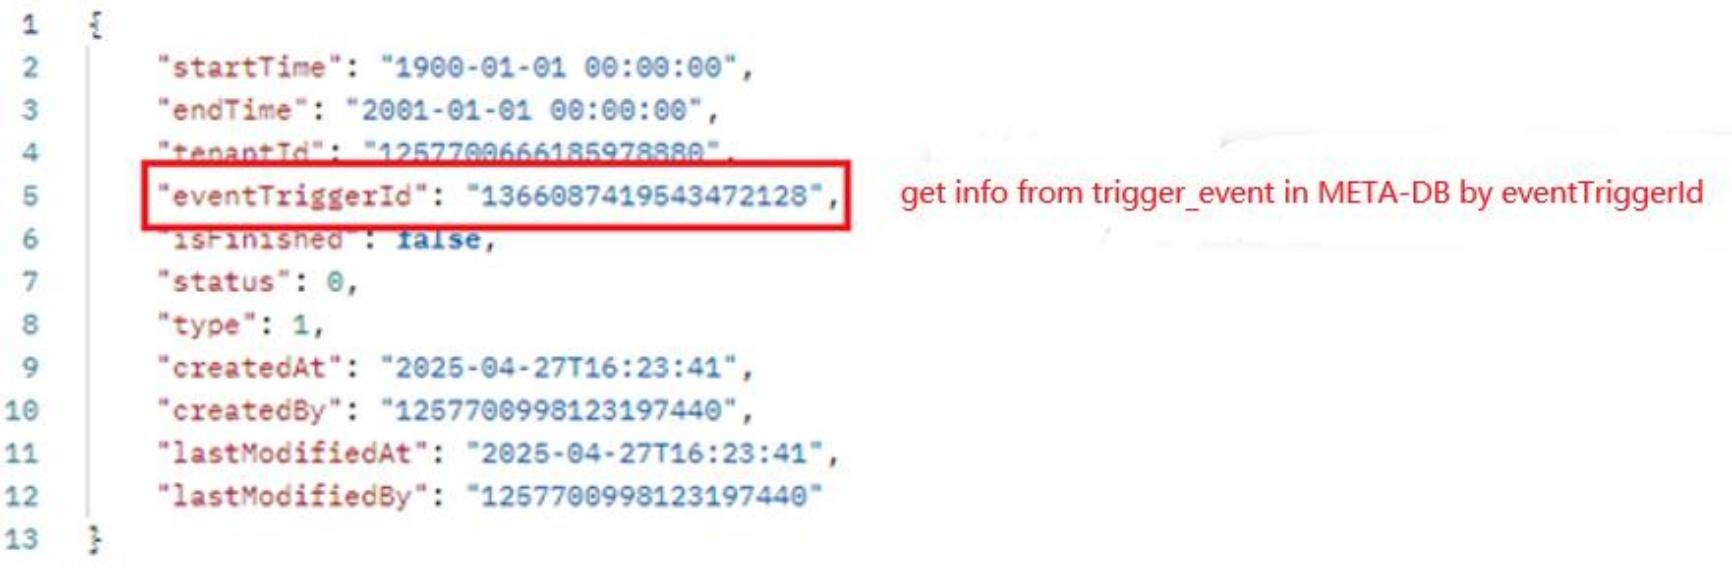
7.2 Trigger by Table
API: {domain_name}/watchmen/collector/trigger/event/table Authorization: pat token Method: POST Request:
{
"startTime": "1900-01-01 00:00:00",
"endTime": "2001-01-01 00:00:00",
"tableName": "t_policy_change"
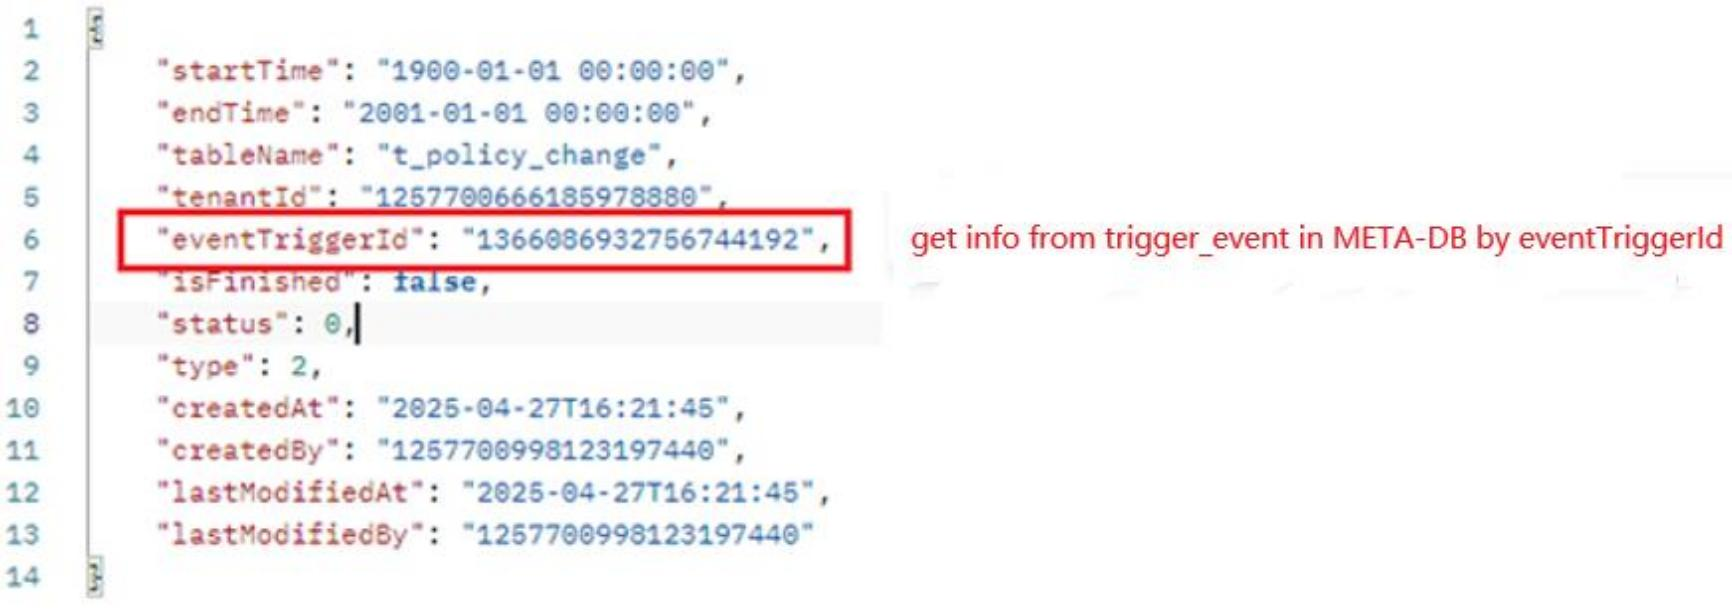
}Instructions:
The “tableName” corresponds to “collector_table_config.name”. If the model has multiple tables, then the root table of the model should be taken.
Pass the corresponding time intervals for startTime and endTime to extract data from the source db.
Response:
7.3 Trigger by Record
API: {domain_name}/watchmen/collector/trigger/event/record
Authorization: pat token
Method: POST
Request:
{
"tableName": "t_gl_fee",
"records": [
{
"gl_fee_id": "13759576"
},
{
"gl_fee_id": "13759577"
}
]
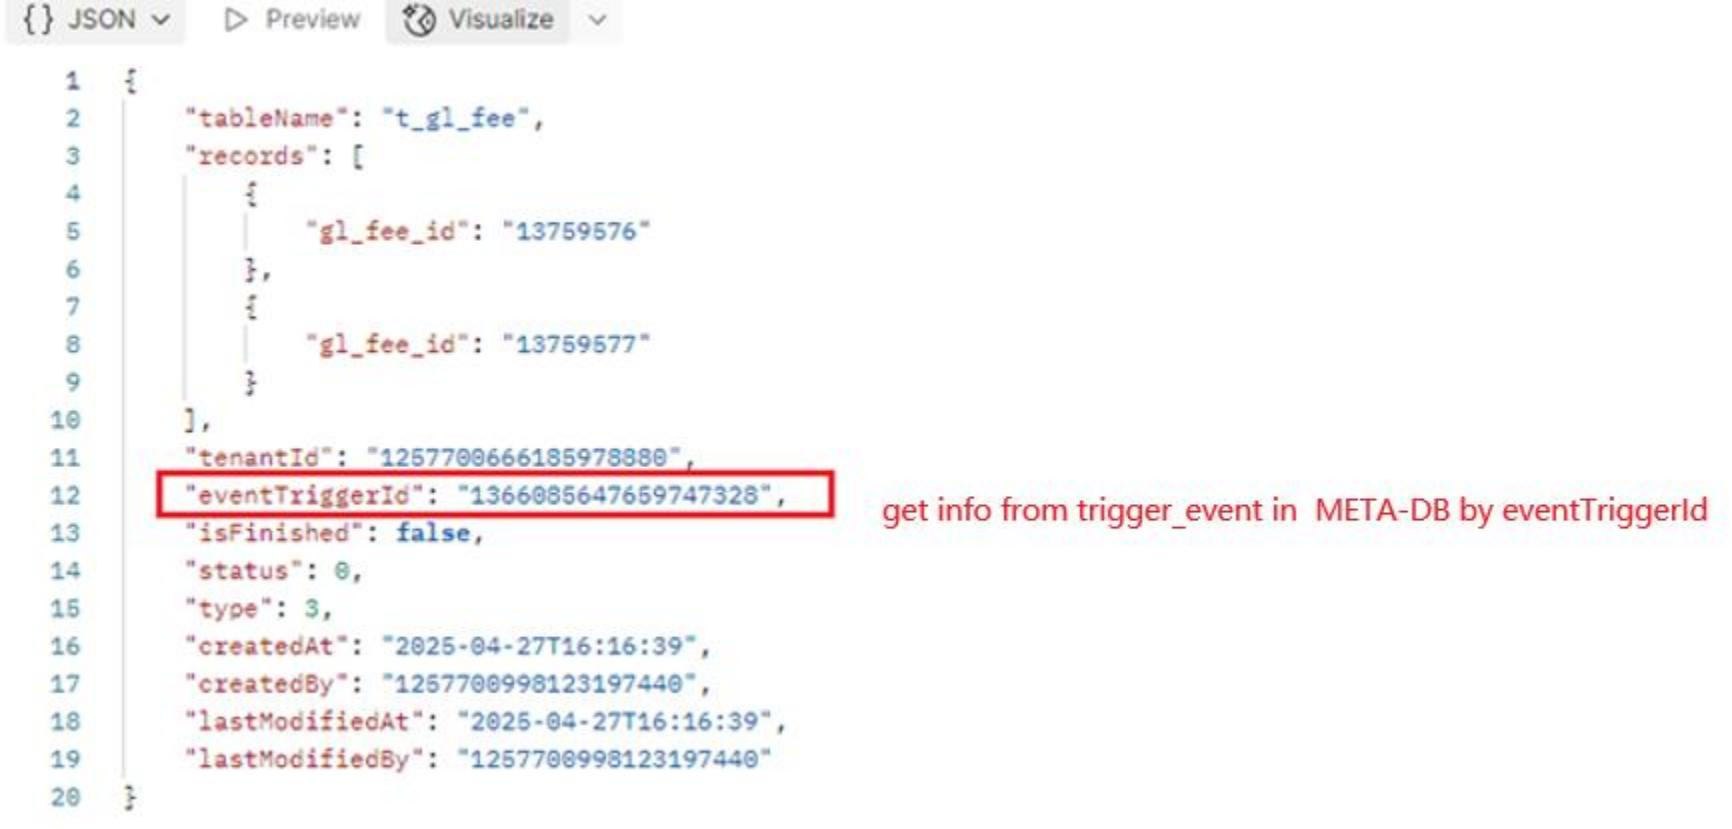
}Instructions:
The “tableName” corresponds to the name in collector_table_config. If there are multiple tables for this model, the root table of this model should be taken.
Put the primary key of the root table in records. The key is “primary_key” and the value is the corresponding value. If there are multiple primary keys, they can be put in synchronously.
Response:
7.4 Troubleshooting
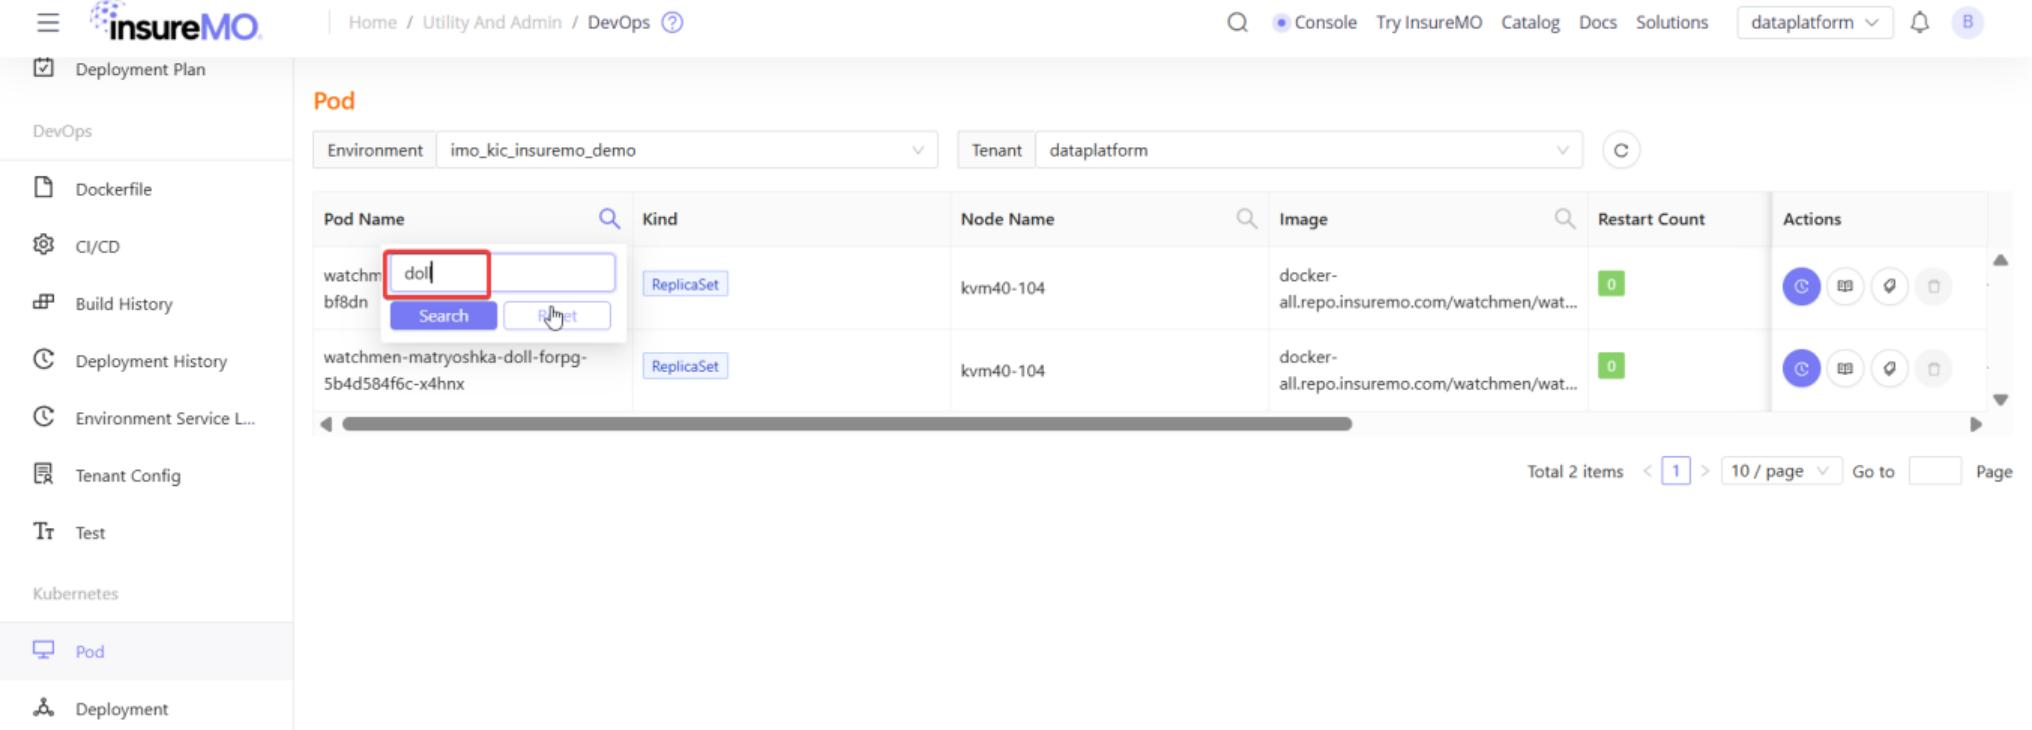
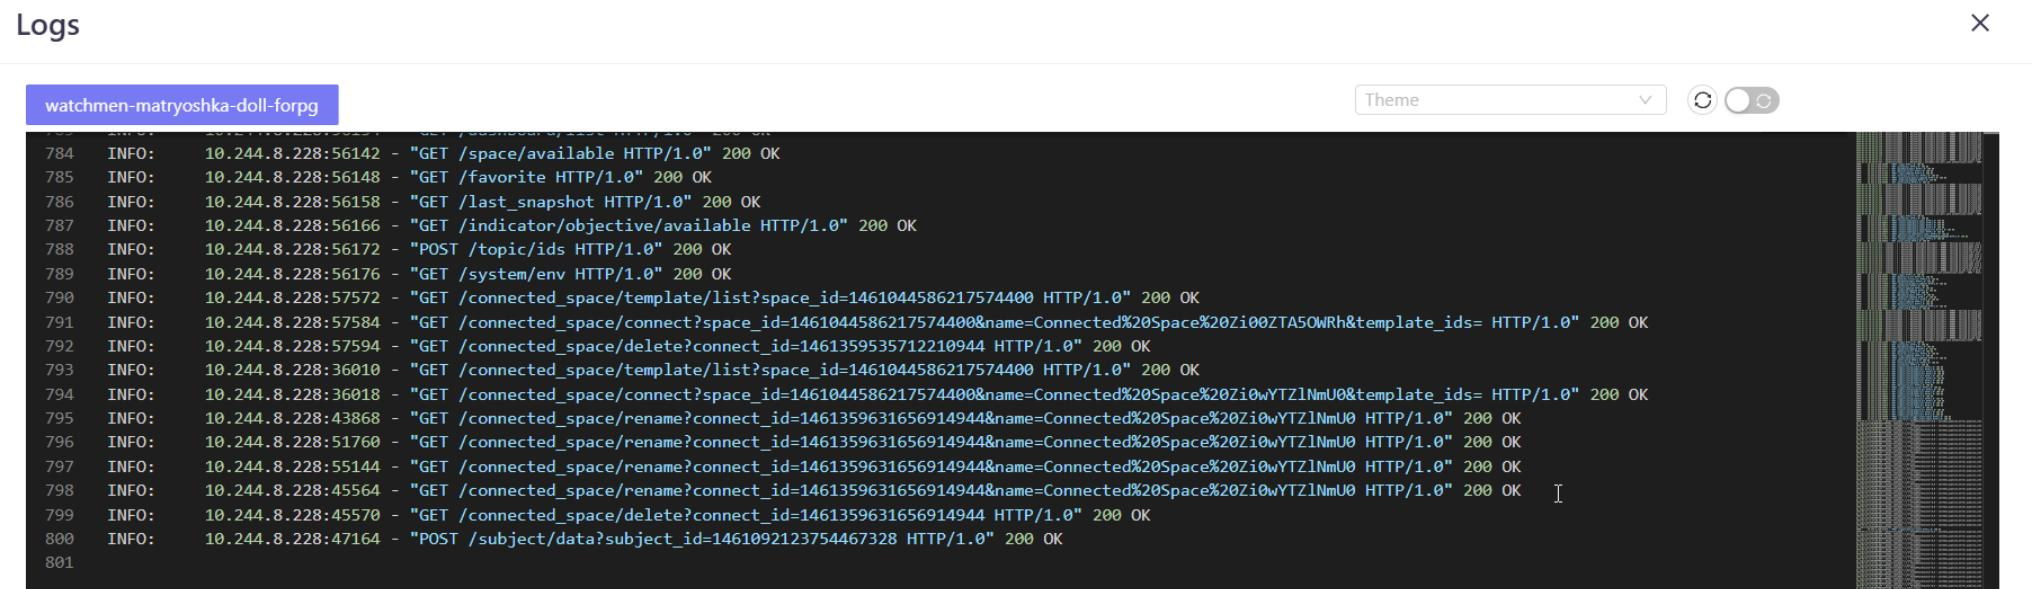
During testing, if you encounter any issues, access InsureMO DevOps to investigate.
8 Terms of DataMO
For detailed definitions and usage of key concepts such as topic, pipeline, subject, and dataset, please visit the watchmen home page via the link below: https://imma-watchmen.com/docs/16.5-prerelease/docs-index