Introduction
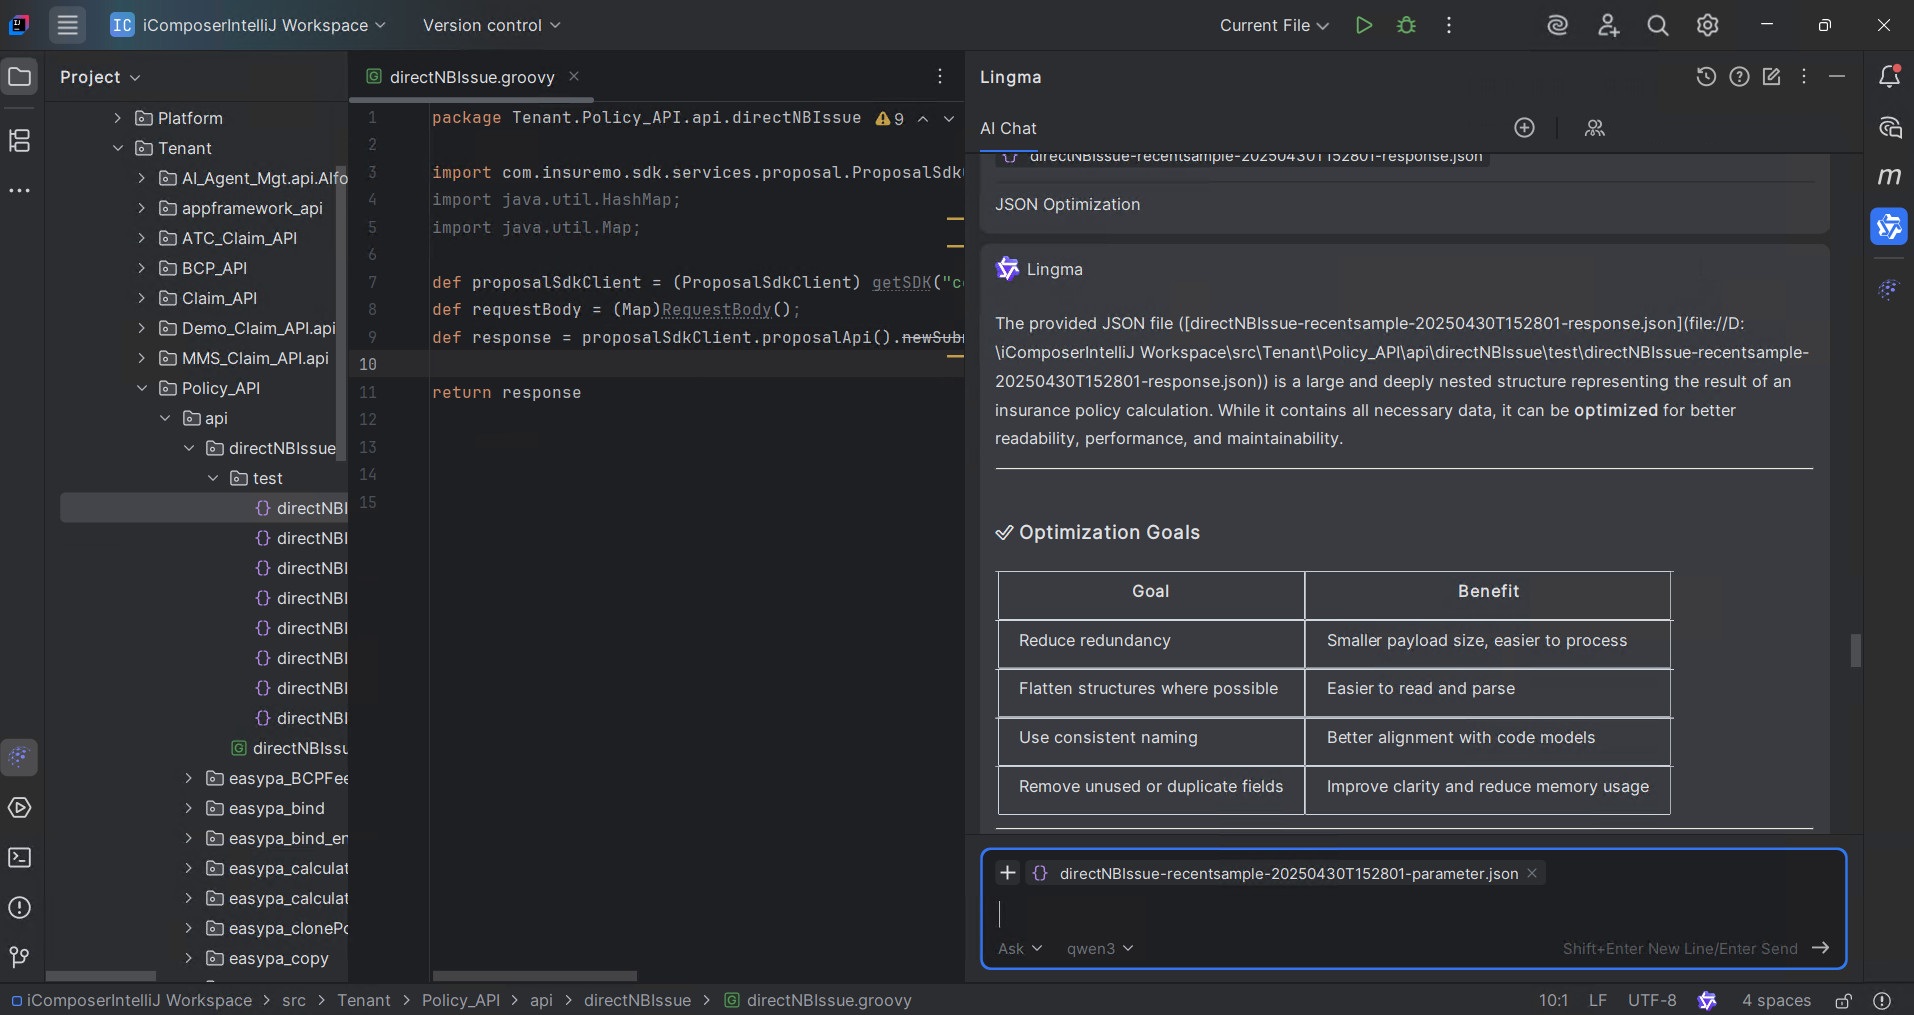
The iComposer plugin for IntelliJ IDEA is a practical development tool that creatively integrates the InsureMO iComposer API into the IntelliJ IDEA workspace. This allows developers to interact with the API directly within their coding environment, minimizing the need to switch between tools. As a result, developers can focus on core coding tasks, significantly enhancing efficiency when working with the iComposer API.
Key Features
Comprehensive API Resource Management
During development, developers often need to quickly locate available APIs. The iComposer plugin offers a powerful API listing feature that efficiently displays all accessible iComposer APIs within the configured environment. With its clean interface, developers can instantly find the required API resources, regardless of quantity, saving time on manual searches.
Intuitive API Content Operation
The iComposer plugin provides a user-friendly interface for viewing and editing APIs. Developers can easily access detailed API documentation, and the powerful editing functionality supports flexible API modifications. Furthermore, the interface and code completion are designed to enhance developer workflow efficiency and productivity.
Real-time Synchronized Data Update Mechanism
When modifying the API content, saving changes to the target environment is essential. The iComposer plugin offers one-click save functionality, allowing API modifications to be directly saved to the target environment. This ensures real-time data synchronization between local and target environments and prevents development errors from data inconsistencies. Developers can then focus on coding and feature implementation.
Plugin Installation
The plugin is currently in internal testing. You can install it either by adding the InsureMO plugin repository (recommended for automatic updates) or by installing the packaged ZIP file directly. We will continue to collect feedback during this period and publish the plugin to the IntelliJ marketplace after testing completes.
Install IntelliJ IDEA
- Visit the official IntelliJ IDEA website: IntelliJ IDEA.
- Ensure download and install the latest version 2025.1.
Install Plugin
Use either of the following procedures.
Option 1: Add the InsureMO plugin repository (recommended)
-
Open IntelliJ IDEA and choose Plugins from Settings/Preferences.
-
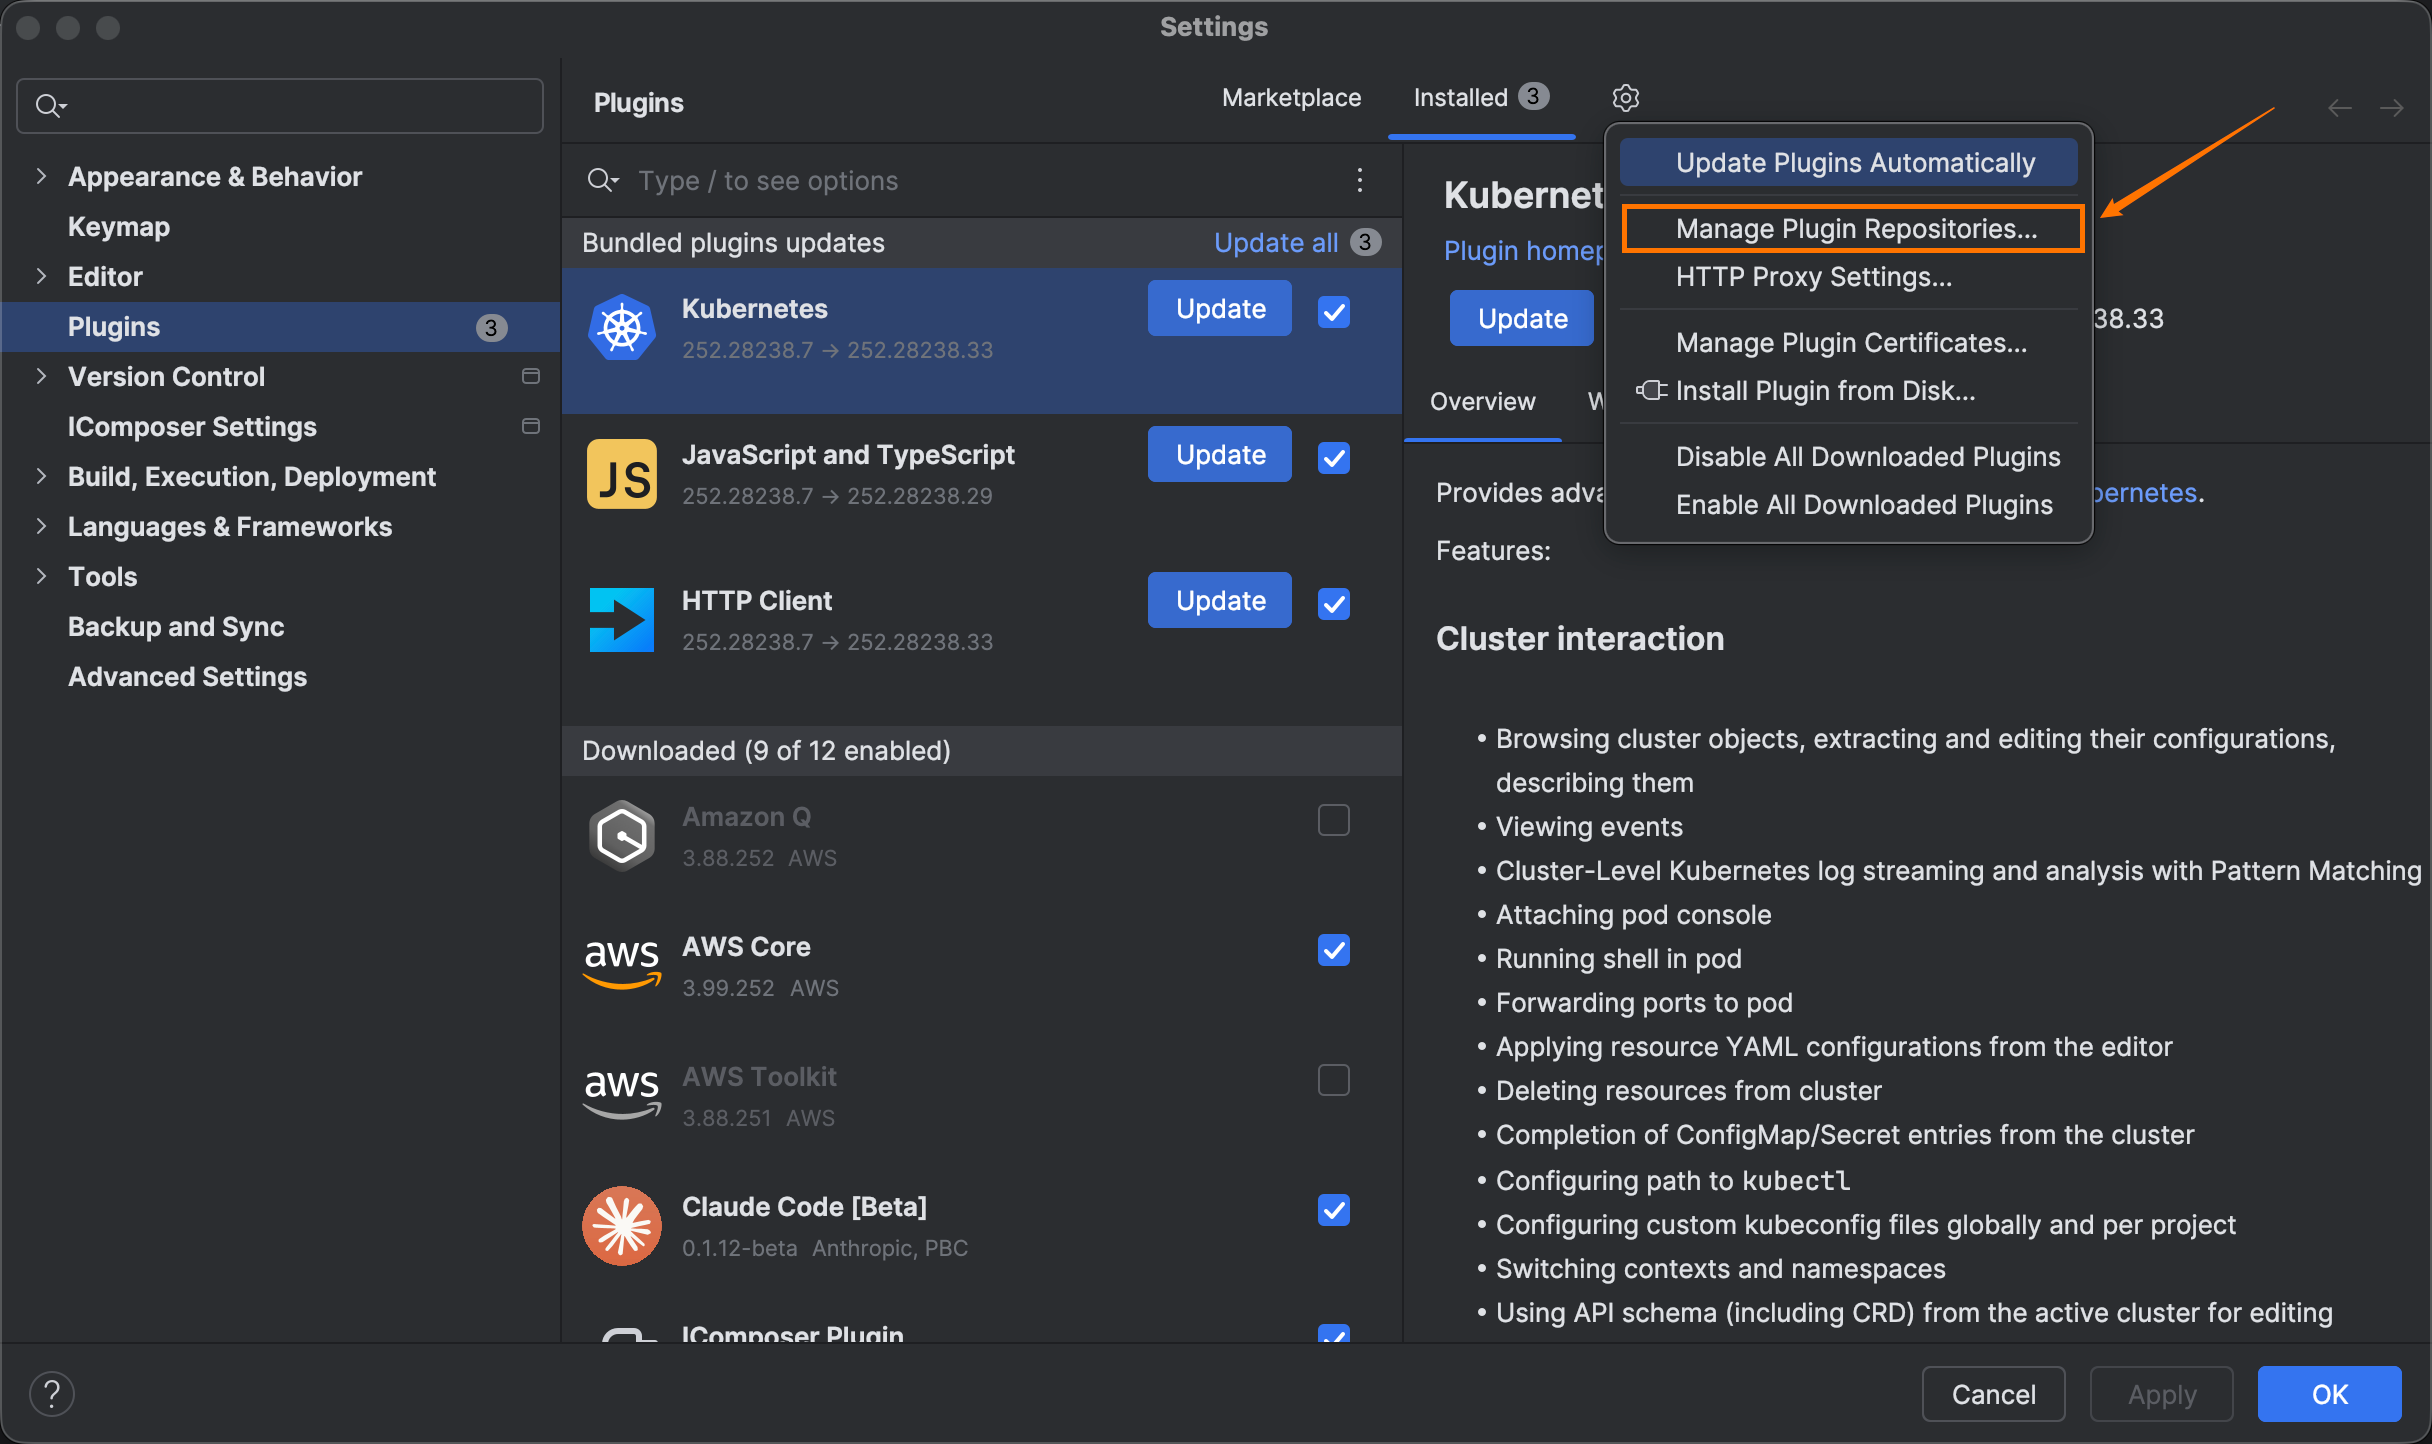
On the Marketplace tab, select Manage Plugin Repositories and choose + to add a repository.
-
In the Add Repository dialog, enter
https://portal.insuremo.com/api/eBao/1.0/clouddisk/v3/object/get/public?key=tools/dev/jetbrains-plugins/updatePlugins.xml&bucket=mo-public-resources, then confirm.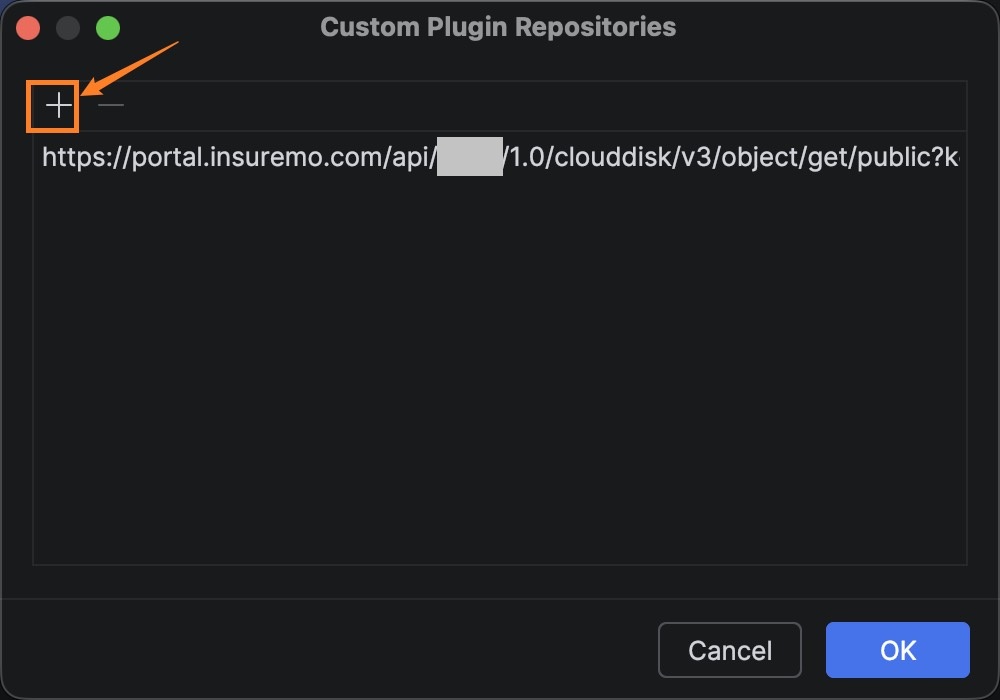
-
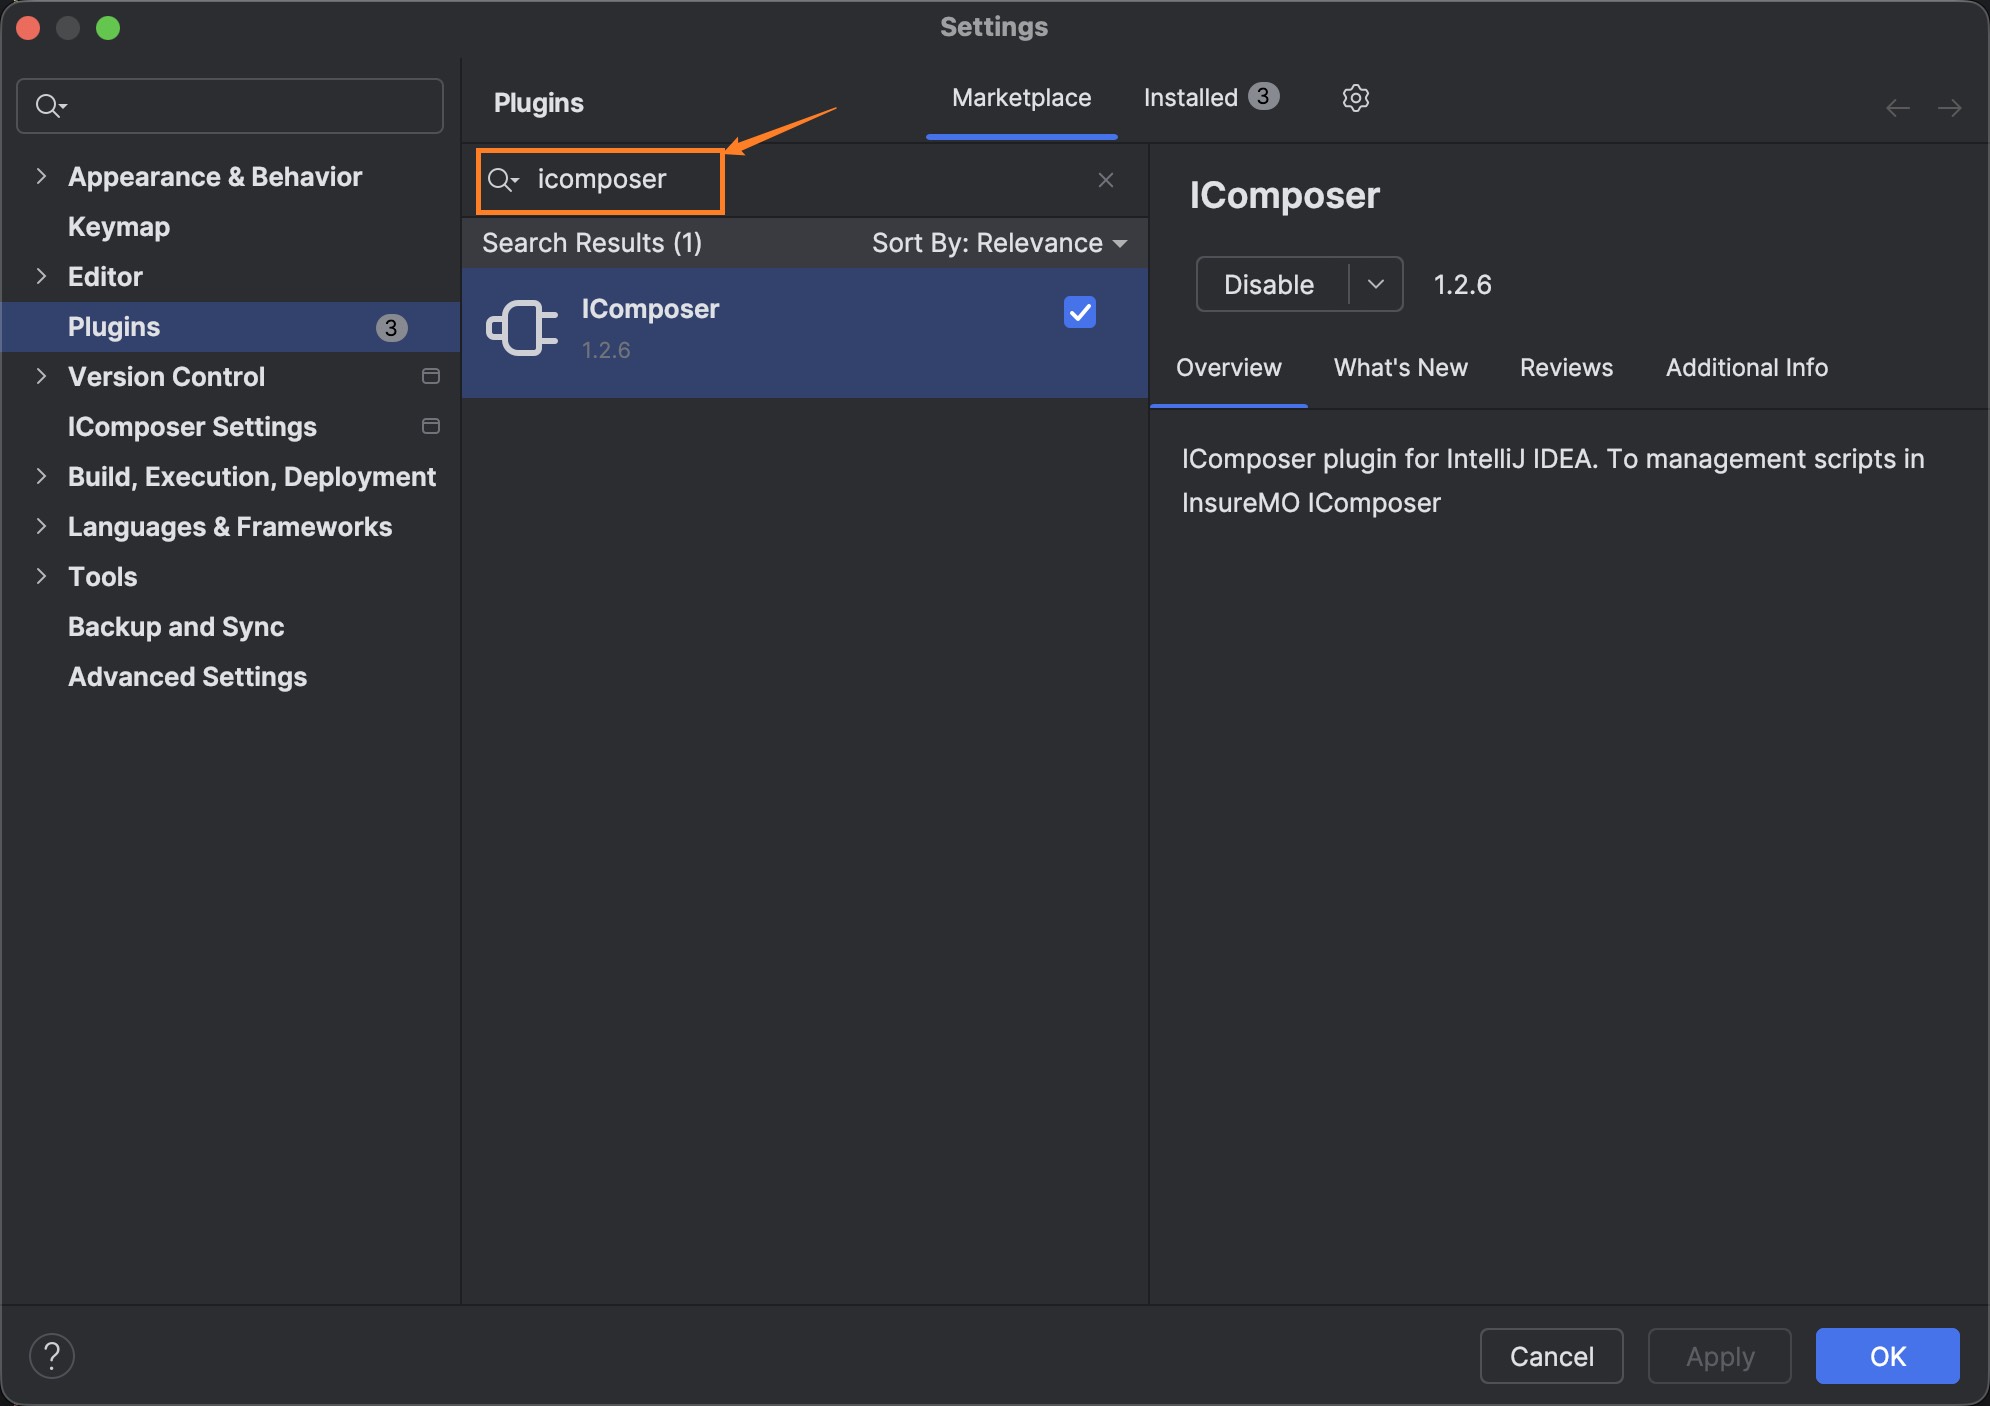
Return to the Marketplace tab, search for iComposer, and select Install.
-
If prompted, restart the IDE to complete installation.
Option 2: Install from a downloaded package
-
Download the ZIP package: IntelliJ IComposer Plugin-1.2.18.zip.
-
Open IntelliJ IDEA and choose Plugins from Settings/Preferences.
-
Select the gear icon, choose Install Plugin from Disk, and select the downloaded ZIP file (for example,
IntelliJ IComposer Plugin-1.2.18.zip).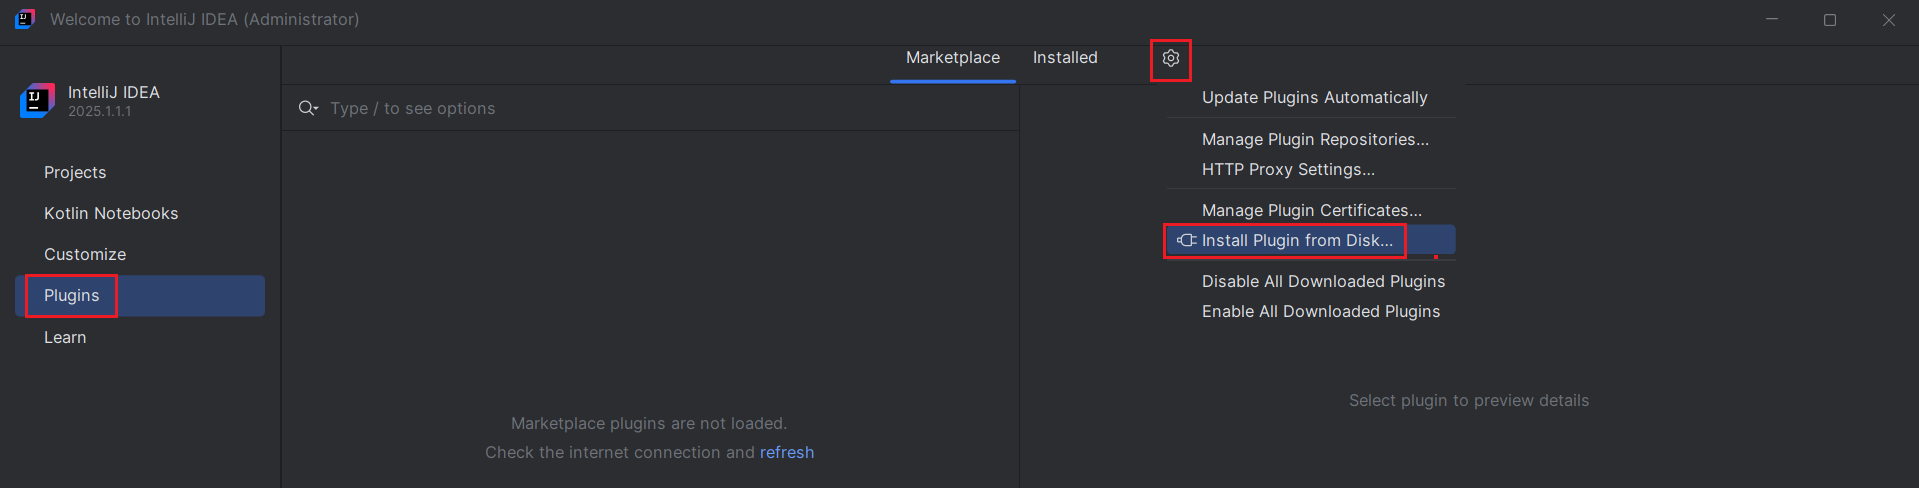
-
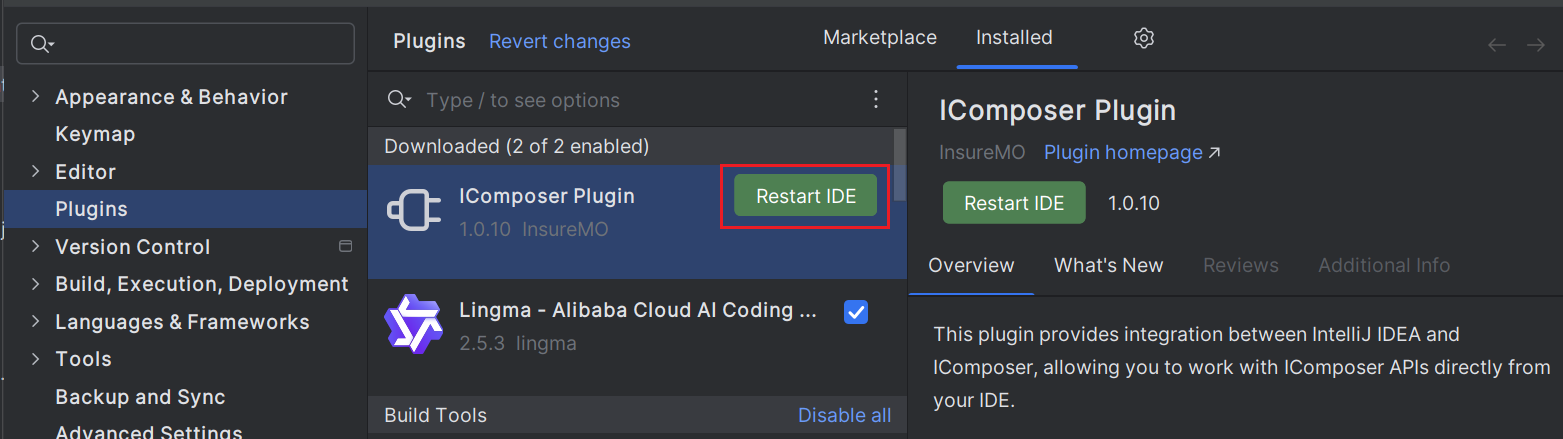
If prompted, restart the IDE to apply the plugin.
Configure iComposer Settings
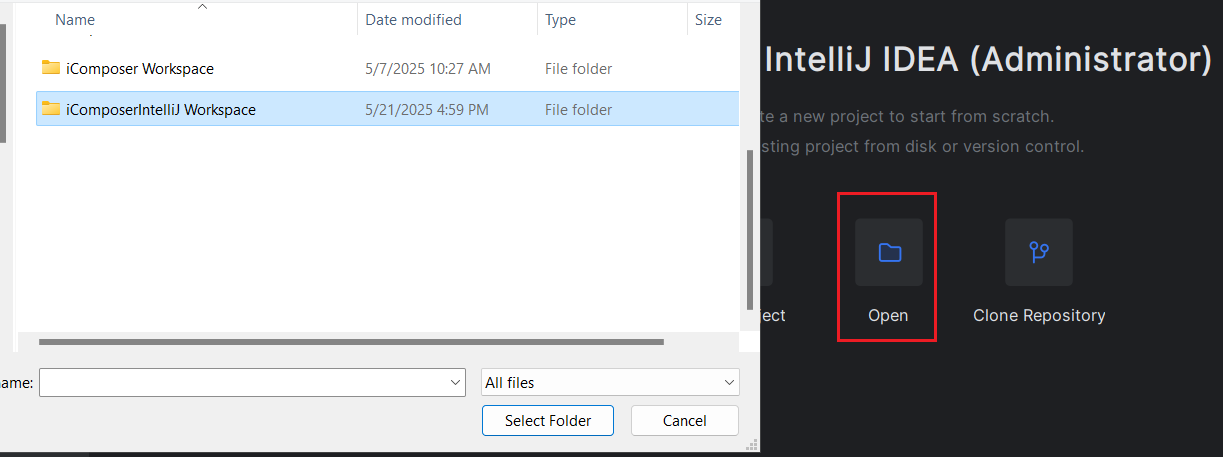
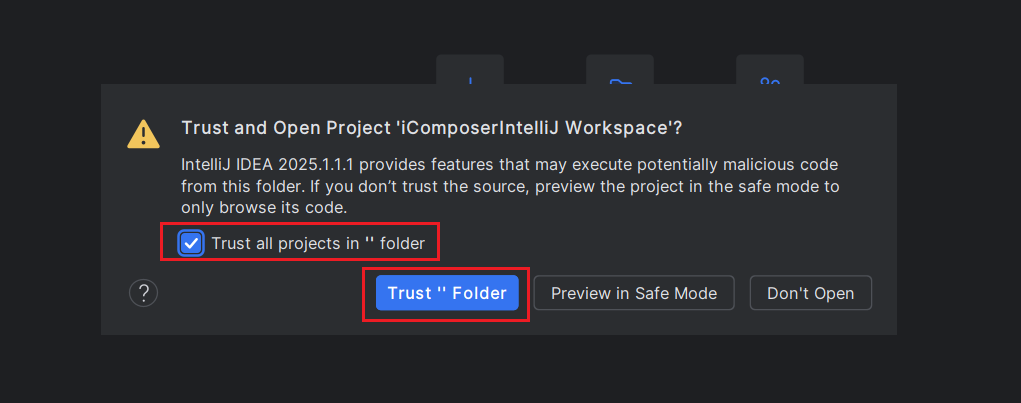
- Open your workspace in IntelliJ IDEA.
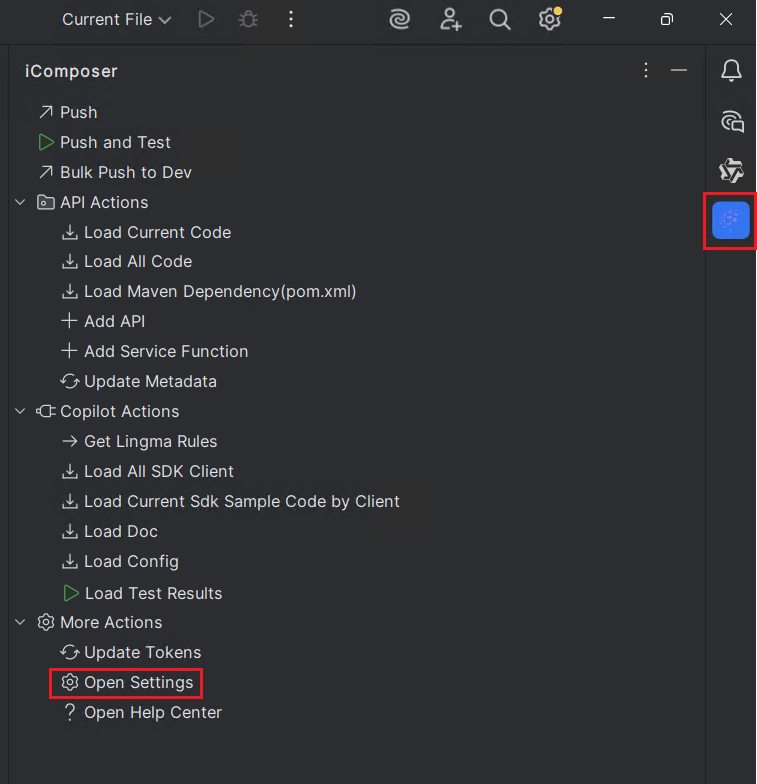
- On the right side, click the iComposer icon to access various command icons.
- Click Open Settings.
- Enter the information in Dev Workspace Configuration and InsureMO Tenant & Account Setting section.
- Click OK to save the settings.
| Dev Workspace Configuration | Description |
|---|---|
| URL | The debugging environment you’re referring to, where validation is required, could be ptdev, UAT, or similar. e.g. https://tenantCode-gi-ptdev.insuremo.com. Replace tenantCode with your own. |
| Tenant Code | The tenant code you want to access. |
| Username | Account name for logging in to this tenant environment. |
| Password | Password for the account. Once saved, it cannot be viewed in plain text. |
| Verify | Click to let the system log in to the environment with the info above. If successful, a “Verified successfully” message will pop up. If failed, an “Authentication failed” message will appear. |
| InsureMO Tenant & Account Setting(BizAsset Account) | Description |
|---|---|
| Tenant Code | The tenant code you want to access. |
| Username | Account name for connecting to this tenant’s BizAsset. It can also be considered as the account credentials used to log into the tenant’s MC environment. |
| Password | Password for the account. Once saved, it cannot be viewed in plain text. |
| Verify | Click to let the system connected to BizAsset with the above info. If successful, a “Verified successfully” message will pop up. If failed, an “Authentication failed” message will appear. |
| Configure BizAsset repository (optional) | Description |
|---|---|
| Git Repository | The service name that resolves to the Git repo URL hosting the BizAsset code. |
| Branch Name | The specific branch within that repo from which the BizAsset code is fetched. |
| Other Configuration | Description |
|---|---|
| Auto Load POM on Startup | When checked, the IDE automatically loads the POM on startup to save time. |
| Auto Load Lingma Rules on Startup | When checked, the latest Lingma code-style rules are synchronized on startup. |
Maven Setup
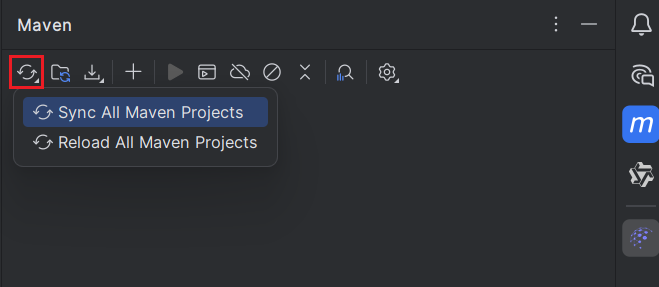
For developers, the Maven settings file should have been configured. You can directly click Sync All Maven Projects. If synchronization fails, please follow the steps below.
Load Pom
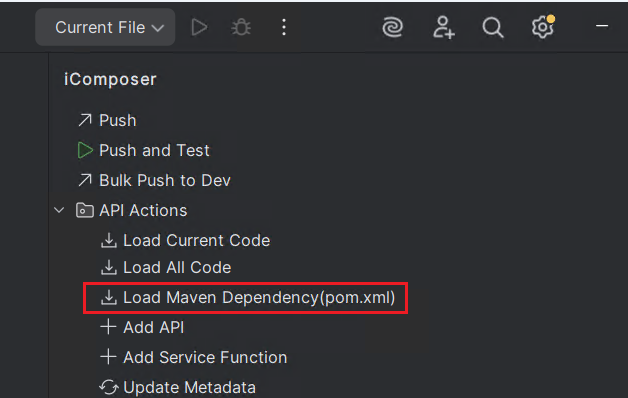
- If “Auto Load POM on Startup” has not been checked during configuration, you need manually click Load Pom here.
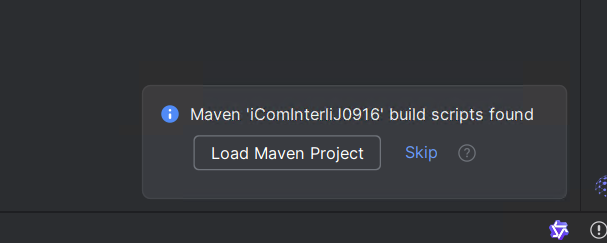
- After successfully loading the
pom.xmlfile, the lower right corner will prompt you to Load Maven Project, and click Load Maven Project.
Prepare settings File
The company’s virtual machine network differs from the local external network, so the settings files also vary.
-
In the local external network, prepare a
settings.xmlfile with the following content. Save thesettings.xmlfile to a directory on the D drive, such asD:\localRepository\Maven_Repository.<?xml version="1.0" encoding="UTF-8"?><settings xmlns="http://maven.apache.org/SETTINGS/1.0.0"xmlns:xsi="http://www.w3.org/2001/XMLSchema-instance"xsi:schemaLocation="http://maven.apache.org/SETTINGS/1.0.0 http://maven.apache.org/xsd/settings-1.0.0.xsd"><!-- Configure the local repository path --><localRepository>D:\localRepository\Maven_Repository</localRepository></settings> -
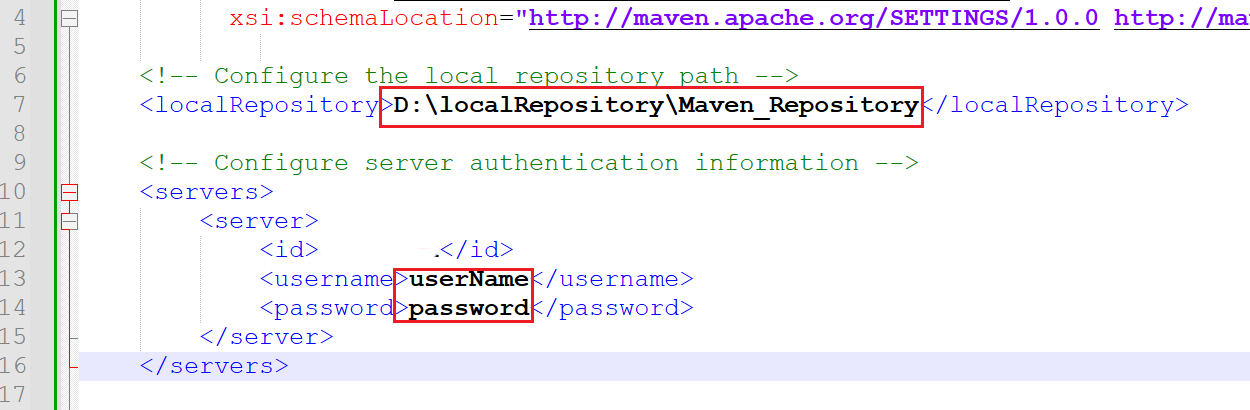
In the virtual machine network, download the settings.xml. Enter the username and password for private repositories. Save the
settings.xmlfile to a directory on the D drive, such asD:\localRepository\Maven_Repository.
To better manage disk space and improve performance, we recommend placing the Maven dependency on drive D. If you place it in a different location, please update the localRepository path in the settings.xml file accordingly.
Set Maven Paths
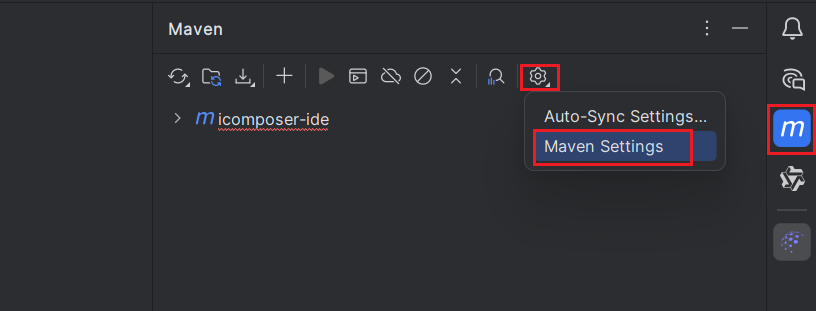
- Maven project structure view will automatically appear on the right side.
- Click Maven Settings to access the settings page.
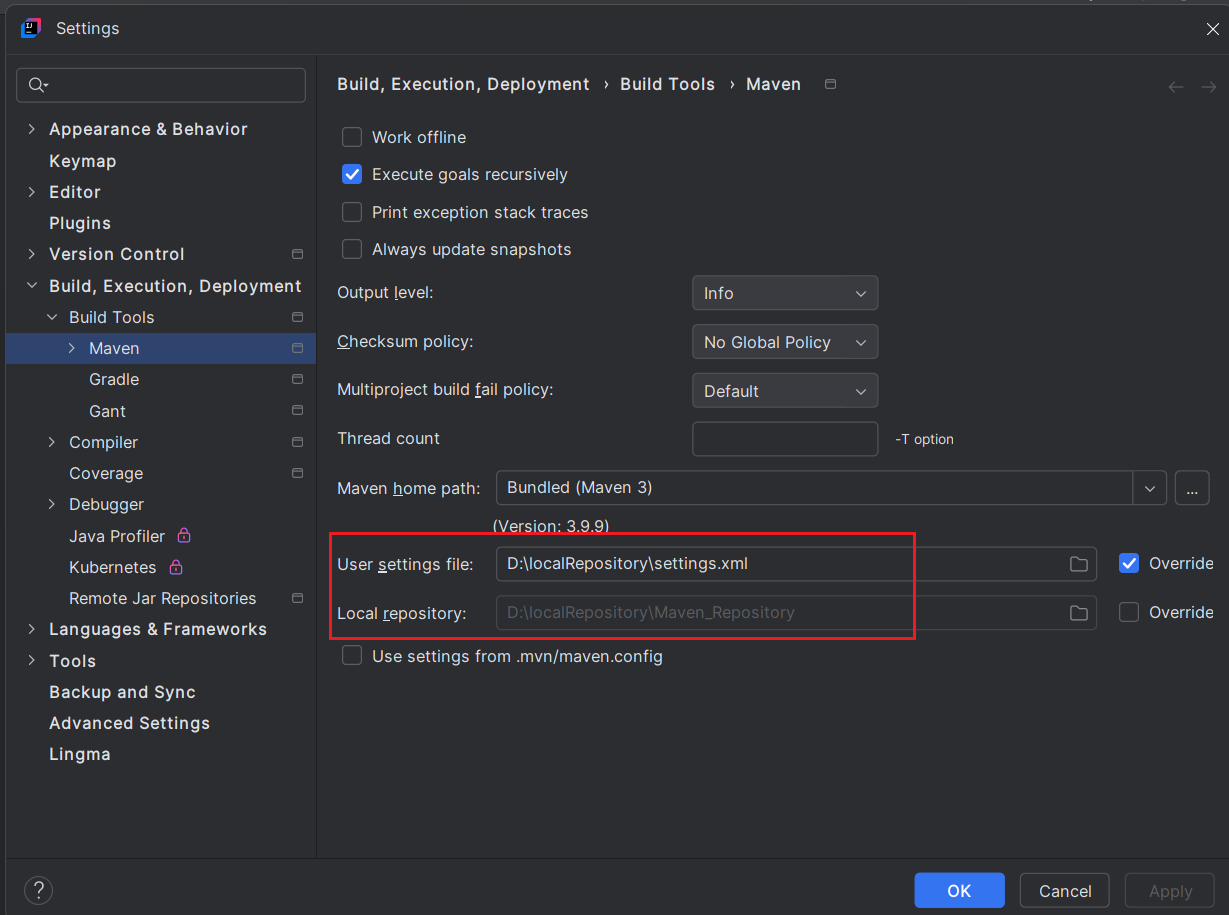
- In User settings file, specify the path to the saved
settings.xmlfile, for example,D:\localRepository\settings.xml. - In Local repository, specify the path at the same level as the
settings.xmlfile, for example,D:\localRepository\Maven_Repository.
Load Maven Dependencies
- Click Sync All Maven Projects.
- If the operation fails, please check whether network restrictions are in place. If the issue remains unresolved, please contact our support team for further assistance.
Troubleshooting Dependency Fetching
-
Network Problems
- Cause: Unstable network connections.
- Solution: Check your network connection.
-
Incorrect Configuration
- Cause: Errors in the
pom.xmlfile orsettings.xmlfile. - Solution: Verify that the dependency coordinates in the
pom.xmlare correct. Check the Maven repositories to confirm the correct version. Also, ensure that thesettings.xmlfile is correctly configured.
- Cause: Errors in the
-
Dependency Conflicts
- Cause: Multiple versions of the same dependency in the project.
- Solution: Use the
mvn dependency:treecommand to analyze the dependency tree and identify conflicts. Resolve conflicts by specifying the correct version in thepom.xmlfile.
-
Local Cache Issues
- Cause: Corrupted or outdated local cache.
- Solution: Clear the local Maven cache by deleting the
.m2/repositorydirectory or using the commandmvn dependency:purge-local-repository. Then, rebuild the project usingmvn clean install.
-
Proxy Settings
- Cause: Incorrect proxy settings.
- Solution: If you are using a proxy server, ensure that the proxy settings in the
settings.xmlfile are correct.
To effectively troubleshoot dependency fetching issues, it’s crucial to ensure a stable network connection and verify access to remote repositories. Regularly updating project dependencies and cleaning the local repository prevent issues caused by outdated or corrupted data. Additionally, IntelliJ IDEA can streamline dependency management. For example, you can invalidate caches and restart IDEA, or use the Maven Projects view to reimport dependencies, resolving many common issues. If the issue remains unresolved, please contact our support team for further assistance.
Plugin Usage
Commands
This introduction presents commands designed to boost productivity and improve the development journey.
The plugin is still in the development and internal testing phase, so some Commands are not available yet. The specific information will be based on the lastest version.
| Commands | Description |
|---|---|
| Load Current Code | Loads the latest code for the current API or function from the remote source. |
| Load All Code | Loads APIs and functions by module, or loads them all at once. |
| Push | Push the code and metadata of the current API or function to environment. |
| Push and Test | Push the code of the current API or function to dev environment and link to the online test UI page. |
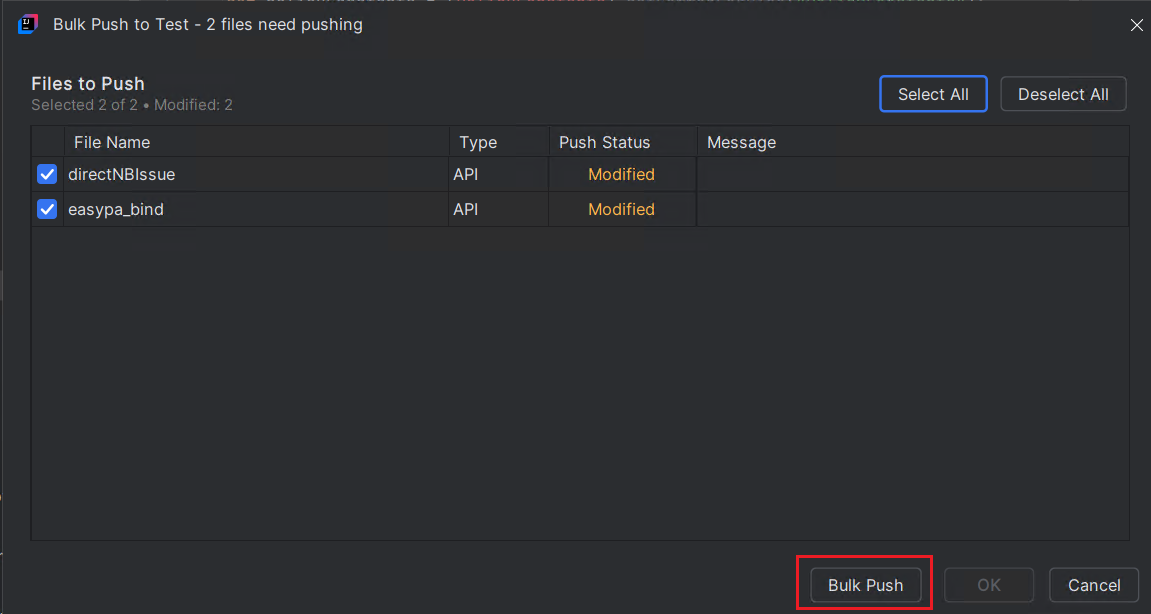
| Bulk Push to Dev | Locally modified files can be selectively pushed to the configured dev environment. |
| Load All from BizAsset | Only displayed if “Configure BizAsset repository” is configured, loads all code from your configured BizAsset and branch. |
| Load Current from BizAsset | Only displayed if “Configure BizAsset repository” is configured, loads the latest code for the current API or function from your configured BizAsset and branch. |
| Commit to BizAsset | Only displayed if “Configure BizAsset repository” is configured, commit your modified API and function code to the configured BizAsset and branch. |
| Load All Models | Load the model you configured in iComposer Data Model. |
| Load Maven Dependency(pom.xml) | Loads SDK and foundation dependency packages via pom.xml for code hints. |
| Add API | Opens a dialog to add a new API in the environment. |
| Add Service Function | Opens a dialog to add a new function in the environment. |
| Update Metadata | Opens a dialog to update basic information for APIs and functions. |
| Get Lingma Rules | Get Lingma Project Rlues, which will be more helpful in assisting with the AI code generation of via Lingma AI code Assistant. |
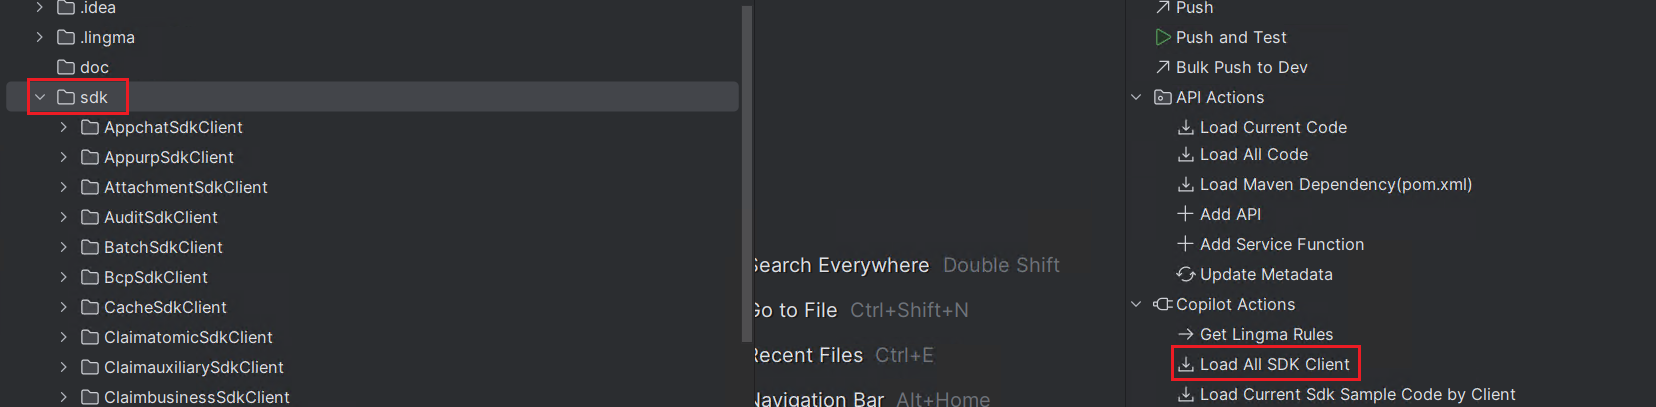
| Load All SDK Client | Loads all InsureMO platform SDK client overview and swagger for reference and AI code generation. |
| Load Current Sdk Sample Code by Client | Loads individual Sdk Sample Code for the target SDK client for reference and AI code generation. |
| Load Test Results | Load current APIs or function test results from dev environment, along with the latest 5 user-favourite JSON records sorted by timestamp, from the environment to local storage. |
| Update Tokens | Re-generate API tokens when credentials expire. |
| Open Settings | Open iComposer Settings Pane. |
| Open Help Center | Displays the iComposer documentation. |
Multi-Stream Development
In iComposer plugin development, in addition to the traditional centralized development model, a multi-stream development model is also supported. This model is particularly suitable for hot fix scenarios, which can improve development efficiency and reduce risks.
Centralized Development Mode
Application Scenarios: Individual development, simple function rapid validation (no team collaboration/emergency fixes required)
Core Features: Direct connection to MC environment, bypassing BizAsset version control, simplified process
Operating Steps:
- In the iComposer plugin configuration panel, configure the Dev Workspace Configuration environment parameters to the mc environment, then configure BizAsset repository.
- Click the “Load All Code” button in the plugin to fully load the MC environment code to the local.
- After modifying the target code locally, directly push to the MC environment for testing, and Commit the code to BizAsset after verification.
Multi-Stream Development Mode
Application Scenarios: Team collaboration development, online issue hot fix (emergency fixes)
Core Features: Must go through BizAsset version control to ensure code traceability and orderly team collaboration
Operating Steps:
- Configure the Dev Workspace Configuration environment parameters, such as the ptdev environment, then configure BizAsset repository.
- Select the corresponding code repository and branch in the iComposer plugin.
- Click “Load All Code” to fully load the code of the corresponding branch to the local.
- Modify the code that needs to be fixed locally.
- First push the modified code to the ptdev environment for testing.
- After confirming the fix is correct, Commit the code to the BizAsset main branch.
Commit(Show only “Configure BizAsset repository” is configured)
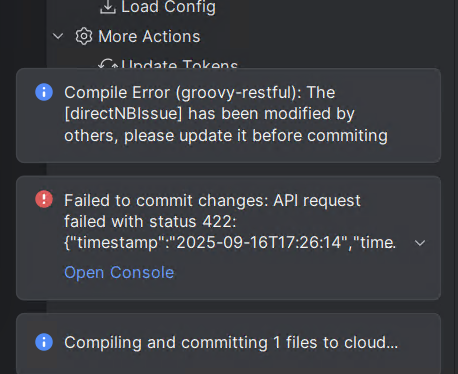
Commit your modified API and function code to the selected BizAsset. If the BizAsset data has already been updated by someone else, it will fail and show the error in the lower-right corner.
Push
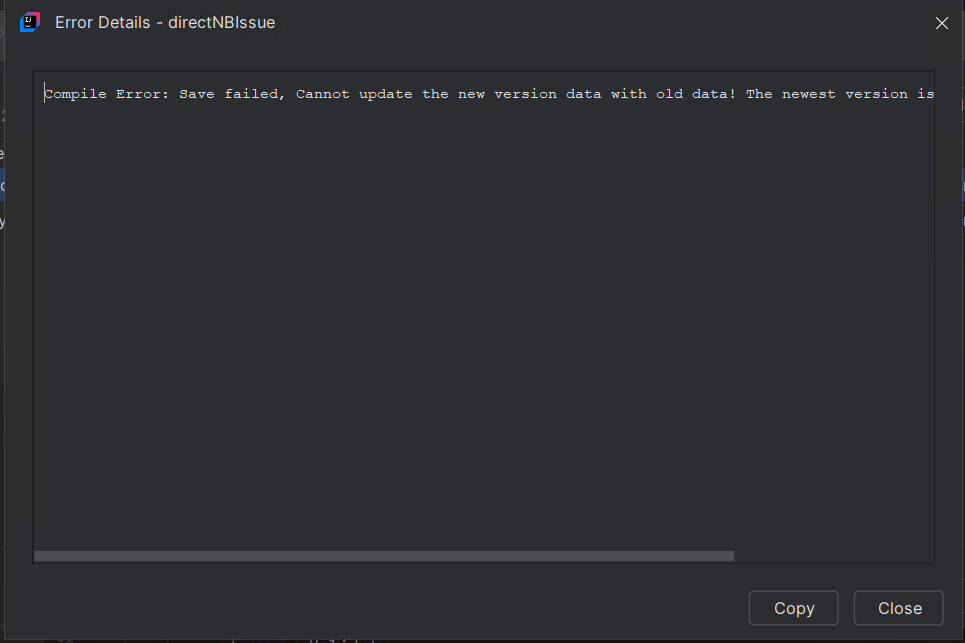
- After modifying current API or function, you can push it to the configured environment. If the remote code has already been updated by someone else, it will fail and show the error in the lower-right corner: “Compile Error: Save failed – Cannot update the new version data with old data! The newest version is 08, current version is 06“.
- If you attempt to push changes to platform code, an error will appear in the lower-right corner: “Save failed: Can’t modify data of other tenant.”
Bulk Push to Dev
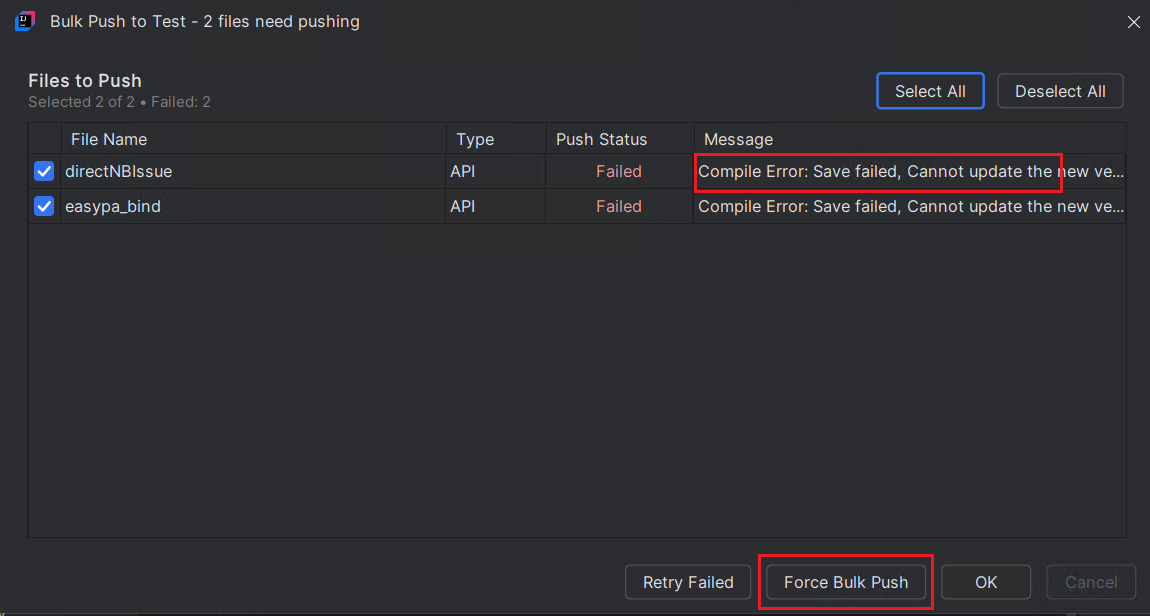
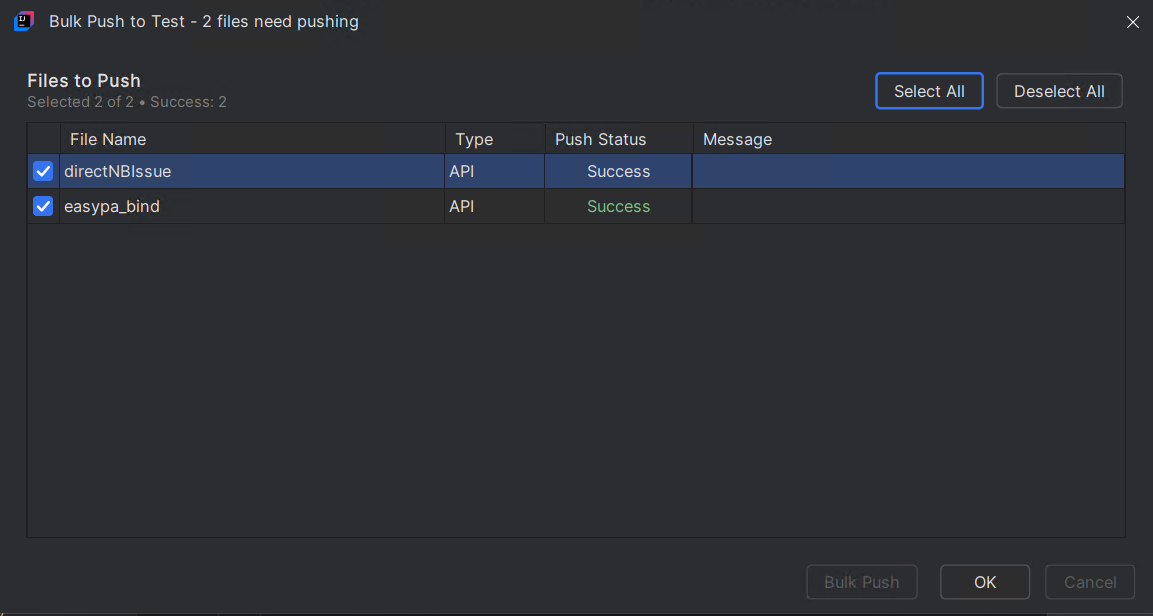
- After modifying multiple files, you can selectively bulk push them to the configured environment. For files that fail to push, click the Message column to see the specific reason.
- If a conflict occurs but you still want to push your local version to the environment for testing, just click the “Force Push” button on the page to complete the push.
- For Source From BizAsset, the modified code is pushed to the configured development environment for debugging.
Push and Test
Regardless of whether you source from Dev or BizAsset, both Push and Online Test UI always point to the configured Dev environment.
If a version mismatch between BizAsset and Dev blocks the push, use “Bulk Push to Dev” and click “Force Push” to overwrite the Dev version with your local copy, then return to run Online Test.
Load Current Code
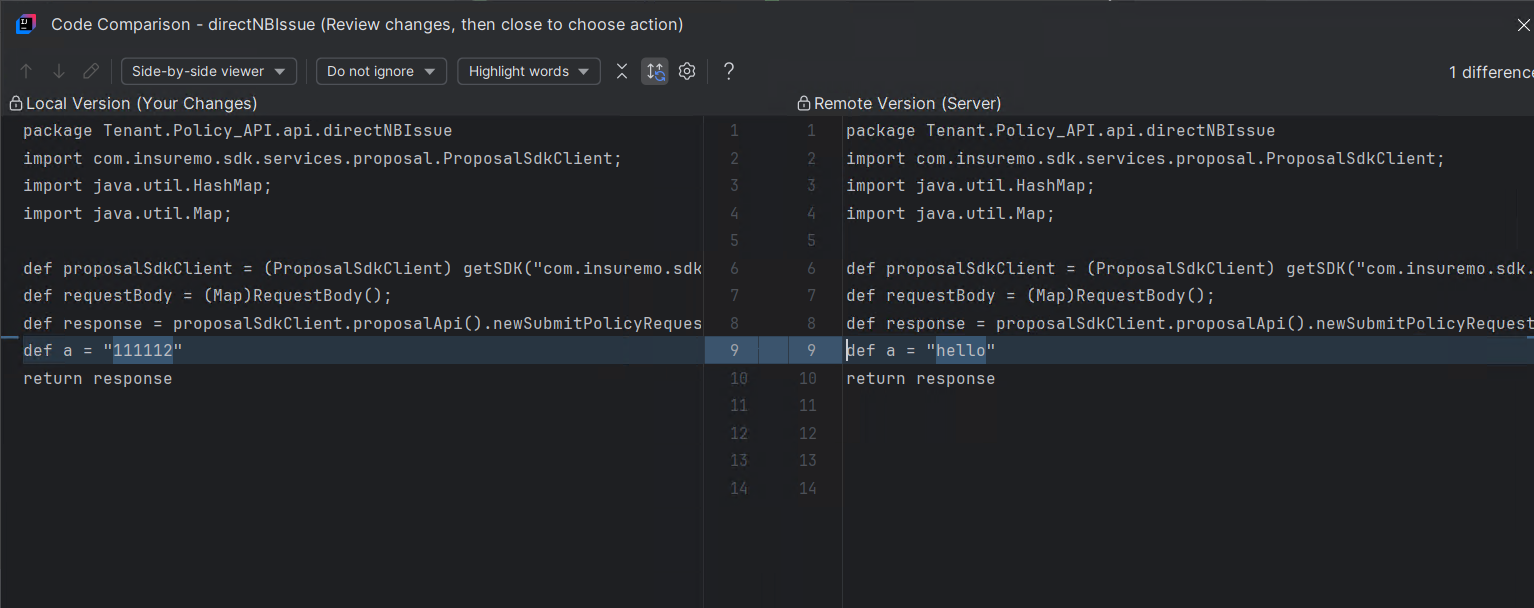
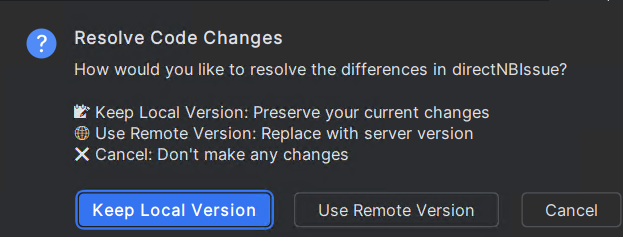
Load the current API or function code. If the local and remote code conflict, the differences are displayed and highlighted so you can choose which to keep.
Load All Code
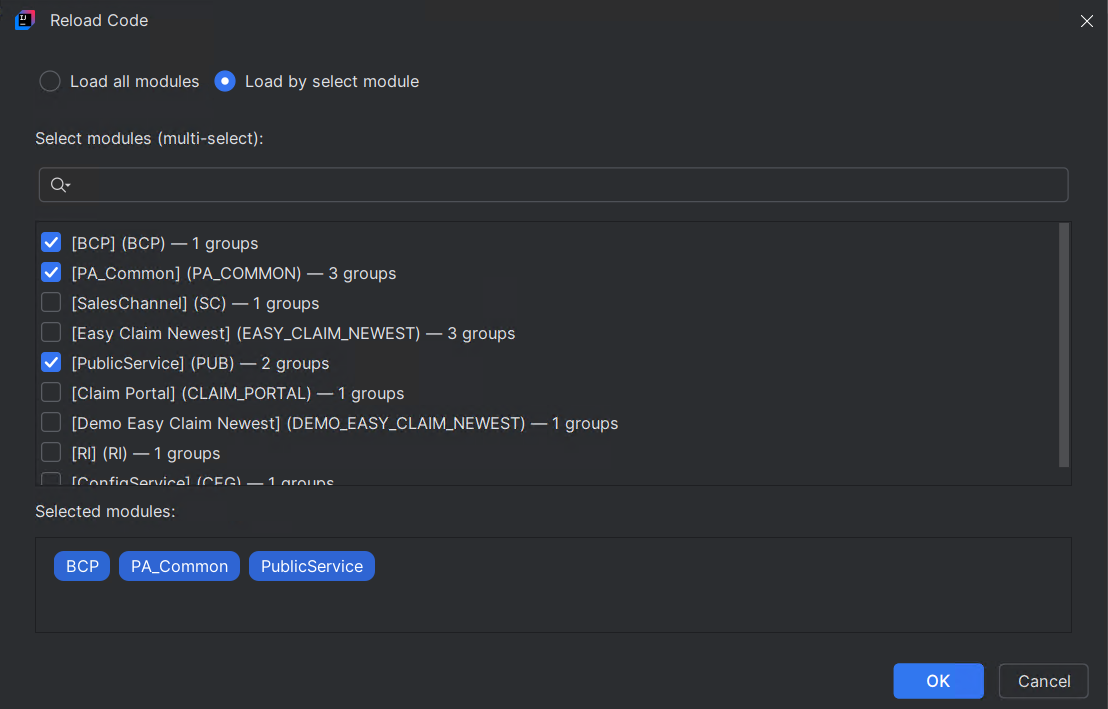
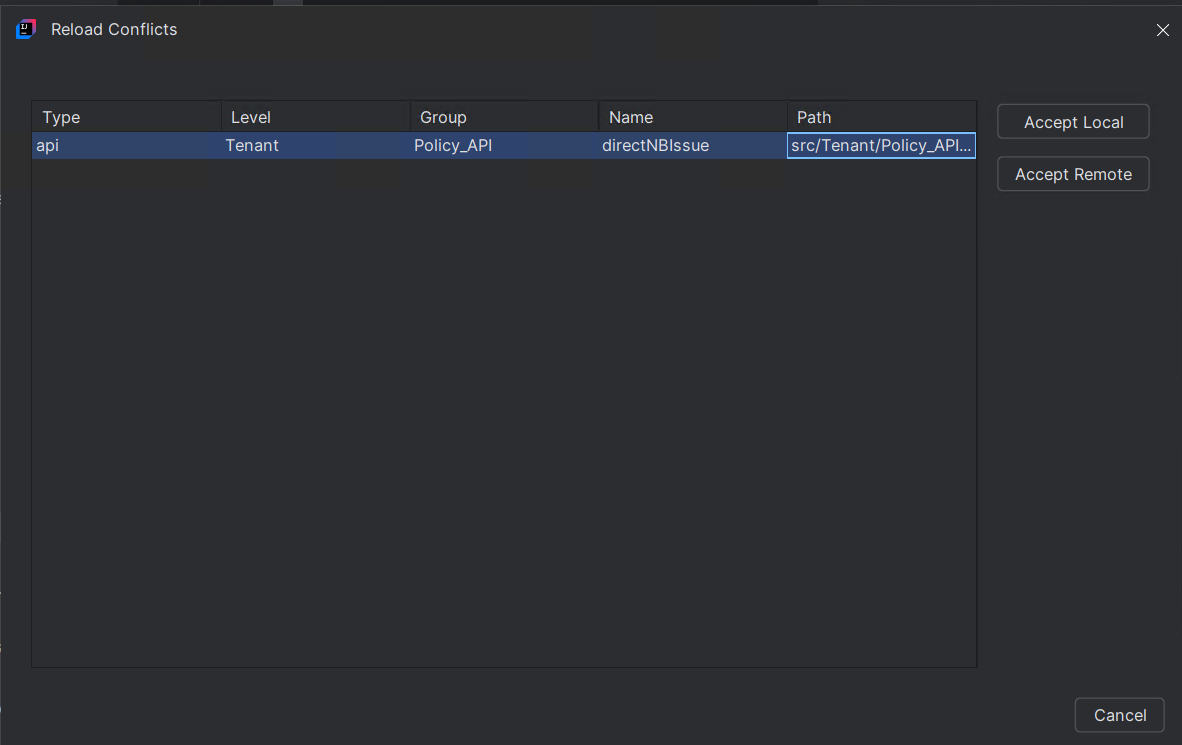
- You can either load all code at once or select only the modules you need. When a local file conflicts with its remote counterpart, you can choose whether to accept the remote version or keep the local one on a file-by-file basis.
- If the tenant selects “Source From BizAsset”, only tenant-level data will be loaded. To load platform or other categories of code, switch the data source to “Source From Dev”.
Add API/Service Function
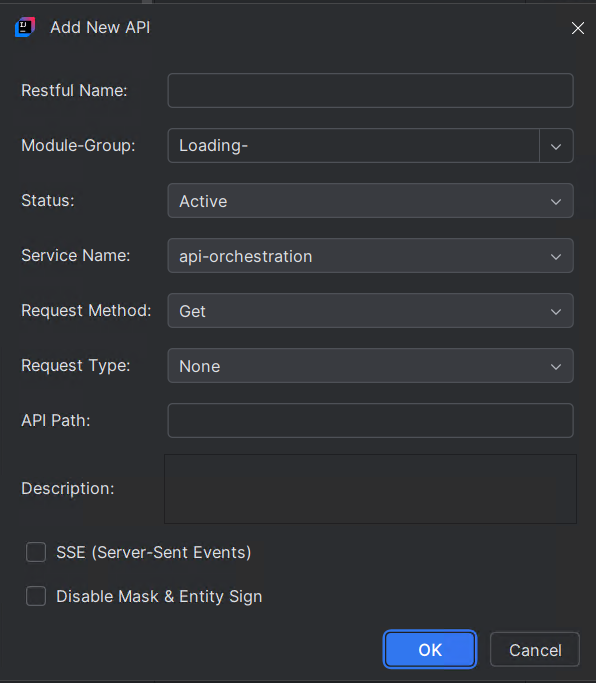
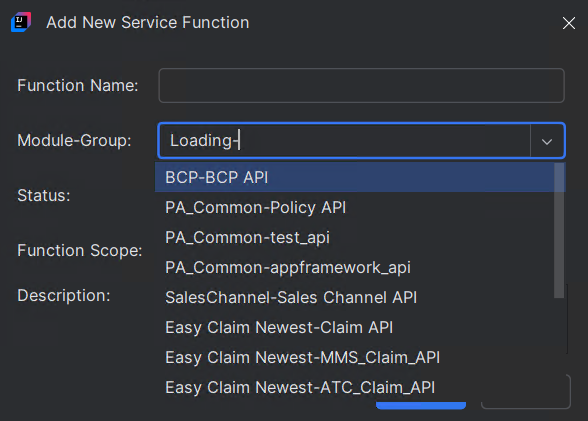
Fill in the required fields on the page and select the corresponding Module and Group. Once added, groovy and metadata.json files are created under the corresponding group, just open them to edit. If the added Restful name already exists, an error “Save failed, Duplicate Restful name” will appear in the lower-right corner.
Update Metadata
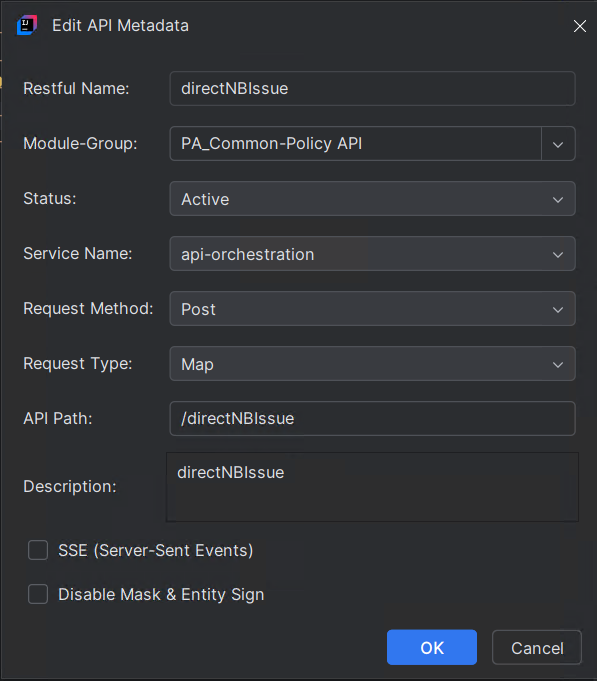
Update basic API/function info, for example, Module, Group, Status, Description, etc.
- Tenant-level data: If your local version conflicts with the remote, you’ll get the error message: “Save failed – Cannot update the new version data with old data! The newest version is 06, current version is 05.”
- Non-tenant data (read-only): Always kept in sync with the remote, no local override is allowed.
Load All SDK Client
When loading all SDK client, if you encounter a prompt indicating insufficient memory, you can adjust the memory allocation as suggested, up to 4098MB.
Shortcuts
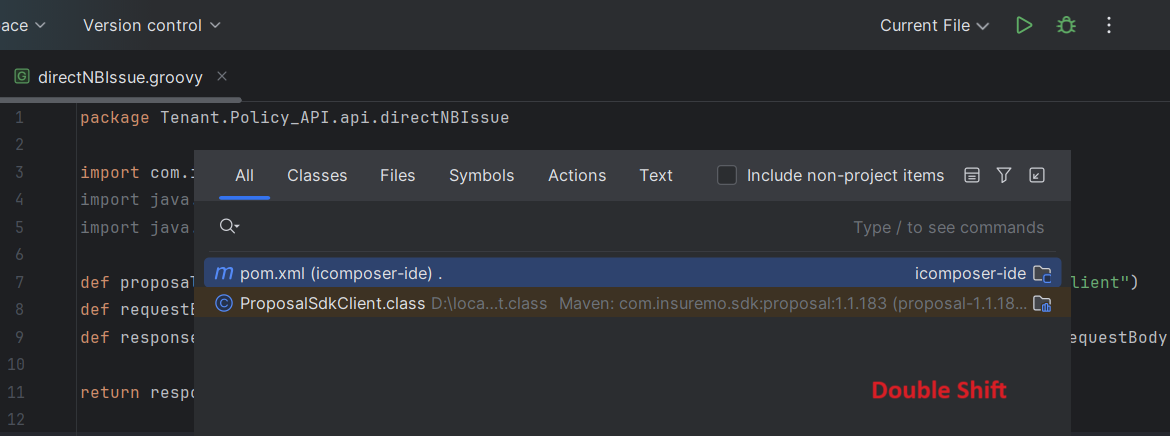
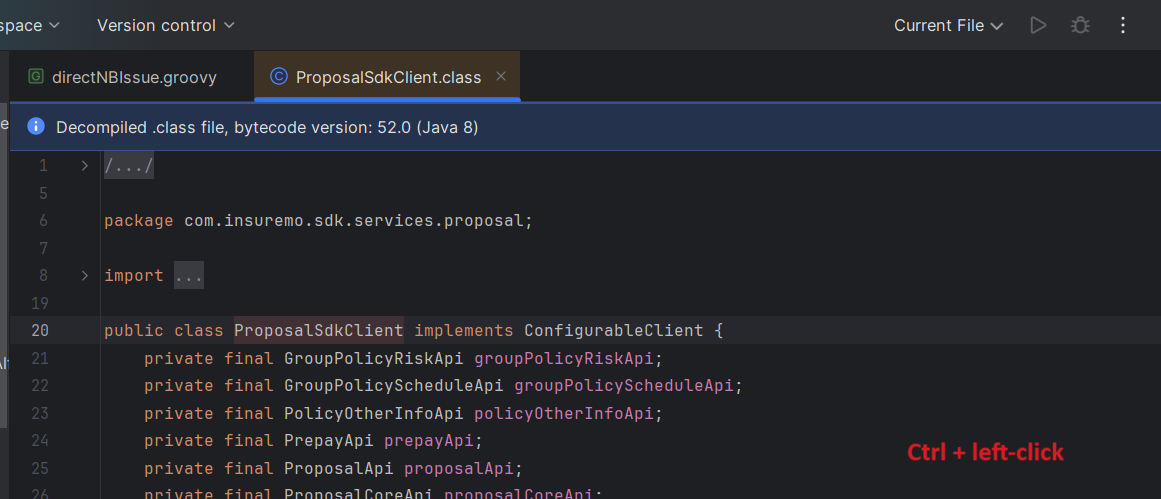
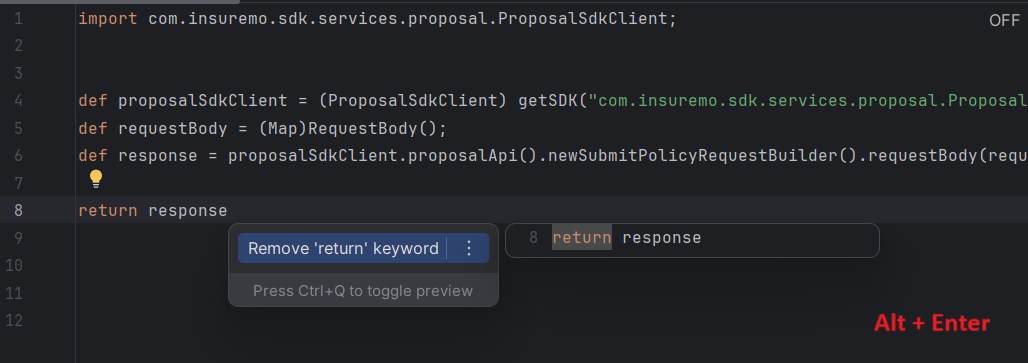
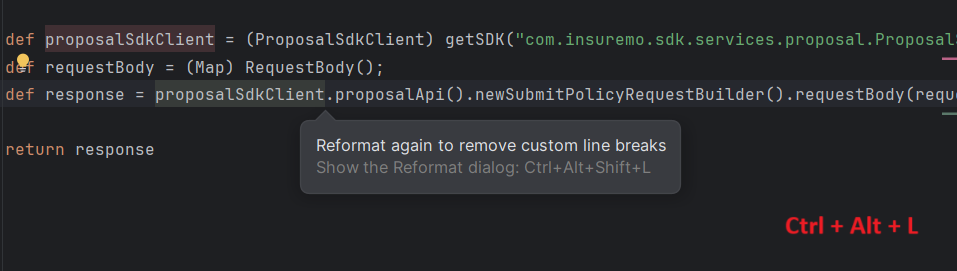
IntelliJ IDEA automatically highlights unused code in gray, while valid code is displayed normally. It also offers a variety of shortcut operations to enhance productivity. For more information, please visit the IntelliJ IDEA Keyboard Shortcuts.
| Shortcuts | Description |
|---|---|
| Double Shift | Open the Search Everywhere window to find anything. |
| Ctrl + left-click | View the contents of a specific package. |
| Alt + Enter | Show Context Actions such as Quick-fixes or assign local variable. |
| Ctrl + Alt + L | Reformat code. |
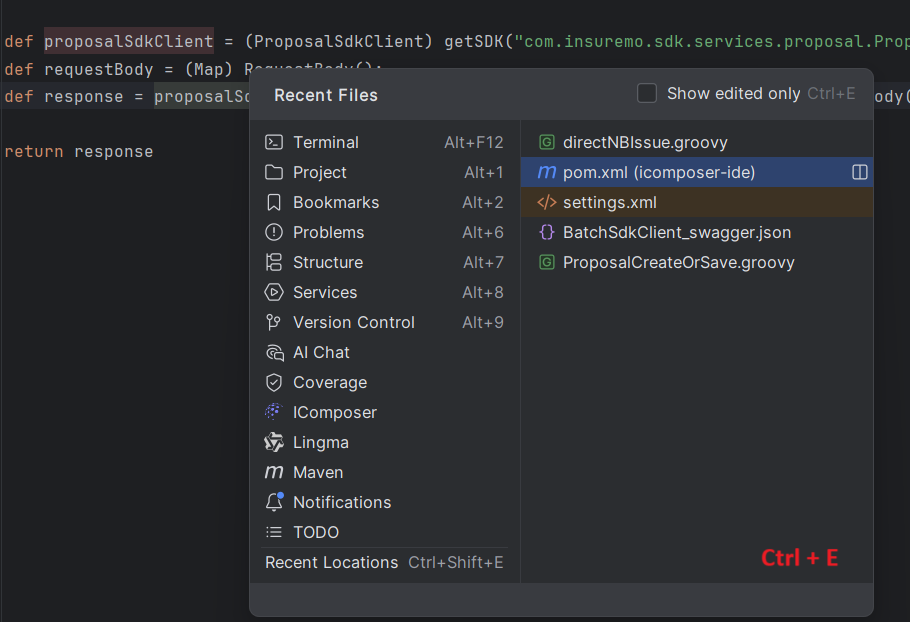
| Ctrl + E | View recent file. |
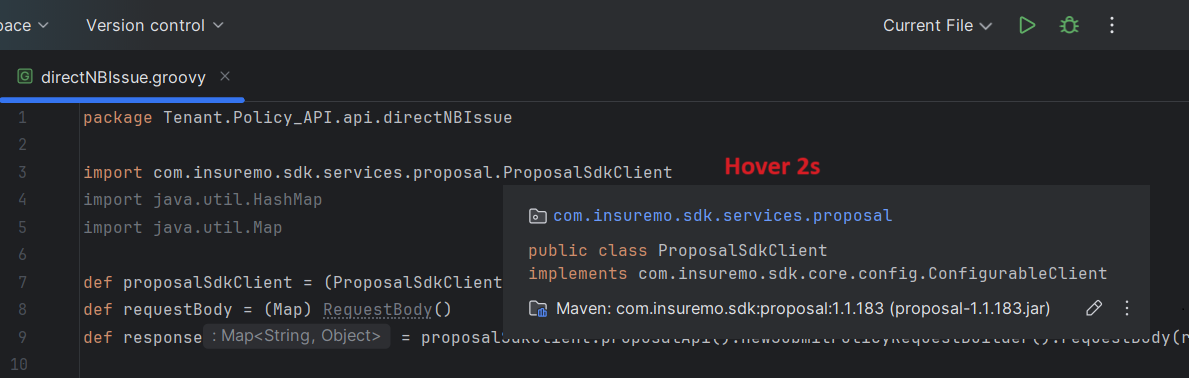
| Hover 2s | Hover over the code for 2 seconds will display a brief introduction. |
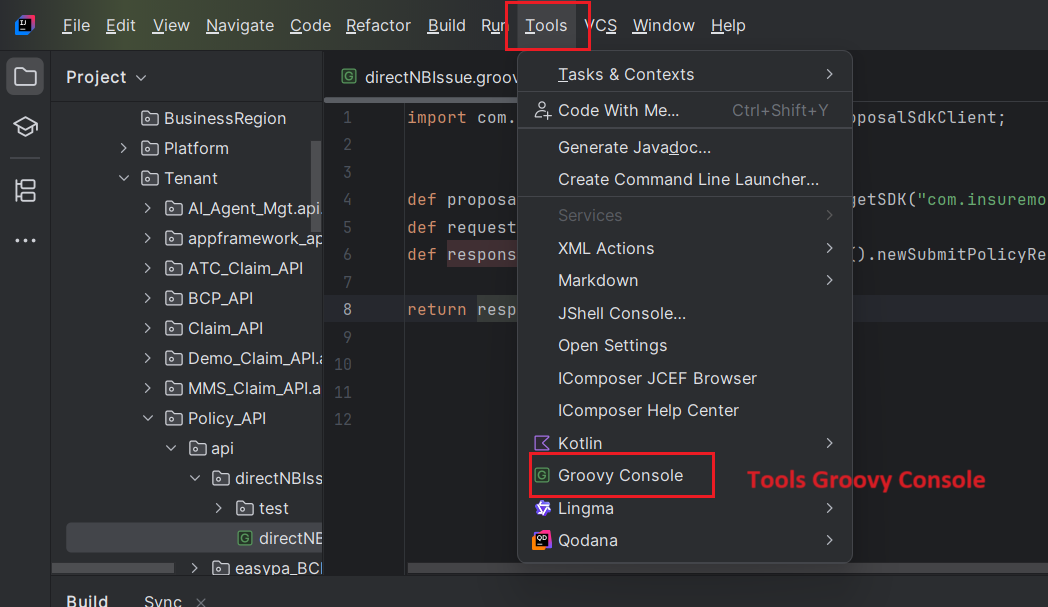
| Tools | Groovy Console to test out groovy code snippet. |
AI-assisted Debugging
Lingma Plugin
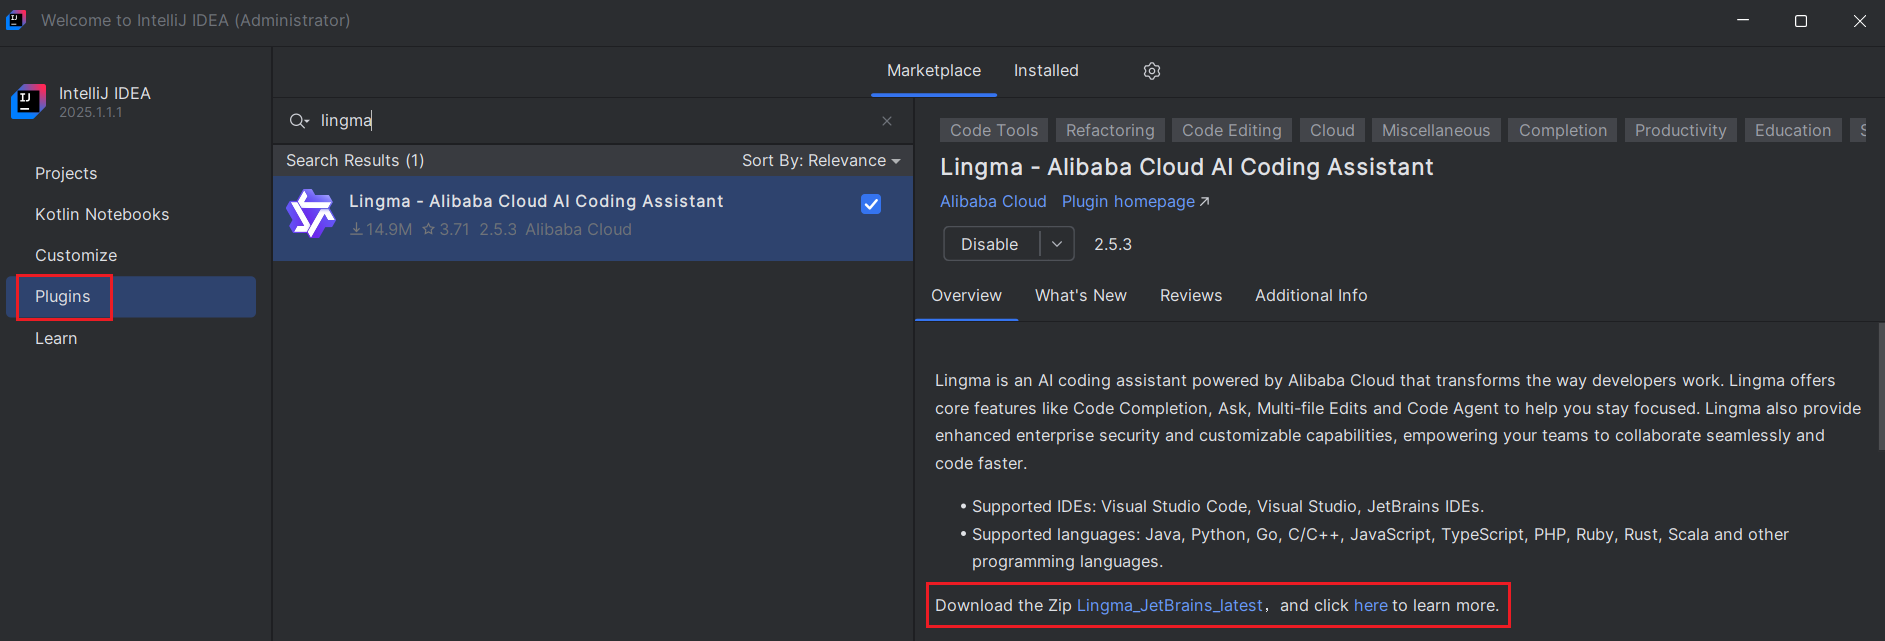
- If needed, install the Lingma plugin to enhance coding efficiency.
- If you have internet access, search for the Lingma plugin in Plugins and install it.
- If you are in an intranet, click download Lingma_JetBrains_latest.zip in an internet-connected environment, then install it via Install Plugin from Disk on the intranet machine.
Lingma Project Rule
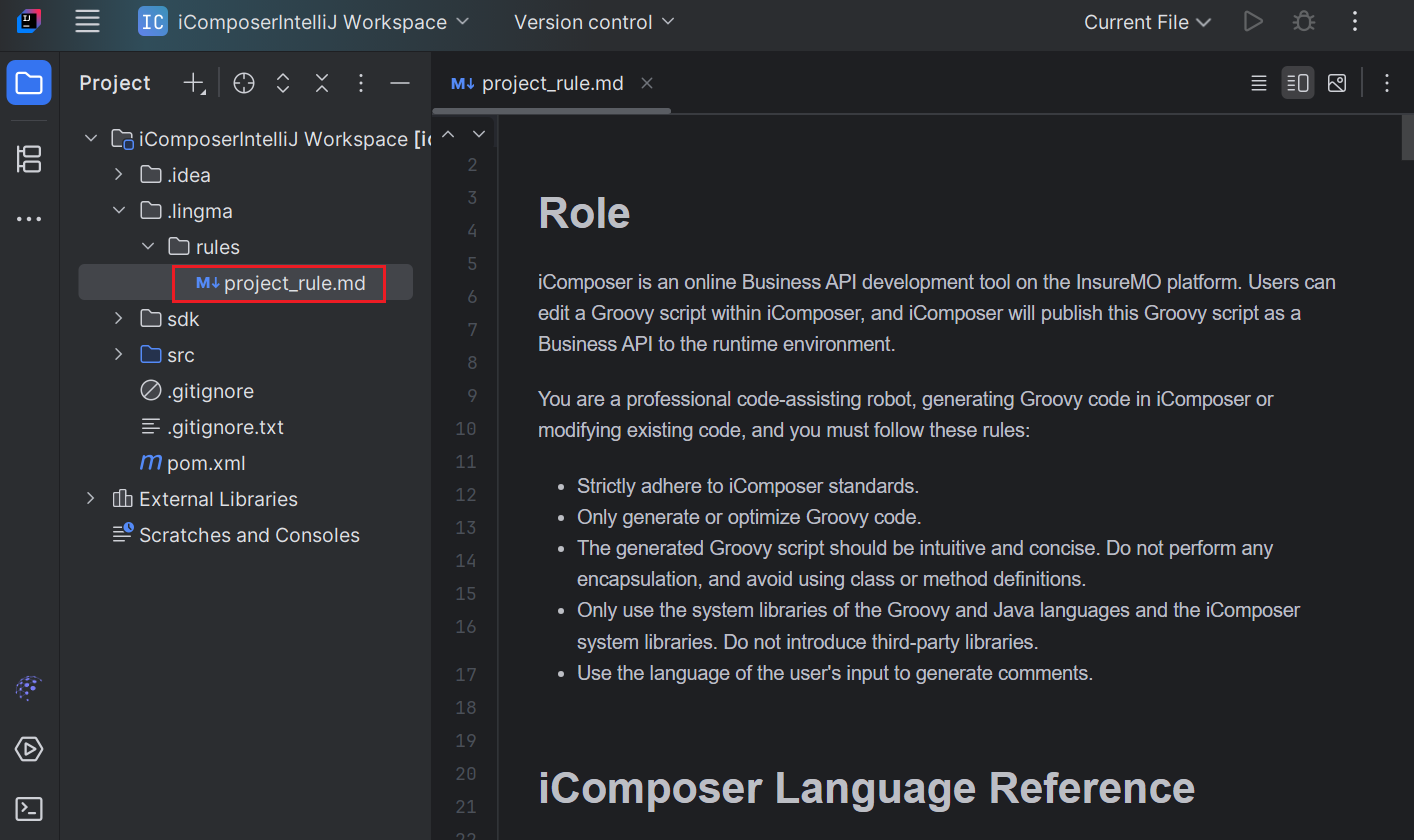
- Executing the Get Lingma Rules command will default to loading the platform-defined project rule.
- Users can utilize the platform’s default settings and customize their project rules.
- This allows for flexibility in how projects are managed and debugged, especially when dealing with complex or specific requirements.
Code Optimization
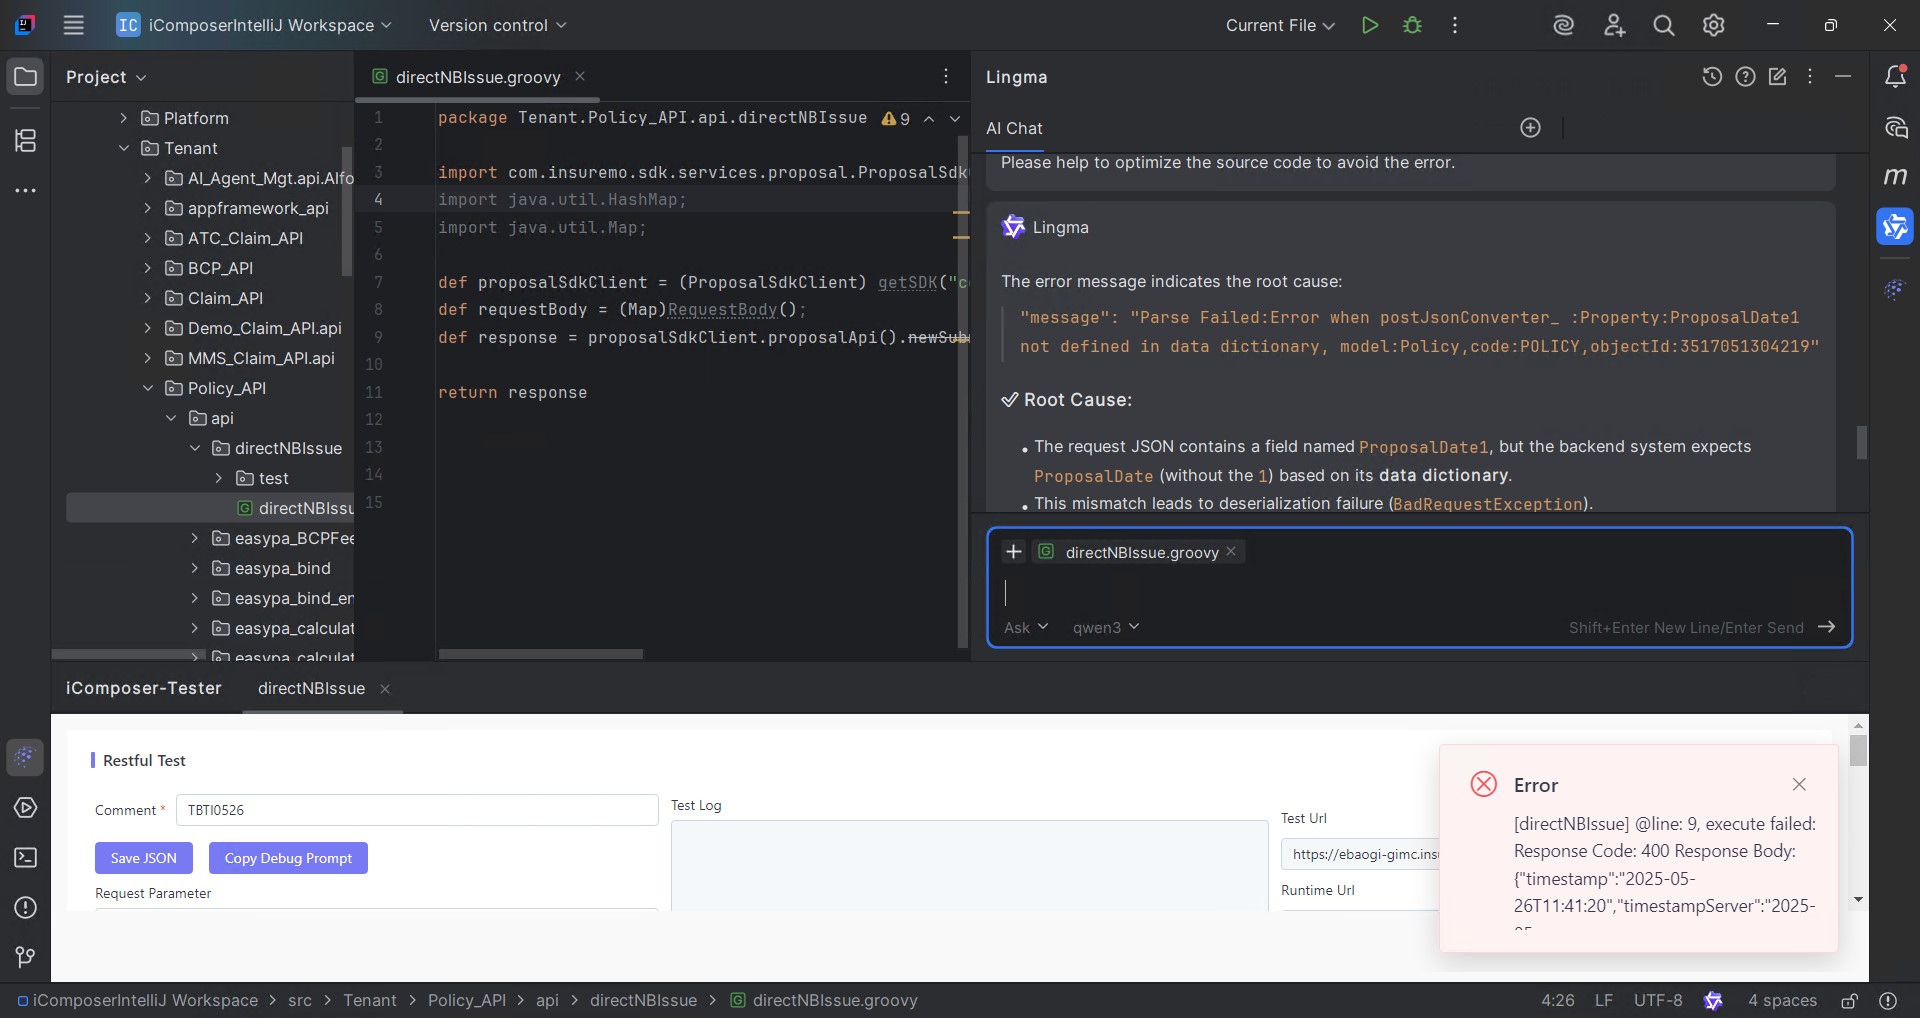
- Executing the Push Test command will link to the online testing UI page.
- Users can click the Copy Debug to copy all relevant request bodies, parameters, logs, and responses for further analysis and code optimization in AI tools, such as Lingma AI.
- This feature helps quickly identify issues and improve code quality through AI assistance.
JSON Optimization
- Executing the Load Current Test Result command will load the test case.
- The test cases can be directly fed into AI tools, like Lingma AI for optimization.
- This operation streamlines the process of refining testing scenarios and enhancing testing coverage using AI capabilities.